
Kupu Whakataki
Mauruuru koe mo te hokoasing the Muse M-12 CR Radio Alarm Clock. This compact and versatile device combines an FM radio with a dual alarm clock, offering convenience and functionality for your daily routine. Featuring a clear red LED display and intuitive controls, the M-12 CR is designed for ease of use. Please read this manual carefully to ensure proper operation and to fully utilize all features of your new alarm clock.
Ihirangi mokete
Tena koa tirohia kei te noho nga taonga katoa kei te pai te ahua:
- Muse M-12 CR Radio Alarm Clock Unit
- Pūurutau Hiko
- Pukapuka Kaiwhakamahi (tenei tuhinga)
Ka mutu te huaview me nga Mana Whakahaere
Familiarize yourself with the various parts and controls of your Muse M-12 CR Radio Alarm Clock.

Whakaahua 1: Mua me runga view of the Muse M-12 CR Radio Alarm Clock, highlighting the red LED display and the arrangement of control buttons.
Control Buttons (Top Panel):
- SNOOZE / DIMMER Button: Press to temporarily silence the alarm (snooze function). Press and hold to adjust display brightness.
- ALARM 1 Button: Press to activate/deactivate Alarm 1. Press and hold to set Alarm 1 time.
- ALARM 2 Button: Press to activate/deactivate Alarm 2. Press and hold to set Alarm 2 time.
- TIME SET Button: Press and hold to set the current time.
- HR (Hour) Button: Used to adjust the hour during time or alarm setting.
- MIN (Minute) Button: Used to adjust the minute during time or alarm setting.
- VOL- / PREV Button: Decreases volume. In radio mode, short press for previous preset station, long press for backward auto-scan.
- VOL+ / NEXT Button: Increases volume. In radio mode, short press for next preset station, long press for forward auto-scan.
- FM / MEM Button: Press to switch to FM radio mode. Press and hold to automatically scan and store FM stations.
- Pātene MOE: Whakahohe ai i te mahi taima moe.
- NAP Button: Activates the nap timer function.
Tatūnga
1. Hononga Mana
- Unpack the Muse M-12 CR unit and the power adapter.
- Insert the DC plug of the power adapter into the DC IN jack located at the back of the unit.
- Plug the power adapter into a standard AC wall outlet (100-240V, 50/60Hz). The display will light up, and the clock will be ready for time setting.
2. Pūtāhui Pūhiko (Whiringa)
To maintain time and alarm settings during a power outage, you can install backup batteries (not supplied). The unit typically uses AAA batteries. Refer to the battery compartment on the bottom of the unit for correct battery type and polarity.
Nga Tohutohu Whakahaere
Te Whakaritenga i te Wa
- Patohia me te pupuri i te PANUITANGA TIME pēhi i te pātene kia tīmata rā anō te kimo o ngā mati o te hāora.
- Pehia te HR pēhi i te pātene kia maha ngā wā hei whakarerekē i te hāora.
- Pehia te MIN pēhi i te pātene kia maha ngā wā hei whakarite i te meneti.
- Pehia te PANUITANGA TIME te paatene ano ki te whakaū me te puta i te aratau tautuhinga wa.
Te Tautuhi i ngā Whakaoho (Whakaoho 1 me te Whakaoho 2)
The M-12 CR features two independent alarms.
- Patohia me te pupuri i te PANUI 1 or PANUI 2 patene tae noa ki te koma nga mati o te haora whakaoho.
- Pehia te HR pātene hei whakarite i te hāora whakaoho e hiahiatia ana.
- Pehia te MIN paatene hei whakarite i te meneti whakaoho e hiahiatia ana.
- Pehia te PANUI 1 or PANUI 2 button again to select the alarm source (Radio or Buzzer). The corresponding indicator will light up.
- Pehia te PANUI 1 or PANUI 2 button one more time to confirm and activate the alarm. The alarm indicator (1 or 2) will appear on the display.
Hei whakakore i te whakaoho, pēhi i te pātene e tika ana PANUI 1 or PANUI 2 button until its indicator disappears from the display.
Radio Operation (FM)
- Pehia te FM / MEM button to switch to FM radio mode. The frequency will be displayed.
- Automatic Scan and Store: Patohia me te pupuri i te FM / MEM button to automatically scan for and store available FM stations (up to 20 presets).
- Whakatika ā-ringa: Whakamahia te VOL- / PREV a VOL+ / NEXT buttons to manually tune to a specific frequency. Long press for auto-scan to the next strong station.
- Kei te whiriwhiri i nga tatūkē: Perehi poto te VOL- / PREV or VOL+ / NEXT ngā pātene hei huri haere i roto i ngā teihana kua whakaritea kua rongoa.
- Whakatika Rōrahi: Whakamahia te VOL- / PREV a VOL+ / NEXT buttons (when not in tuning mode) to adjust the radio volume.
Mahi Whakamoe
Ka tangi ana te whakaoho, paatohia te WHAKATAERE / DIMMER button to temporarily silence the alarm. The alarm will sound again after a few minutes (default snooze time is usually 9 minutes, refer to specific product behavior if different).
Mahinga Taima Moe
Ko te taima moe ka taea e koe te moe ki te reo irirangi, ka whakaweto aunoa i muri i te waa kua whakaritea.
- I te wa e whakatangihia ana te reo irirangi, pehia te MOE button repeatedly to cycle through available sleep timer durations (e.g., 120, 90, 60, 30, 15, 10, 5 minutes, or OFF).
- Ka weto aunoa te reo irirangi i muri i te wa kua tohua.
Taumahi Matawā Moemoea
The nap timer sets an alarm to sound after a short, predefined period.
- Pehia te NAP button repeatedly to select a nap duration (e.g., 120, 90, 60, 30, 15, 10, 5 minutes, or OFF).
- The alarm will sound after the selected nap time has elapsed.
Whakaata Koura
Hei whakatika i te kanapa o te whakaaturanga LED:
- Pehia te WHAKATAERE / DIMMER button (when the alarm is not sounding) to cycle through different brightness levels (e.g., High, Medium, Low, Off).
Te tiaki
- Te horoi: Whakamahia he kakahu ngohengohe, maroke hei horoi i waho o te waahanga. Kaua e whakamahi i nga kai horoi, te wax, te whakarewa ranei na te mea ka pakaru te otinga.
- Turanga: Whakatakotoria te waeine ki runga i tētahi mata pūmau, papatahi, kia matara atu i te rā tika, i ngā pūtake wera, me te puehu nui, te makuku rānei.
- Whakahau: Me whakarite kia pai te hau huri noa i te waahanga kia kore ai e wera rawa. Kaua e araia nga whakatuwheratanga hau.
- Momotu Hiko: If the unit is not going to be used for a long period, unplug the power adapter from the wall outlet.
Raparongoā
| Raruraru | Take pea | Rongoā |
|---|---|---|
| Karekau he hiko / Whakaatu | Power adapter not connected or faulty. Power outlet not active. | Me whakarite kia mau te urutau hiko ki roto i te waeine me tetahi putanga pakitara mahi. Whakamātauria he putanga kē. |
| Kare e tangi te whakaoho | Alarm not activated. Alarm volume too low (for radio alarm). Incorrect alarm time set. | Ensure the alarm indicator (1 or 2) is visible on the display. Increase radio volume if using radio alarm. Verify alarm time is correctly set. |
| He pai te powhiri reo irirangi | Antenna not extended or positioned correctly. Interference from other electronic devices. Weak signal in the area. | Fully extend and adjust the FM wire antenna for best reception. Move the unit away from other electronics. Try auto-scanning for stronger stations. |
| Kaore nga paatene e whakautu ana | He hapa pūnaha rangitahi. | Unplug the unit from power for a few minutes, then plug it back in to reset. |
Whakatakotoranga
| Tauira | M-12 CR |
| Momo Whakaatu | LED (Whero) |
| Rahi Whakaatu | 1.5 cm (0.6 inihi) |
| Panui Irirangi | FM (with 20 preset stations) |
| Nga Mahi Whakaoho | Dual Alarm (Radio or Buzzer), Snooze, Sleep, Timer (Nap) |
| Puna Mana | Wired (AC Power Adapter) |
| Ahu (L x W x H) | 12.9 x 5.3 x 6.5 cm (tata) |
| Taumaha | 290 g (āwhi.) |
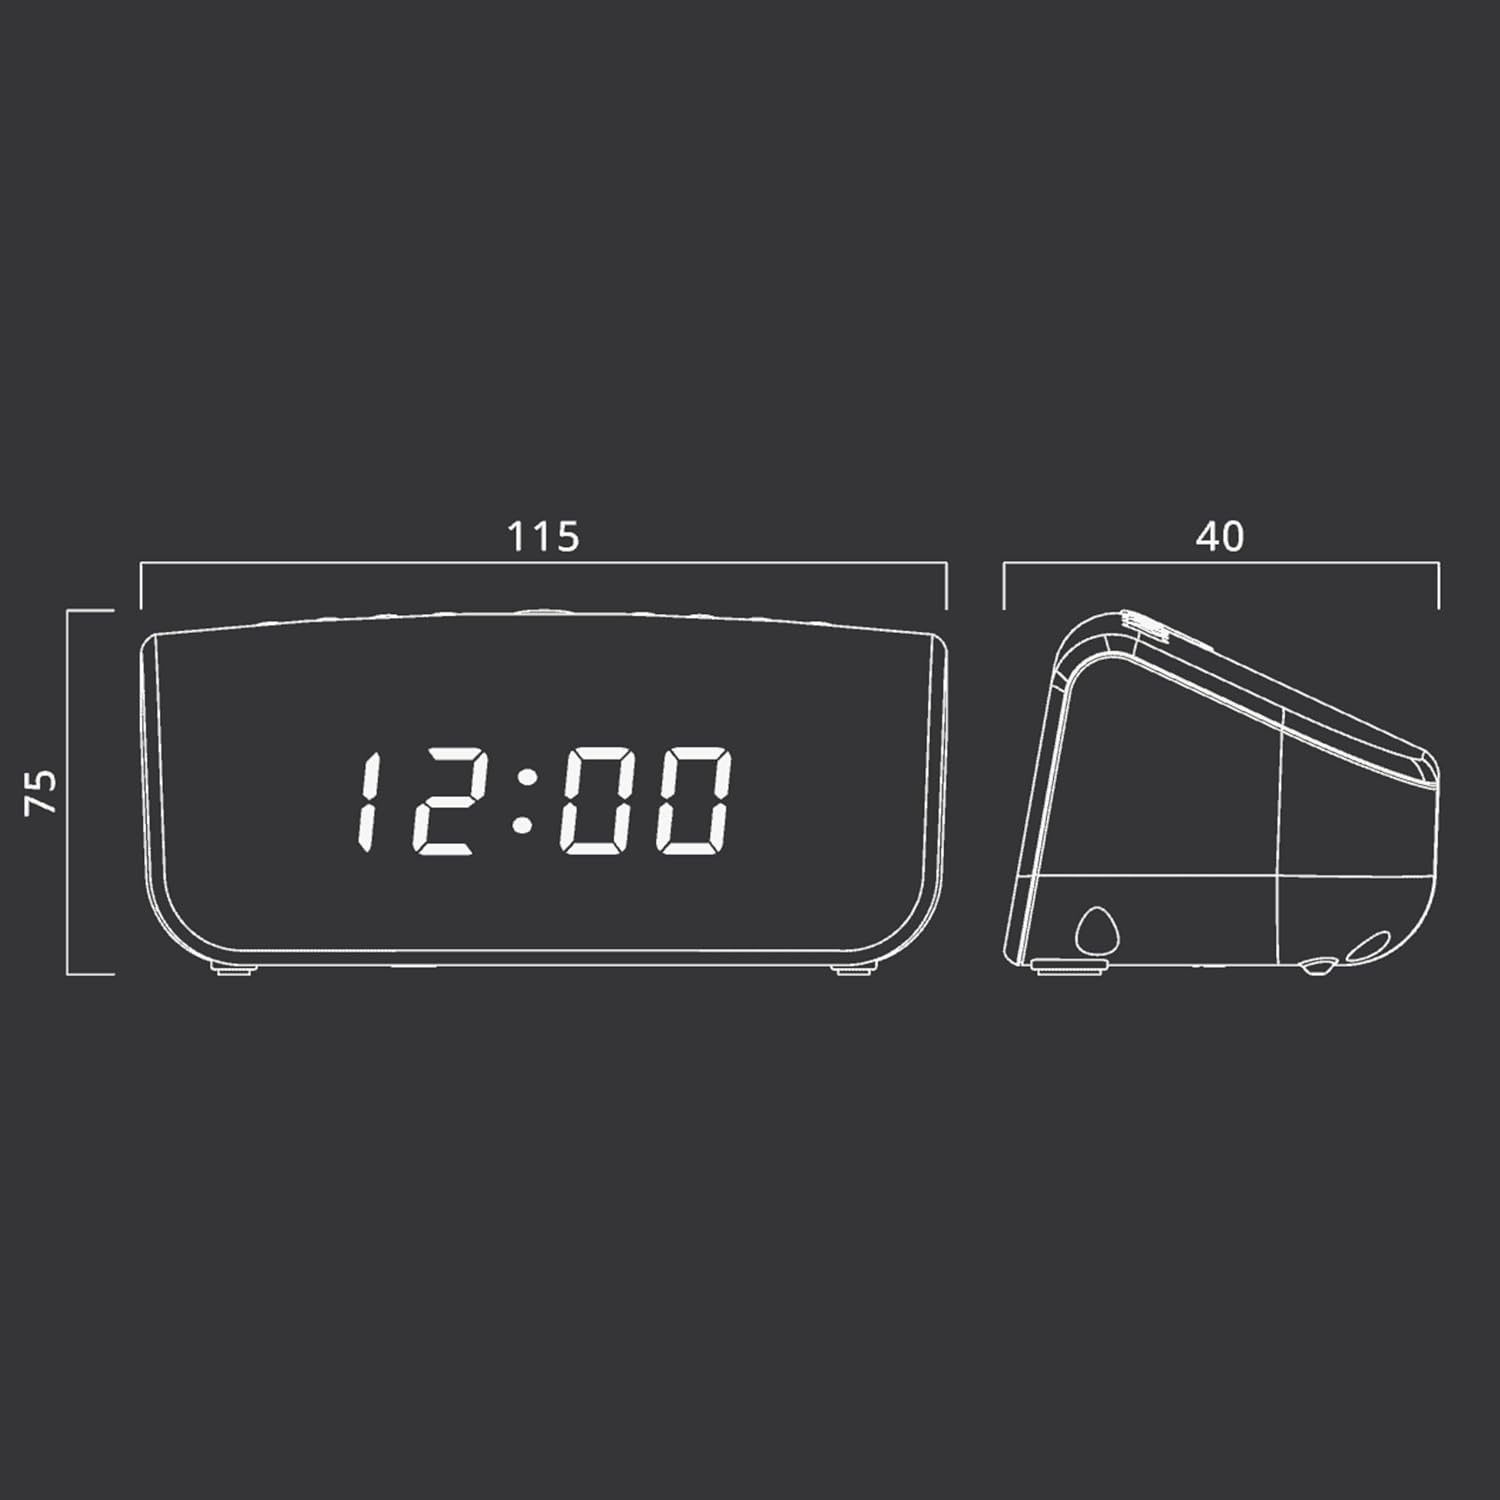
Whakaahua 2: Approximate dimensions of the Muse M-12 CR unit.
Pūtāhui me te Tautoko
For warranty information and technical support, please refer to the warranty card included with your product or visit the official Muse webpae. Puritia to riirii hoko hei tohu mo te hoko mo nga kereme whakamana.
For further assistance, please contact Muse customer service.