
1. Kupu Whakataki
This manual provides instructions for the proper setup, operation, and maintenance of your Acer B247Y 23.8-inch LED LCD Monitor. Please read this manual thoroughly before using your monitor to ensure optimal performance and to prevent damage.
The Acer B247Y is a 23.8-inch Full HD (1920 x 1080) monitor featuring an IPS panel for wide viewing angles, an anti-glare display, and a frameless design on three sides. It includes multiple connectivity options and an ergonomic stand for comfortable viewing.
2. Ihirangi mokete
Manatokona kei roto katoa nga taonga kei roto i to kete. Mena kei te ngaro, kua pakaru ranei etahi mea, whakapaa atu ki to kaihoko.
- Acer B247Y 23.8-inch LED LCD Monitor
- Tu Aroturuki (Turanga me te kaki)
- Power Adapter (Internal) and Power Cable
- Te VGA Cable
- WhakaaturangaPort 1.2 Taura
- Tauera HDMI
- Audio-in Cable (if included)
- Audio-out Cable (if included)
- Pukapuka Kaiwhakamahi (tenei tuhinga)
3. Tatūnga
3.1 Te Huinga i te Turanga Aroturuki
The monitor comes with a detachable foot stand. Follow these steps to assemble:
- Kia ata tangohia te kaitirotiro me te tu i nga waahanga mai i te kete.
- Whakapirihia te kaki tu ki te papa aroturuki. Me whakarite kia pai te pao ki te waahi.
- Attach the stand base to the stand neck. Tighten any screws if provided, usually located on the underside of the base.
- Whakanohoia te kaitirotiro kua whakaemihia ki runga i te mata papatahi.
Tuhipoka: The monitor also supports VESA mount (100 x 100 mm) for wall or arm mounting. Refer to your VESA mount kit instructions for installation.
3.2 Te hono i te Aroturuki
Honoa te kaupane ki to rorohiko, ki etahi atu taputapu ma te whakamahi i nga taura tika.
- Hononga Ataata:
- Connect one end of the DisplayPort cable to the DisplayPort output on your computer and the other end to the DisplayPort input on the monitor.
- Alternatively, connect an HDMI cable from your computer's HDMI output to the monitor's HDMI input.
- For older systems, connect a VGA cable from your computer's VGA output to the monitor's VGA input.
- Hononga Ororongo:
- If using VGA or DisplayPort without audio, connect an audio cable from your computer's audio output to the monitor's audio-in port for integrated speakers.
- To connect external speakers or headphones, use the monitor's audio-out port.
- Hononga Hiko:
- Honoa te taura hiko ki te urunga hiko o te kaitutei, katahi ka honoa te tahi pito ki roto i te putanga hiko kua tu.

Figure 3.2.1: Acer B247Y Monitor with Stand. This image illustrates the overall appearance of the monitor when fully assembled on its stand.
4. Nga Tohutohu Whakahaere
4.1 Kei te Hiko / Weto
Pēhia te pātene mana, kei te taha matau o raro, o muri rānei o te mata tirotiro, hei whakakā, hei whakaweto rānei i te mata tirotiro. Ka tiaho te rama tohu mana ina kā te mata tirotiro.
4.2 Adjusting Monitor Settings (OSD)
The monitor features an On-Screen Display (OSD) menu for adjusting various settings. Use the control buttons (typically located near the power button) to navigate and select options within the OSD menu.
Ko nga tautuhinga OSD noa ko:
- Pikitia: Brightness, Contrast, Color Temperature, Gamma, Acer eColor Management modes (e.g., Dark Room, Eco).
- Ororongo: Volume control for integrated speakers or audio-out.
- Tāuru: Select the active video input source (VGA, DisplayPort, HDMI).
- OSD: Wā mutu OSD, reo.
- Whakahaere: Tautuhi ano ki nga waahi wheketere.
4.3 Whakaritenga Ergonomic
The Acer B247Y monitor stand offers several ergonomic adjustments to optimize your viewwheako:
- Tapahia: Adjust the screen angle from -5 degrees to 25 degrees (forward/backward).
- Hurihuri: Rotate the monitor horizontally up to +/- 45 degrees.
- Whakatikatika Teitei: Adjust the screen height by up to 120mm.
- Kaurori: Hurihia te mata 90 nga nekehanga mo te whakaahua viewing.
5. Tiaki
Ma te tiaki tika ka mau te roa me te mahi tino pai o to kaitirotiro.
- Te horoi i te Mata: Me ata horoia te mata ki te kakahu ngohengohe, kore-puru. Mo nga tohu pakeke, dampen the cloth with a small amount of water or a non-abrasive screen cleaner. Do not spray liquid directly onto the screen.
- Te horoi i te Casing: Whakamahia he kakahu ngohengohe, maroke hei horoi i te aroturuki casing. Kaua e whakamahi i ngā hopi horoi kaha, i ngā hopi horoi rānei.
- Whakahau: Me whakarite kia kaua e araia nga tuwhera o te hau i runga i te kaupane kia kore ai e wera rawa.
- Weto Whakakore: Whakawetohia te mata, ka momotu mai i te putanga hiko i mua i te horoinga, i te wā rānei kāore e whakamahia ana mō te wā roa.
6. Te Raru
Mena ka raru koe ki to kaupane, tirohia nga mahi rapurongoā noa e whai ake nei:
- No Power / Monitor Does Not Turn On:
- Me whakarite kei te hono tika te taura hiko ki te mata me te putanga hiko e mahi ana.
- Manatokohia kei te mahi te putanga hiko ma te hono ki tetahi atu taputapu.
- Patohia te paatene mana.
- No Image / "No Signal" Message:
- Check that the video cable (DisplayPort, HDMI, or VGA) is securely connected to both the monitor and your computer.
- Me mohio kei te ora to rorohiko, kaore i te aratau moe.
- Whakamahia te tahua OSD hei tīpako ā-ringa i te pūtake tāuru tika.
- Whakamātauria he taura ataata rerekē, he tauranga rānei mēnā e wātea ana.
- Ko te Atahanga he korikori, he maamaa ranei:
- Me whakarite kia whakatakotoria te taumira o te mata o tō rorohiko ki te taumira taketake o te mata (1920 x 1080).
- Adjust brightness, contrast, and other picture settings via the OSD menu.
- Check for any physical damage to the screen or cables.
- Kāore he Oro mai i ngā Kaikōrero:
- Whakanuia te oro mā te whakamahi i te tahua OSD, i ngā tautuhinga oro rānei a tō rorohiko.
- Ensure the audio cable (if used) is properly connected.
- Manatokohia kua tohua te taputapu whakaputa oro tika ki nga tautuhinga tangi o to rorohiko.
7. Whakatakotoranga
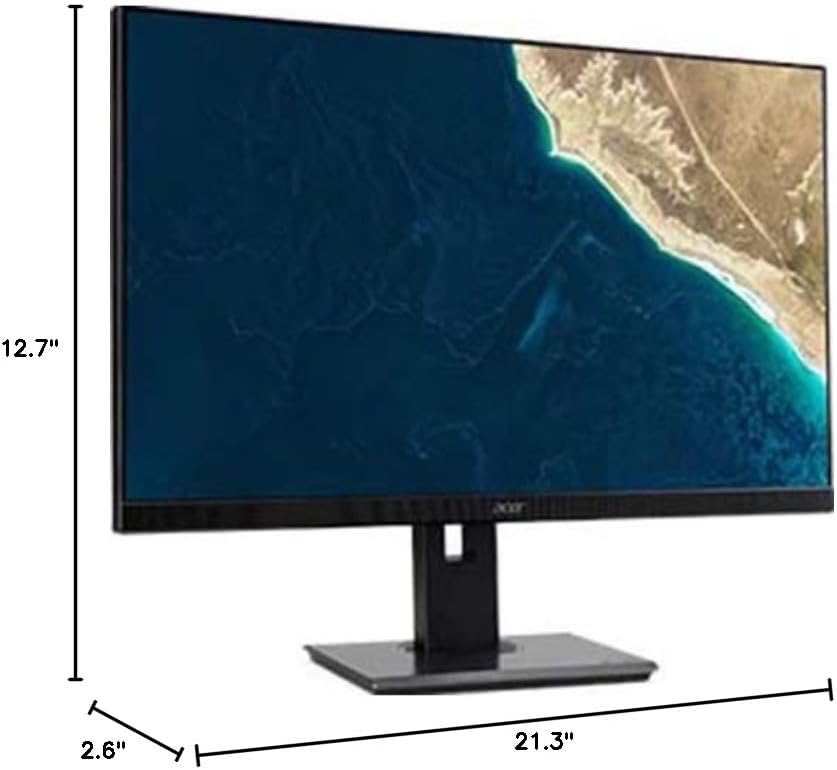
Figure 7.1.1: Acer B247Y Monitor Dimensions. This image shows the approximate height (12.7"), width (21.3"), and depth (2.6") of the monitor without the stand.
| Āhuahira | Whakatakotoranga |
|---|---|
| Tau tauira | B247Y |
| Rahi Mata | 23.8 inihi (60.5 cm) |
| Momo Whakaatu | LED LCD, IPS Panel, Anti-glare (AG) |
| Taumira Morahi | 1920 x 1080 (Katoa HD) |
| Aspect Ratio | 16:9 |
| Rere tāmata | 75 Hz |
| Wā Whakautu | 4ms (gray-to-gray) |
| Tirohanga (tikanga) | 250 cd/m² |
| Ratio Taarua Maori | 1,000:1 |
| Tauwehenga Pūrata Hihiko | 100,000,000:1 |
| Viewnga Koki (H / V) | 178° / 178° |
| Hononga | VGA, DisplayPort 1.2, HDMI, Audio-in, Audio-out |
| Kaikōrero Whakakotahi | 2 x 2.0W |
| Whakaritenga Ergonomic | Tilt (-5° to 25°), Swivel (+/- 45°), Height Adjustment (120mm), Pivot (90°) |
| VESA Mount Support | 100 x 100 mm |
| Ahu me te Tu (W x H x D) | 21.3" x 14.9"~19.6" x 7.6" (54.0cm x 37.9cm~49.9cm x 19.3cm) |
| Taumaha me te Tu | 12.3 lb. (5.6 kg) |
| Pūurutau Hiko | Roto |
| Tae | Pango |
8. Pūtāhui me te Tautoko
Your Acer B247Y monitor comes with a Limited Three-Year Warranty. Please retain your proof of purchase for warranty claims.
For technical support, service, or warranty inquiries, please refer to the official Acer support website or contact their customer service department. Contact information can typically be found on the Acer webpaetukutuku, i roto rānei i te kāri pūtāhui kei roto i tō hua.
Kensington Maukati: The monitor supports a Kensington lock for security. Attach a compatible Kensington lock (sold separately) to the security slot on the monitor to deter theft.