
Nga Tohutohu Haumaru Nui
To ensure safe operation and prolong the life of your monitor, please read and follow these instructions carefully:
- Me momotu te taura hiko mai i te putanga hiko i mua i te horoinga o te mata.
- Kaua e whakaatuhia te matawai ki te ua, ki te makuku rānei, kia kore ai e pāngia e te ru hiko.
- Me whakarite kia pai te hau huri noa i te kaitirotiro kia kore ai e wera rawa. Kaua e araia nga whakatuwheratanga hau.
- Whakamahia anake te urutau hiko me nga taura i tukuna mai e te kaihanga.
- A ape i te whakatakoto i nga mea taumaha ki runga i te taura hiko, te aroturuki ranei.
- If the monitor is damaged or malfunctions, do not attempt to repair it yourself. Contact qualified service personnel.
Ihirangi mokete
Before proceeding with the setup, please check the contents of your package to ensure all items are present:
- Acer CB272U smiiprx LED Monitor
- Tūnga Aroturuki (Turanga me te Ringa)
- Waea hiko
- Tauera HDMI
- Aratohu Tīmatanga Tere / Kāri Pūtāhui
Tatūnga
1. Huihui i te Turanga Aroturuki
- Carefully remove the monitor from its packaging. Place the monitor face down on a soft, clean cloth or surface to prevent scratches to the screen.
- Attach the stand arm to the back of the monitor panel. Ensure it is securely fastened, typically by sliding it into place until it clicks or by tightening screws.
- Connect the stand base to the bottom of the stand arm. Secure the base by tightening the captive screw located underneath the base.

Whakaahua 1: Whakamuri view of the Acer CB272U smiiprx monitor with the stand attached, illustrating the assembly points.
2. Connecting the Monitor to Your Computer
- Connect one end of the provided HDMI cable to the HDMI port on the monitor.
- Connect the other end of the HDMI cable to the HDMI output port on your computer or graphics card.
- Plug the power cord into the monitor's power input, then plug the other end into a grounded electrical outlet.

Whakaahua 2: Koki muri view showing the input ports of the monitor, including HDMI and power connections.
Te whakahaere i te Aroturuki
Te Whakahiko me te Weto
Locate the power button on the monitor's bezel. Press it once to turn the monitor on. The power indicator light will illuminate. Press it again to turn the monitor off.
Adjusting Display Settings (OSD Menu)
The On-Screen Display (OSD) menu allows you to customize various monitor settings. Use the control buttons (usually located on the back or bottom right of the monitor) to navigate the OSD menu. Common adjustments include:
- Tirohanga/Prata: Whakatikatikahia te kanapa whānui me te rerekētanga i waenga i ngā wāhi mārama me ngā wāhi pōuri.
- Tautuhinga Tae: Whakarerekehia te pāmahana tae, te gamma, me nga taumata RGB takitahi.
- Pūtake Tāuru: Manually select the video input (e.g., HDMI).
- Ororongo: Control volume for the built-in speakers.
Whakaritenga Ergonomic
The Acer CB272U smiiprx monitor stand offers multiple ergonomic adjustments to optimize your viewte whakamarie:
- Whakatikatika Teitei: Whakanuia, whakahekea ranei te kaitutei ki te taumata kanohi.
- Tapahia: Adjust the screen angle forward or backward to reduce glare.
- Hurihuri: Rotate the monitor horizontally to share your screen or adjust viewkoki.
- Kaurori: Rotate the screen to a portrait orientation for document viewte whakawaehere ranei.
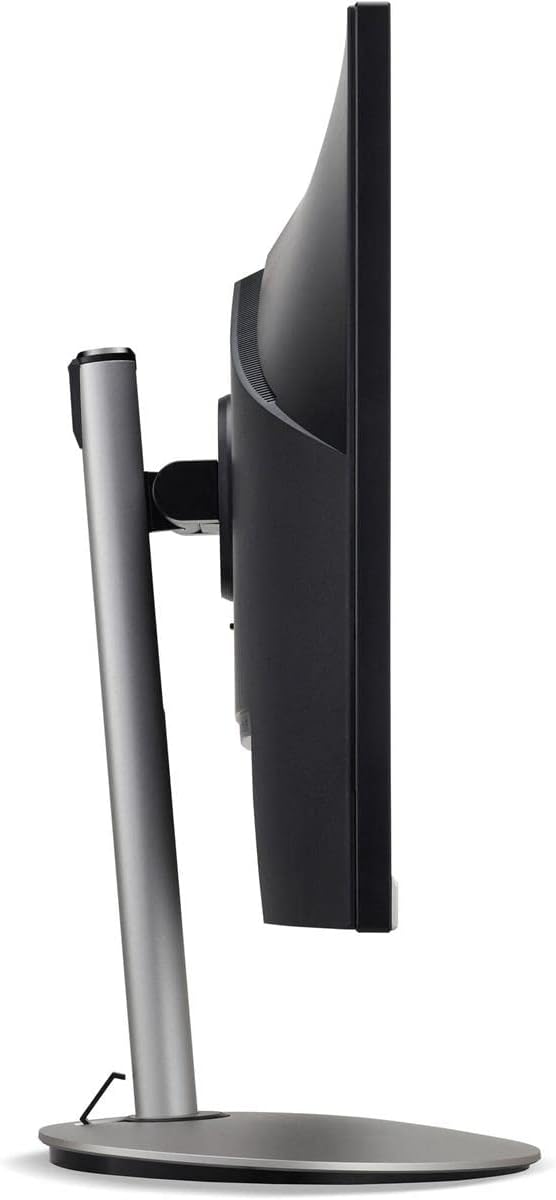
Whakaahua 3: Te taha profile of the monitor, illustrating its adjustable stand for ergonomic positioning.
Te tiaki
Cleaning the Monitor Screen and Casing
To clean your monitor, first ensure it is turned off and unplugged from the power outlet. Use a soft, lint-free cloth. For stubborn marks, lightly dampen the cloth with water or a specialized non-abrasive screen cleaner. Kaua e rehu tika te wai ki runga i te mata, ki te mata rānei.asing. A ape i te whakamahi i nga matū kino, te horoi horoi, te whakarewa ranei.
Nga Aratohu Rokiroki
If you need to store the monitor for an extended period, it is recommended to use its original packaging to protect it from dust, moisture, and physical damage. Store in a cool, dry environment away from direct sunlight and extreme temperatures.
Raparongoā
Tirohia te ripanga i raro nei mo nga take noa me o raatau otinga:
| Raruraru | Take pea | Rongoā |
|---|---|---|
| Kaore he ahua o te mata | Kua momotu te taura hiko; Kua momotuhia te taura ataata; Ko te puna whakaurunga he i tohua. | Check power and video cable connections; Ensure the monitor is powered on; Select the correct input source via the OSD menu. |
| Ko te atahanga he rangirua, he korikori ranei | Incorrect resolution setting; Faulty video cable. | Set the display resolution to 2560 x 1440 at 75 Hz; Try a different HDMI cable. |
| Kaore he tangi mai i nga kaikorero | Monitor volume too low or muted; Incorrect audio output selected on computer. | Adjust monitor volume via OSD; Unmute audio; Select the monitor as the audio output device in your computer's sound settings. |
| Aroturuki korikori | Refresh rate mismatch; Interference; Faulty cable. | Ensure refresh rate is set to 75 Hz; Check for nearby electronic devices causing interference; Replace video cable. |
Whakatakotoranga
Key technical specifications for the Acer CB272U smiiprx LED Monitor:
| Āhuahira | Taipitopito |
|---|---|
| Ingoa Tauira | CB272U smiiprx |
| Rahi Mata | 24.1 Inihi |
| Whakatau Maori | 2560 x 1440 (WQHD) |
| Rere tāmata | 75 Hz |
| Wā Whakautu | 1 Millisecond (VRB) |
| Aspect Ratio | 16:9 |
| Momo Whakaatu | LED-backlit LCD / TFT active matrix (IPS) |
| Tirohanga | 350 cd/m² |
| Tauwehenga Purata | 1000:1 (Paeko) |
| Hononga | HDMI |
| Tukutahi Urutau | FreeSync |
| Nga Kai-korero Hanga-roto | Ae |
| Dimensions (WxDxH with stand) | 24.1 in x 9.2 in x 20.5 in |
| Taumaha (me te turanga) | 18.1 Pauna |

Figure 4: Monitor dimensions with stand, indicating width, depth, and height.
Nga korero Whakaputanga
The Acer CB272U smiiprx LED Monitor comes with a 3-tau kaihanga iti pūtāhui. This warranty covers defects in materials and workmanship under normal use. For complete details regarding warranty coverage, limitations, and how to make a claim, please refer to the warranty documentation included with your product or visit the official Acer support webpae.
Please retain your proof of purchase (receipt or invoice) as it will be required for any warranty service.
Tautoko Kiritaki
Should you require further assistance, technical support, or wish to download the latest drivers and firmware updates for your monitor, please visit the official Acer support webpae:
Ka kitea hoki e koe ngā mōhiohio whakapā mō te ratonga kiritaki a Acer i tō rohe i runga i te tautoko. webpae mō ngā āwhina whaiaro.