1. Kupu Whakataki
This manual provides detailed instructions for the installation, operation, and maintenance of your Anlapus 1080p HD-TVI Surveillance Camera. Please read this manual thoroughly before using the product to ensure proper function and safety.
The Anlapus HD-TVI camera is designed for both indoor and outdoor surveillance, offering high-definition video quality and robust performance in various environmental conditions.
2. Ihirangi mokete
Manatokohia ko nga mea katoa kei raro nei kei roto i to kete. Mena kei te ngaro, kua pakaru ranei etahi taonga, tena koa whakapiri atu ki te tautoko a nga kaihoko.
- 4 x Anlapus 1080p HD-TVI Cameras
- 4 x BNC Video Cables
- 1 x Tuku Hiko
- 1 x 1-to-4 Power Splitter Cable
- 4 x Ngā Whakapiri Whakatūpato
- 4 x Mounting Screw Bags (including screws and wall plugs)
- 4 x Mounting Hole Templates
- 1 x Aratohu Timata Tere
3. Nga Hua o te Hua
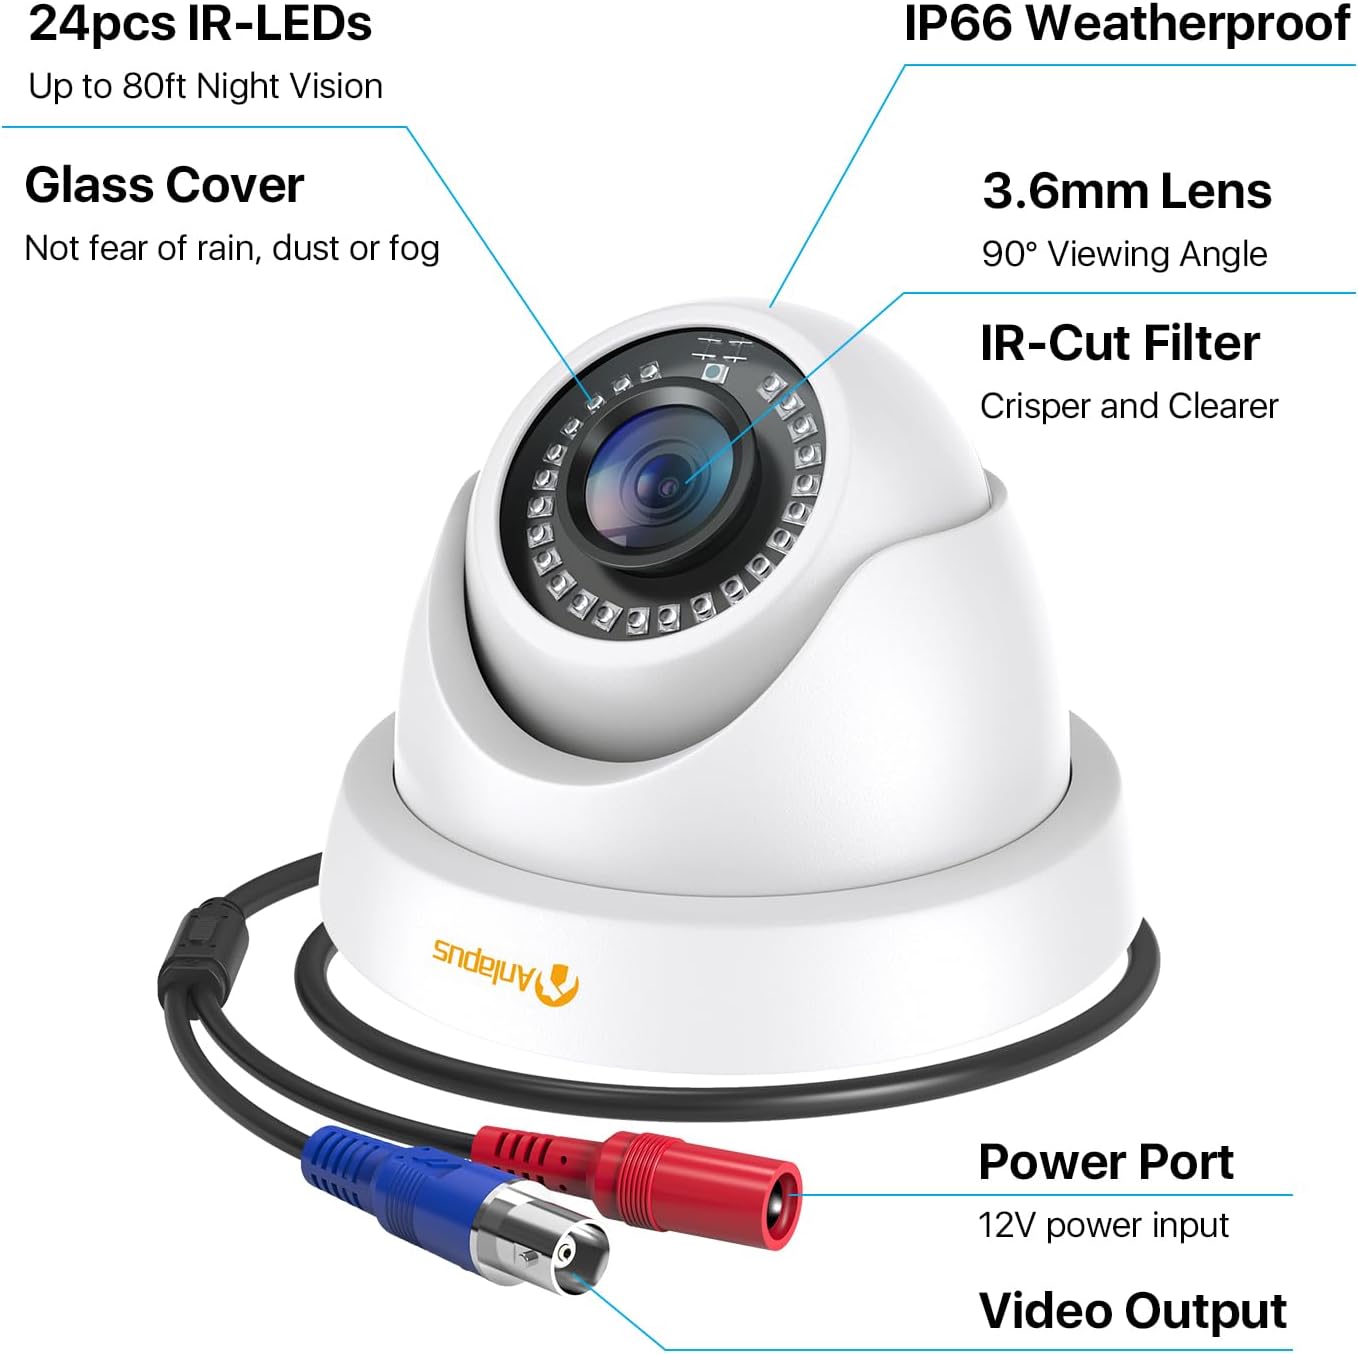
- 1080p HD Resolution: Ka whakarato i te ataata marama me te taipitopito footage (1920x1080 pixels).
- Whānui Viewing Koki: Equipped with a 3.6mm lens, offering a 90-degree field of view.
- HD-TVI Compatibility: Designed to work with HD-TVI DVRs. Ensure your DVR supports HD-TVI technology.
- Matakitenga Ake Po: Features 24 IR-Cut LEDs for up to 24 meters (80 feet) of clear black and white night vision.
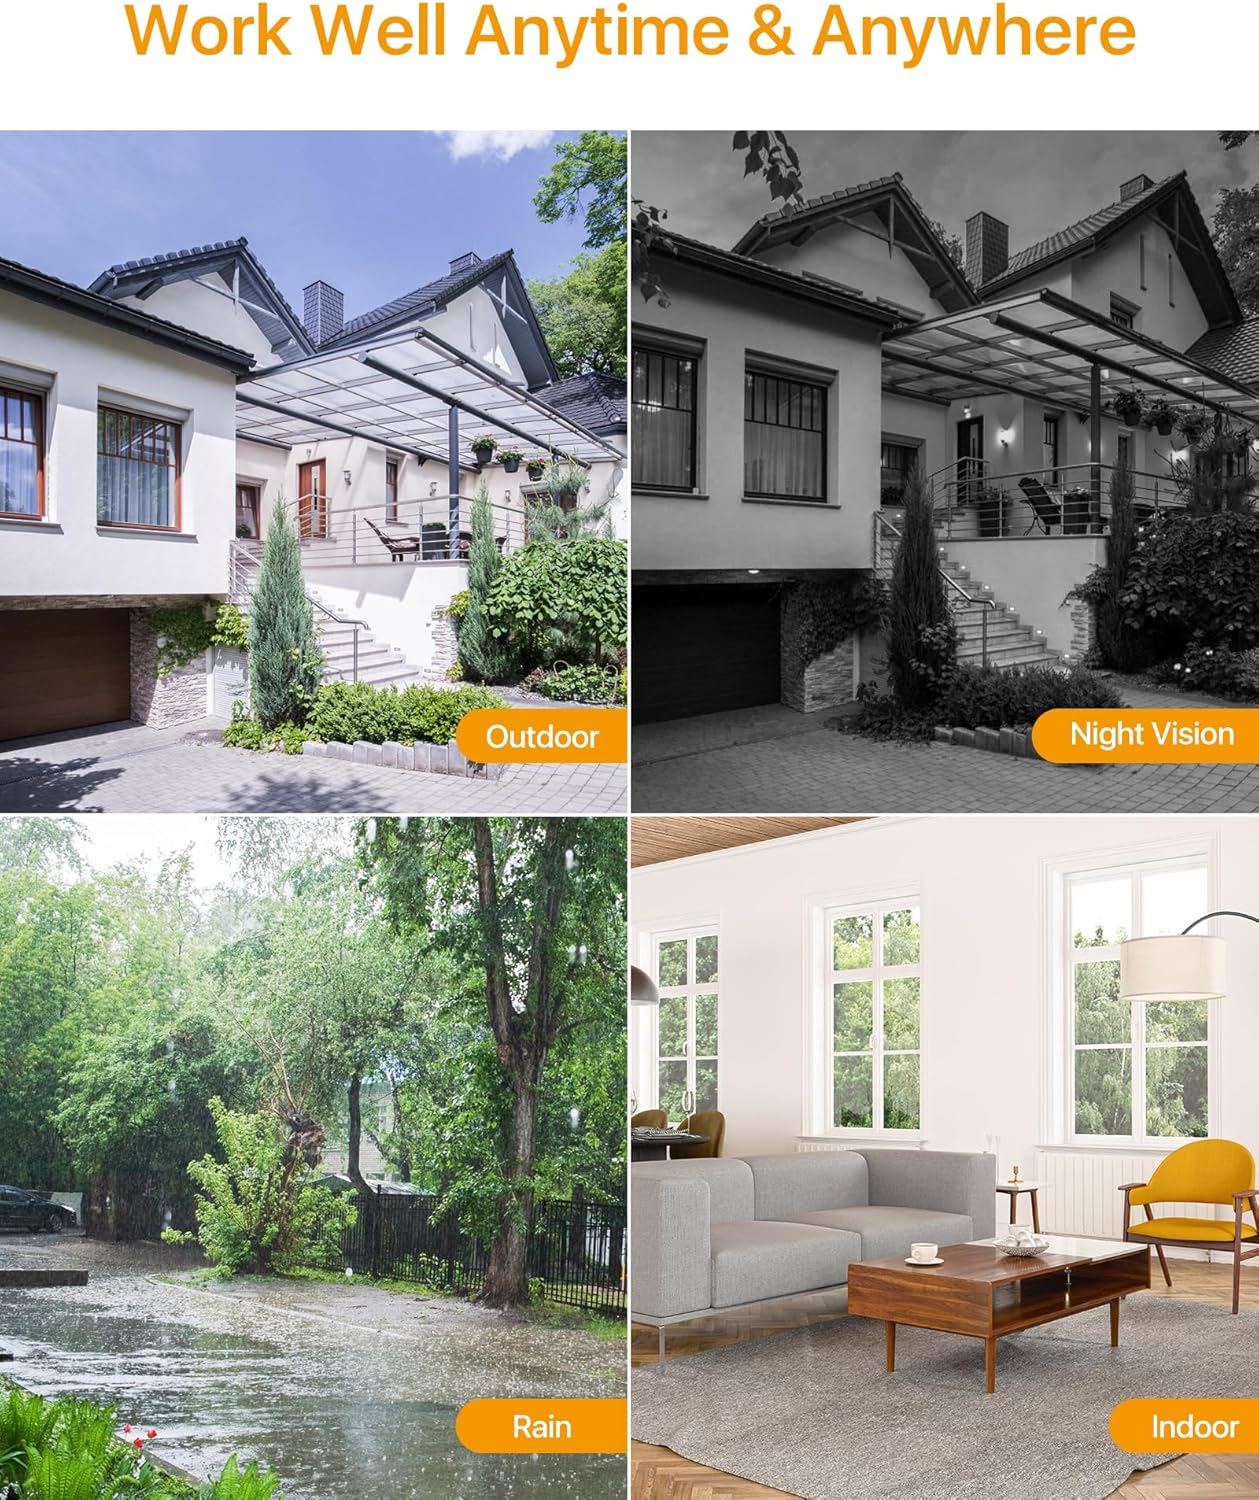
- IP66 Whakatauranga Huarere: Robust metal housing ensures protection against dust and water, suitable for both indoor and outdoor use in various weather conditions.
- Whakapiki Hangarau: Features a 3-axis adjustable bracket for ceiling or wall mounting, allowing 360-degree horizontal and 180-degree vertical adjustment.


4. Tatūnga me te Tāuta
4.1 Rarangi Arowhai I mua i te Whakaaturanga
- Ensure your DVR is compatible with HD-TVI cameras.
- Plan the camera placement to cover desired surveillance areas.
- Ensure power outlets are accessible for the camera power supply.
- Gather necessary tools: drill, screwdriver, ladder (if mounting high).
4.2 Whakauru i te Kamera
- Select a suitable mounting location (wall or ceiling) that provides the desired viewing angle and is within reach of the BNC cable and power supply.
- Use the provided mounting hole template to mark the drill points on the surface.
- Porohia nga kohao pairati ki nga waahi kua tohua.
- Insert the wall plugs into the drilled holes (if mounting on masonry or drywall).
- Whakamauhia te turanga kāmera ki te mata mā te whakamahi i ngā tīwiri kua whakaratohia.
- Adjust the camera angle using the 3-axis bracket. The bracket allows for 360-degree horizontal rotation and 180-degree vertical tilt. Tighten the adjustment screws once the desired angle is achieved.
4.3 Te hono i te kamera
Refer to the connection diagram below for proper wiring.
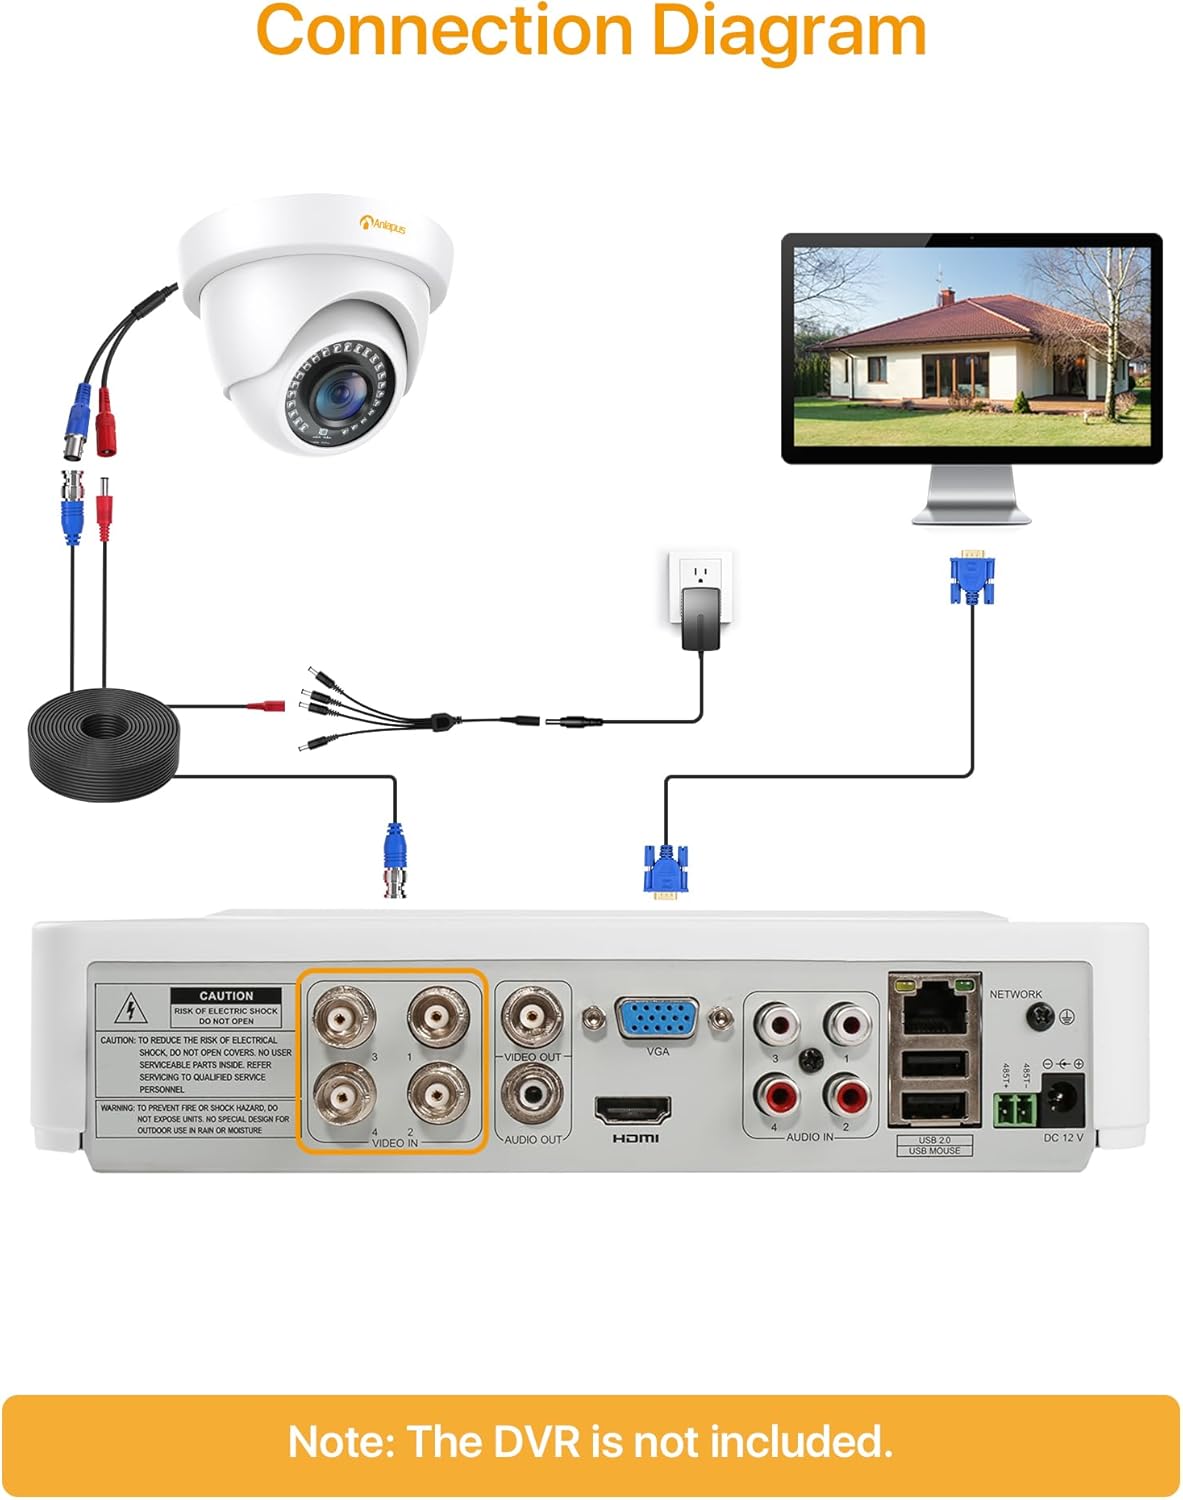
- Connect one end of the BNC video cable to the video output port of the camera.
- Connect the other end of the BNC video cable to a "VIDEO IN" port on your HD-TVI DVR.
- Connect the camera's power input to one of the outputs on the 1-to-4 power splitter cable.
- Connect the power supply to the 1-to-4 power splitter cable.
- Monohia te pūtake hiko ki tētahi putanga hiko paerewa.
- Repeat these steps for all cameras.
Hiranga: Me whakarite kia mau nga hononga katoa i mua i te whakakaha i te punaha.
5. Nga Tohutohu Whakahaere
Once the cameras are properly installed and connected to your HD-TVI DVR, refer to your DVR's instruction manual for specific operating procedures, including:
- Viewkei te ora footage mai i nga kamera.
- Recording and playback of video.
- Configuring motion detection and alerts.
- Accessing the system remotely via mobile app or web atanga.
- Adjusting camera settings (if supported by your DVR).
The Anlapus camera provides a continuous video feed to the DVR. Its night vision capabilities activate automatically in low-light conditions.
6. Tiaki
- Te horoi: Me horoi i ia wa te arotahi kamera me te whare ki te ngohengohe, damp kakahu. A ape i te kai horoi, te whakarewa ranei.
- Tirohanga taura: Tirohia ngā taura katoa i ia wā, mō ngā tohu o te pakaru, te pakaru rānei, te kore rānei o ngā hononga.
- Whakahōu Firmware: While the camera itself does not typically require firmware updates, ensure your DVR's firmware is up-to-date for optimal performance and compatibility.
- Tiaki Taiao: Although the camera is IP66 weatherproof, extreme weather conditions (e.g., heavy snow, ice) may temporarily affect performance. Ensure the camera is securely mounted to withstand strong winds.
7. Te Raru
| Raruraru | Take pea | Rongoā |
|---|---|---|
| No image on DVR screen |
|
|
| Kounga ahua ngoikore / ataata pōuriuri |
|
|
| Ko te tirohanga o te po kaore e mahi |
|
|
If you encounter issues not covered here, please contact Anlapus customer support.
8. Whakatakotoranga
| Tau tauira | AJ-A4K-202T4-WPES |
| Whakatau Ataata | 1080p (1920 x 1080 Pika) |
| Arotahi | 3.6mm |
| Viewing Koki | 90 Waeine |
| Awhe Tirohanga Po | Tae atu ki te 24 Mita (80 putu) |
| IR LED | 24 pcs IR-Cut LEDs |
| Whakatauranga Taurangi | IP66 |
| Rauemi | Te whakarewa |
| Hangarau Hononga | Waea (BNC) |
| Whakauru Mana | 12 Volts |
| Whakamahi Hiko | 12 Watts |
| Ahu (L x W x H) | 42.9 x 27 x 8.71 cm |
| Taumaha | 2.61 kilograms (for the package) |
| Whakamahi Manakohia | Tirotiro |
| Pūrere Hototahi | Papa Ataata Ataata Ataata (DVR) |
9. Pūtāhui me te Tautoko
Anlapus products are designed for reliability and performance. For warranty information and technical support, please refer to the warranty card included in your package or visit the official Anlapus webpae.
If you require assistance with installation, troubleshooting, or have any questions regarding your Anlapus surveillance camera, please contact our customer support team. Contact details can typically be found on the Anlapus brand store page or in the quick start guide.