Kupu Whakataki
This manual provides comprehensive instructions for the Vivitar Podcast and Social Media Microphone MIC918. This high-quality condenser microphone is designed for clear audio capture for various applications, including podcasting, live streaming, gaming, voice-overs, and vocal recording. It features a simple plug-and-play USB connection, integrated volume control, and a stable tripod stand for optimal positioning.
Nga korero haumaru
- Kaua e whakaaturia te hopuoro ki te wai, ki te makuku nui rānei.
- Āraia te pāmahana tino kino, te rā tika rānei.
- Do not attempt to disassemble or modify the microphone. This will void the warranty.
- Tiakina te hopuoro mai i nga papa autō kaha.
- Whakamahia anake te kakahu maeneene, maroke hei horoi.
Ka mutu te huaview
Ihirangi mokete
- Vivitar MIC918 Microphone Unit
- Tuinga Tripod
- Integrated USB Connection Cable
Wae hopuoro
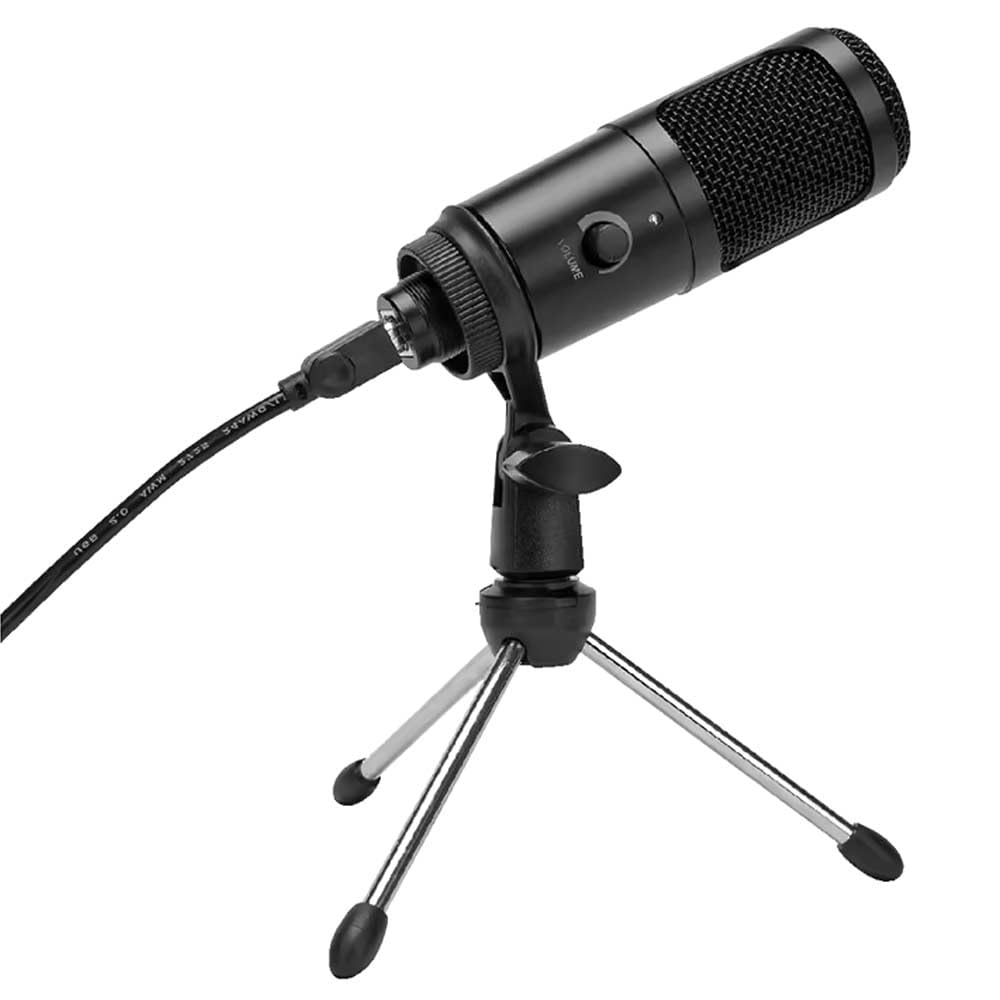
Whakaahua 1: Vivitar MIC918 Microphone unit attached to its tripod stand, showing the integrated USB cable.

Whakaahua 2: Te taha view of the Vivitar MIC918 Microphone, highlighting the volume control knob and the Vivitar brand logo.
The microphone unit features a durable metal construction. The front side includes a volume control knob for easy audio level adjustments. The microphone is designed with a unidirectional polar pattern to focus on sound directly in front of it, reducing background noise.
Tatūnga
Te hono i te hopuoro
- Huihuia te Tu: If not already assembled, unfold the tripod stand and ensure it is stable on a flat surface. Securely attach the microphone unit to the stand's mounting point. The rotating shaft ring allows for angle adjustment.
- Tūhono ki te Pūrere: Plug the integrated USB cable from the microphone into an available USB port on your computer, laptop, or compatible gaming console.
- Mono me te Purei: The Vivitar MIC918 is a plug-and-play device. Your operating system (Windows, macOS, etc.) should automatically detect and install the necessary drivers. No additional software installation is typically required.
- Tīpakohia hei Pūrere Tāuru: After connecting, navigate to your device's sound settings or the audio settings within your recording/streaming software. Select the "Vivitar MIC918" or similar USB audio device as your primary input (microphone) device.
Te whakahaere
Te Whakarite Rōrahi
The microphone features a built-in volume control knob located on its side (refer to Figure 2). Rotate this knob clockwise to increase the microphone's input sensitivity (volume) and counter-clockwise to decrease it. Adjust this to achieve the desired recording level without distortion.
Te whakanoho i te hopuoro
For optimal audio capture, position the microphone directly in front of the sound source (e.g., your mouth for speaking or singing). The tilting tripod stand allows you to adjust the microphone's angle to best suit your needs. Due to its unidirectional polar pattern, the microphone is most sensitive to sounds coming from the front and less sensitive to sounds from the sides or rear, helping to minimize ambient noise.
Te tiaki
- Te horoi: Use a soft, dry, lint-free cloth to wipe the microphone's exterior. Do not use liquid cleaners, aerosols, or solvents.
- Rokiroki: When not in use, store the microphone in a clean, dry place, away from dust and extreme temperatures.
- Te whakahaere: Kia tūpato te pupuri i te hopuoro. Kaua e tukua kia taka, kia kaua hoki e pāngia e te kaha o te pānga.
Raparongoā
| Raruraru | Take pea | Rongoā |
|---|---|---|
| Kāore he oro e puta mai ana i te hopuoro. | Ko te hopuoro kaore i te hono tika. Incorrect input device selected. He iti rawa te reo hopuoro. | Me whakarite kia mau te hono o te taura USB ki te hopuoro me te pūrere. Verify that "Vivitar MIC918" is selected as the input device in your system's sound settings or recording software. Increase the volume using the knob on the microphone and check system input levels. |
| Poor sound quality (e.g., muffled, too quiet, background noise). | He te whakatakotoranga hopuoro. High ambient noise. Input level too high or too low. | Position the microphone closer to the sound source and ensure it's facing directly towards it. Tuhia ki tetahi taiao ata noho. Adjust the microphone's volume knob and system input levels to an optimal range, avoiding clipping or being too faint. |
| Kāore te rorohiko e mōhio ki te hopuoro. | Putanga USB, taura rānei he hapa. System driver issue. | Ngana ki te hono i te hopuoro ki tetahi tauranga USB rereke i runga i to rorohiko. Restart your computer. If the issue persists, check your operating system's device manager for any driver conflicts or updates. |
Whakatakotoranga
| Āhuahira | Whakatakotoranga |
|---|---|
| Waitohu | Vivitar |
| Tau tauira | MIC918 |
| Hononga | USB (Mono me te Tākaro) |
| Momo hopuoro | Kaipupuri |
| Tauira Poara | Takitahi |
| Tohu Waitohu-ki-Toi | 78 dB |
| Rauemi Whakapiri | Te whakarewa |
| Taumaha Tūemi | 0.95 Pauna (tata ki te 0.43 kg) |
| Rahi Tūemi (L x W x H) | 8.86 x 5.36 x 2.49 inihi (tata ki te 22.5 x 13.6 x 6.3 cm) |
| Puna Mana | Hiko Waea (ma te USB) |
| Pūrere Hototahi | Computers, Laptops, Gaming Consoles |
Nga korero Whakaputanga
The Vivitar Podcast and Social Media Microphone MIC918 comes with a 3-Year USA Warranty. For specific terms, conditions, and to register your product, please refer to the official Vivitar webpaetukutuku, whakapā atu ranei ki ta raatau tautoko kaihoko. Puritia to tohu hoko mo nga kereme whakamana.
Tautoko Kiritaki
For further assistance, technical support, or inquiries regarding your Vivitar MIC918 microphone, please visit the official Vivitar website or contact their customer service department. Contact information can typically be found on the Vivitar website under the 'Support' or 'Contact Us' sections.