
1. Kupu Whakataki
Welcome to the HyperX Armada 25 Gaming Monitor user manual. This document provides essential information for setting up, operating, maintaining, and troubleshooting your new monitor. The HyperX Armada 25 is designed for competitive gaming, featuring a 24.5-inch Full HD (1920x1080) IPS panel, a 240Hz refresh rate, and a 1ms response time, ensuring smooth and responsive visuals. It also includes NVIDIA G-SYNC compatibility to eliminate screen tearing and minimize input latency. A desk mount is included for convenient setup and to maximize desk space.
Āhuatanga matua:
- Mōkī Katoa-i-Kotahi: Includes an ergonomic arm and desk mount for easy setup and space-saving.
- Rere Tāmata Nui me te Wā Whakautu: 240Hz refresh rate and 1ms response time for ultra-smooth gaming.
- Vibrant IPS Panel: 24.5-inch Full HD (1920x1080) IPS panel delivers stunning visuals with accurate colors and wide viewnga koki.
- NVIDIA G-SYNC Hototahi: Eliminates screen tearing and reduces stuttering for a fluid gaming experience.

Ataata Hua Mana:
2. Tatūnga
This section guides you through the initial setup of your HyperX Armada 25 Gaming Monitor, including assembly and connection to your computer.
2.1. Assembling the Desk Mount
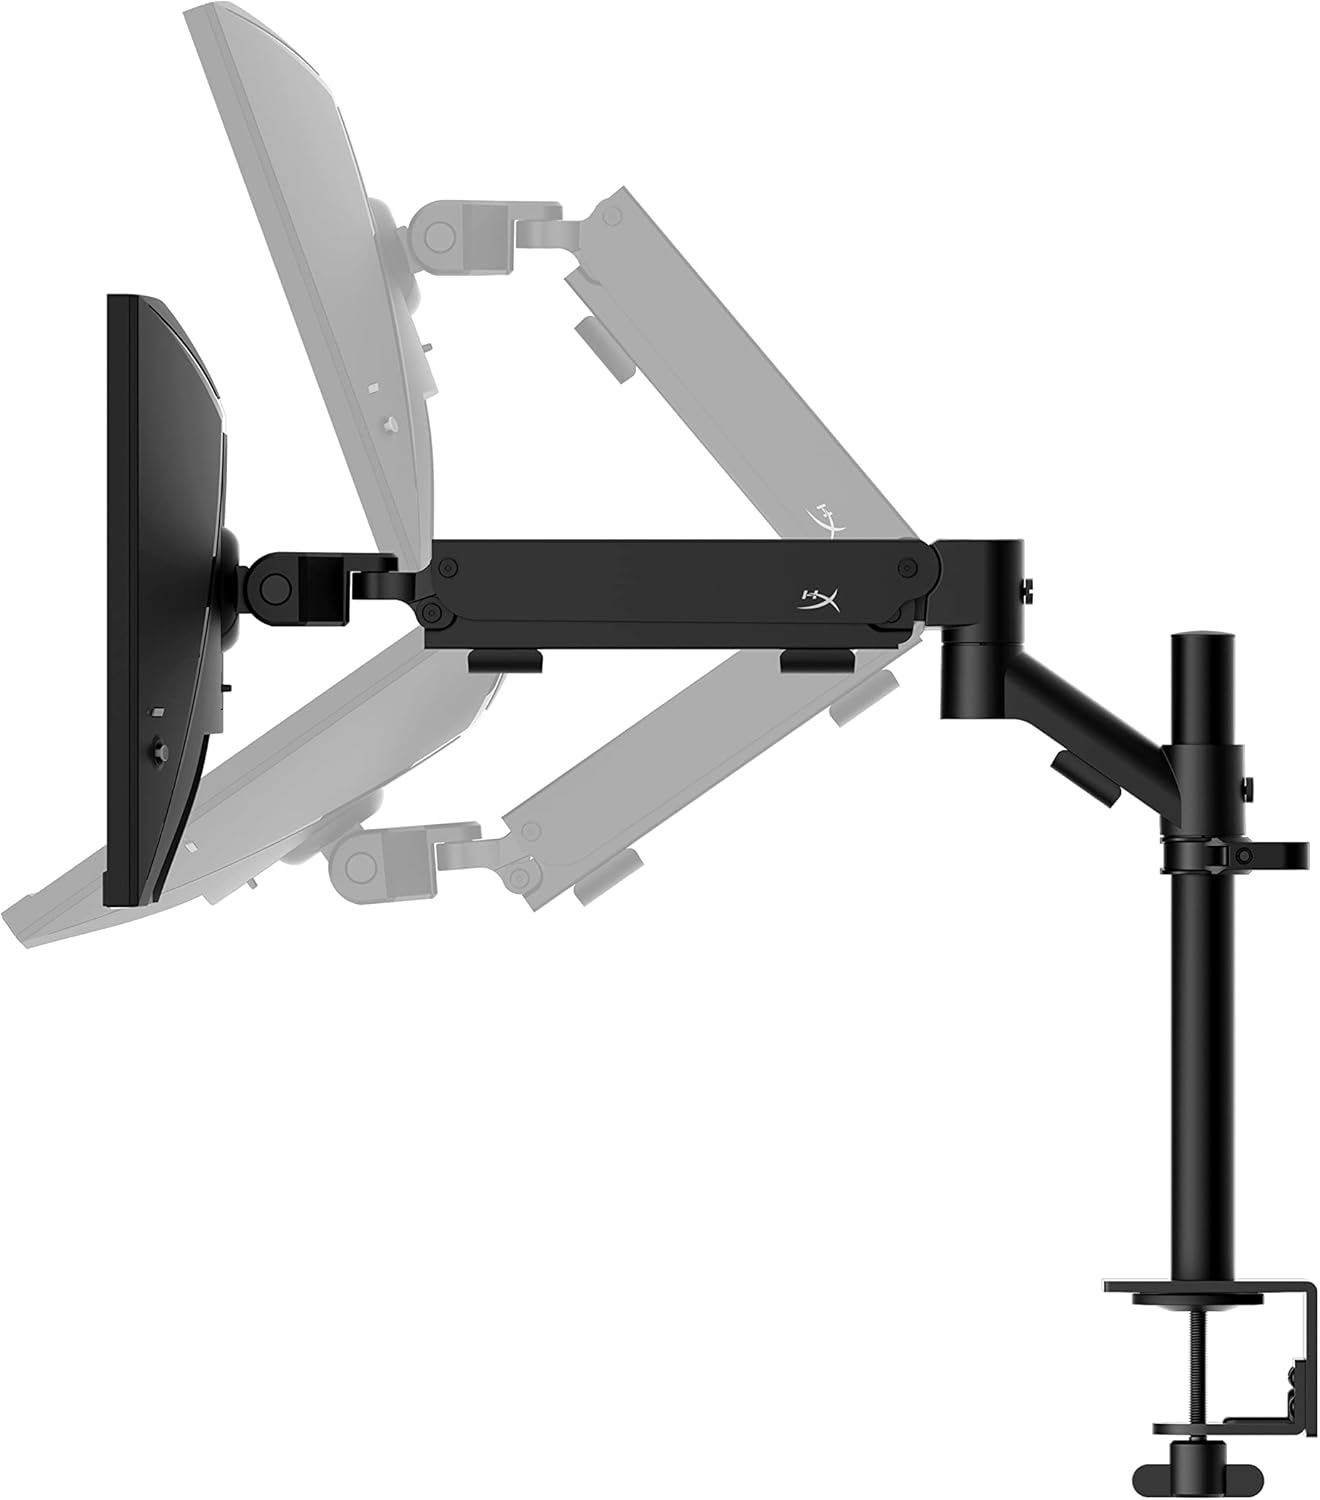
The HyperX Armada 25 comes with an integrated ergonomic desk mount. Follow the instructions provided in the separate quick start guide for detailed assembly steps. The monitor head easily snaps into the arm, allowing for quick and secure installation.

2.2. Te hono i te Aroturuki
Connect the monitor to your computer using the appropriate cables. The HyperX Armada 25 supports both HDMI and DisplayPort connections.
- Connect one end of the HDMI or DisplayPort cable to the corresponding port on your computer's graphics card.
- Connect the other end of the cable to an available HDMI 2.0 or DisplayPort 1.4 port on the back of your monitor.
- Honoa te taura hiko ki te kaupane, katahi ki te putanga hiko.
- Pēhia te pātene hiko i runga i te aroturuki hei whakakā.

3. Whakahaere i te Aroturuki
This section covers basic operation and navigation of the monitor's On-Screen Display (OSD) menu.
3.1. Whakaterenga Ma-Mata (OSD).
The OSD menu is controlled using a joystick located on the back of the monitor. This joystick allows you to power on/off the monitor and navigate through various settings.
- Pēhia te rakau harikoa: To open the OSD menu or confirm a selection.
- Move the joystick Up/Down/Left/Right: To navigate through menu options and adjust settings.
- Hold the joystick: To power off the monitor.

3.2. Te Whakatikatika i te Tūnga o te Aroturuki
The ergonomic desk mount allows for flexible positioning of your monitor. You can adjust the height, tilt, swivel, and pivot to find your optimal viewkoki.

4. Tiaki
Proper maintenance ensures the longevity and optimal performance of your HyperX Armada 25 Gaming Monitor.
- Te horoi i te Mata: Kia ngawari te whakamahi i te kakahu ngohengohe, karekau he ngongo dampened with water or a specialized screen cleaner. Avoid using harsh chemicals, abrasive materials, or direct spraying onto the screen.
- Te horoi i te Casing: Ūkuia te aroturuki casing me te kakahu ngohengohe, maroke.
- Whakahau: Me whakarite karekau e araia nga kohao hau o te kaitirotiro kia kore e wera rawa.
- Whakaweto Ina Kaore i te Whakamahi: Whakawetohia te kaitirotiro ki te kore e whakamahia mo nga wa roa hei whakaora i te kaha me te roa o tona oranga.
5. Te Raru
Ki te pā mai he raruraru ki tō mata tirotiro, tirohia ngā mahi rapurongoā noa e whai ake nei.
- Kore Mana:
- Tirohia mehemea kei te hono pai te taura hiko ki te aroturuki me te putanga hiko.
- Me whakarite kei te tika te mahi a te putanga hiko.
- Patohia te paatene mana i runga i te aroturuki.
- Kore he Tohu:
- Verify that the HDMI or DisplayPort cable is securely connected to both the monitor and your computer.
- Me mohio kei te ora to rorohiko, kaore i te aratau moe.
- Tīpakohia te puna whakauru tika ma te whakamahi i te tahua OSD.
- Flickering Screen or Image Issues:
- Check the display cable for damage or loose connections.
- Me mohio kei te hou tonu o taraiwa kaari whakairoiro.
- Whakaritea te reeti tāmata i ngā tautuhinga whakaatu o tō rorohiko.
- If G-SYNC is enabled, try disabling it temporarily to see if the issue persists.
- Buttons Not Responding (OSD Joystick):
- Me mohio kei te kaha te kaitutei.
- Try restarting the monitor by unplugging and replugging the power cable.
- Clean around the joystick to ensure no debris is obstructing its movement.
6. Whakatakotoranga
Detailed technical specifications for the HyperX Armada 25 Gaming Monitor.
| Āhuahira | Taipitopito |
|---|---|
| Hunga Hua | 21.94 x 25.79 x 31.12 inihi; 16.98 Pauna |
| Tauira Tuemi | HyperX Armada 25 |
| Te Ra Tuatahi Wātea | Akuhata 24, 2022 |
| Kaihanga | HP Inc. |
| ASIN | B0B2C1G356 |
| Rahi Whakaatu | 24.5-inihi Hauroki |
| Whakatau | FHD (1920x1080) |
| Rere tāmata | 240Hz |
| Momo Paewhiri | Paewhiri IPS |
| Wā Whakautu | 1ms |
| Hangarau Tukutahi | NVIDIA® G-SYNC® Hototahi |
| Included Mount | Desk Mount Included |
| Hononga | HDMI and Display Port |
7. Pūtāhui me te Tautoko
For warranty information, technical support, or to access additional resources, please visit the official HyperX webpaetukutuku, whakapā atu ranei ki ta raatau ratonga kaihoko.
- HyperX mana Webpae: www.hyperx.com
- Whārangi Tautoko Hua: Refer to the support section on the HyperX webpaetukutuku mō tō tauira motuhake.