1. Kupu Whakataki
This manual provides detailed instructions for the installation, operation, and maintenance of your Fermax F1393 SEE-U 7-inch WiFi Video Intercom Kit. Please read this manual thoroughly before installation and use to ensure proper functionality and safety. The Fermax SEE-U kit offers advanced features including a 7-inch touchscreen monitor, WiFi connectivity for mobile call forwarding, and remote door opening.
2. Nga korero haumaru
- E taunakitia ana te whakaurunga ngaio: Due to the electrical nature of this product, professional installation by a qualified electrician is highly recommended to prevent damage and ensure correct operation.
- Momotu Hiko: Always disconnect power to the installation area before performing any wiring or maintenance.
- Voltage Hototahitanga: Ensure all connected components, especially the door opener, are compatible with the system's voltage requirements (12Vdc) and do not exceed the maximum current draw (250mA for door openers).
- Nga Tikanga Taiao: The outdoor panel is robust and waterproof (IP54 IK07), but avoid direct high-pressure water jets. The indoor monitor should be kept in a dry environment.
- Whakatakotoranga taura: Use appropriate cable types and gauges as specified in the installation section to maintain signal integrity and power delivery over distance.
3. Ihirangi mokete
Your Fermax F1393 SEE-U kit includes the following components:
- 1x Fermax SEE-U 7-inch WiFi Monitor (White)
- 1x Fermax SEE-U Outdoor Panel (Gray) with surface-mount box
- 1x Universal Power Adapter (REF. 1390)
- Removable terminal blocks for monitor and panel
- Whakanuia nga tira me nga whakapiri pakitara
- Varistors for installation protection
- Pukapuka Tohutohu

Figure 3.1: Fermax F1393 SEE-U Kit Packaging

Figure 3.2: Contents of the Fermax F1393 SEE-U Kit, including the outdoor panel, indoor monitor, and power adapter.
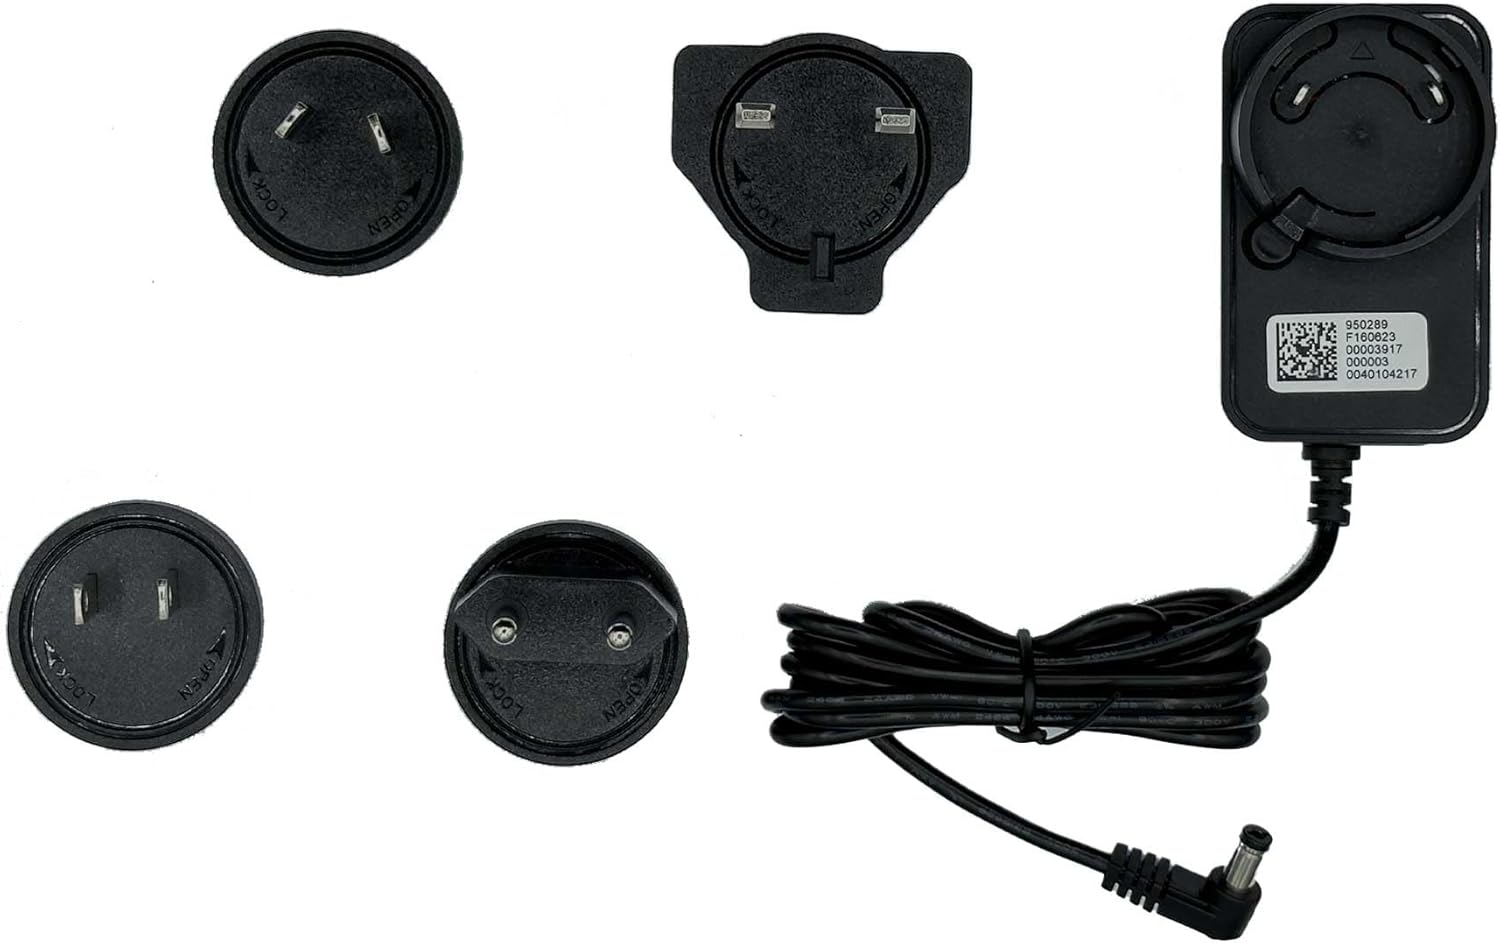
Figure 3.3: The universal power adapter (REF. 1390) with interchangeable plugs included in the kit.
4. Tatūnga & Tāuta
The Fermax F1393 SEE-U kit utilizes a 2-wire system for simplified installation. The monitor comes pre-programmed for ease of use.
4.1. Cable Distance Guidelines
Ensure proper cable selection based on distance to maintain optimal performance. Refer to the table below for maximum recommended distances:
Video 4.1: Installation of Fermax SEE-U NO WIFI Kit. This video demonstrates the physical mounting and wiring process for the monitor and outdoor panel, including cable distance recommendations.
4.2. Mounting the Monitor (Indoor Unit)
- Whakaritea Waea: Ensure the two wires from the outdoor panel location are routed to the desired monitor location.
- Fix Connector: Secure the monitor's connector plate to the wall using the provided screws. Consider the optimal height for viewing (approximately 1450mm from the floor to the center of the monitor for an average adult).
- Tāpirihia te Aroturuki: Carefully place the monitor onto the fixed connector plate, ensuring it clicks securely into place.

Figure 4.2.1: Dimensions of the Fermax SEE-U 7-inch monitor (204mm width, 130mm height, 19mm depth).

Whakaahua 4.2.2: Mua view of the Fermax SEE-U 7-inch monitor.
4.3. Te Whakamau i te Papa o Waho
- Fix Support: Secure the outdoor panel's support bracket to the wall using the provided screws. Ensure the height allows for clear viewing of visitors (approximately 1650-1700mm from the floor to the camera).
- Attach Panel: Mount the outdoor panel onto the support bracket until it clicks into place.
- Paewhiri Haumaru: Insert and tighten the security screw at the bottom of the panel to prevent unauthorized removal.

Figure 4.3.1: Dimensions of the Fermax outdoor panel (90mm width, 149.5mm height, 38mm depth).

Whakaahua 4.3.2: Mua view of the robust Fermax outdoor panel with wide-angle camera and call button.
4.4. Hononga Waea
The kit uses a 2-wire bus system. Use the removable terminal blocks for connections.
- Waea Aroturuki: Connect the two main wires to the 'BUS' terminals on the monitor's terminal block. Ensure the monitor furthest from the outdoor panel has its micro-switches configured as shown in the diagram (Figure 4.4.1).
- Waea Paewhiri: Connect the other end of the two main wires to the 'BUS' terminals on the outdoor panel's terminal block.
- Hononga Hiko: Plug the universal power adapter into the monitor's power input. Then, plug the adapter into a standard electrical outlet. The system requires 15Vdc / 1.5A (22.5W).

Figure 4.4.1: Back of the Fermax SEE-U monitor showing the terminal block for BUS connections and micro-switches. The diagram indicates the correct micro-switch configuration for the furthest monitor.
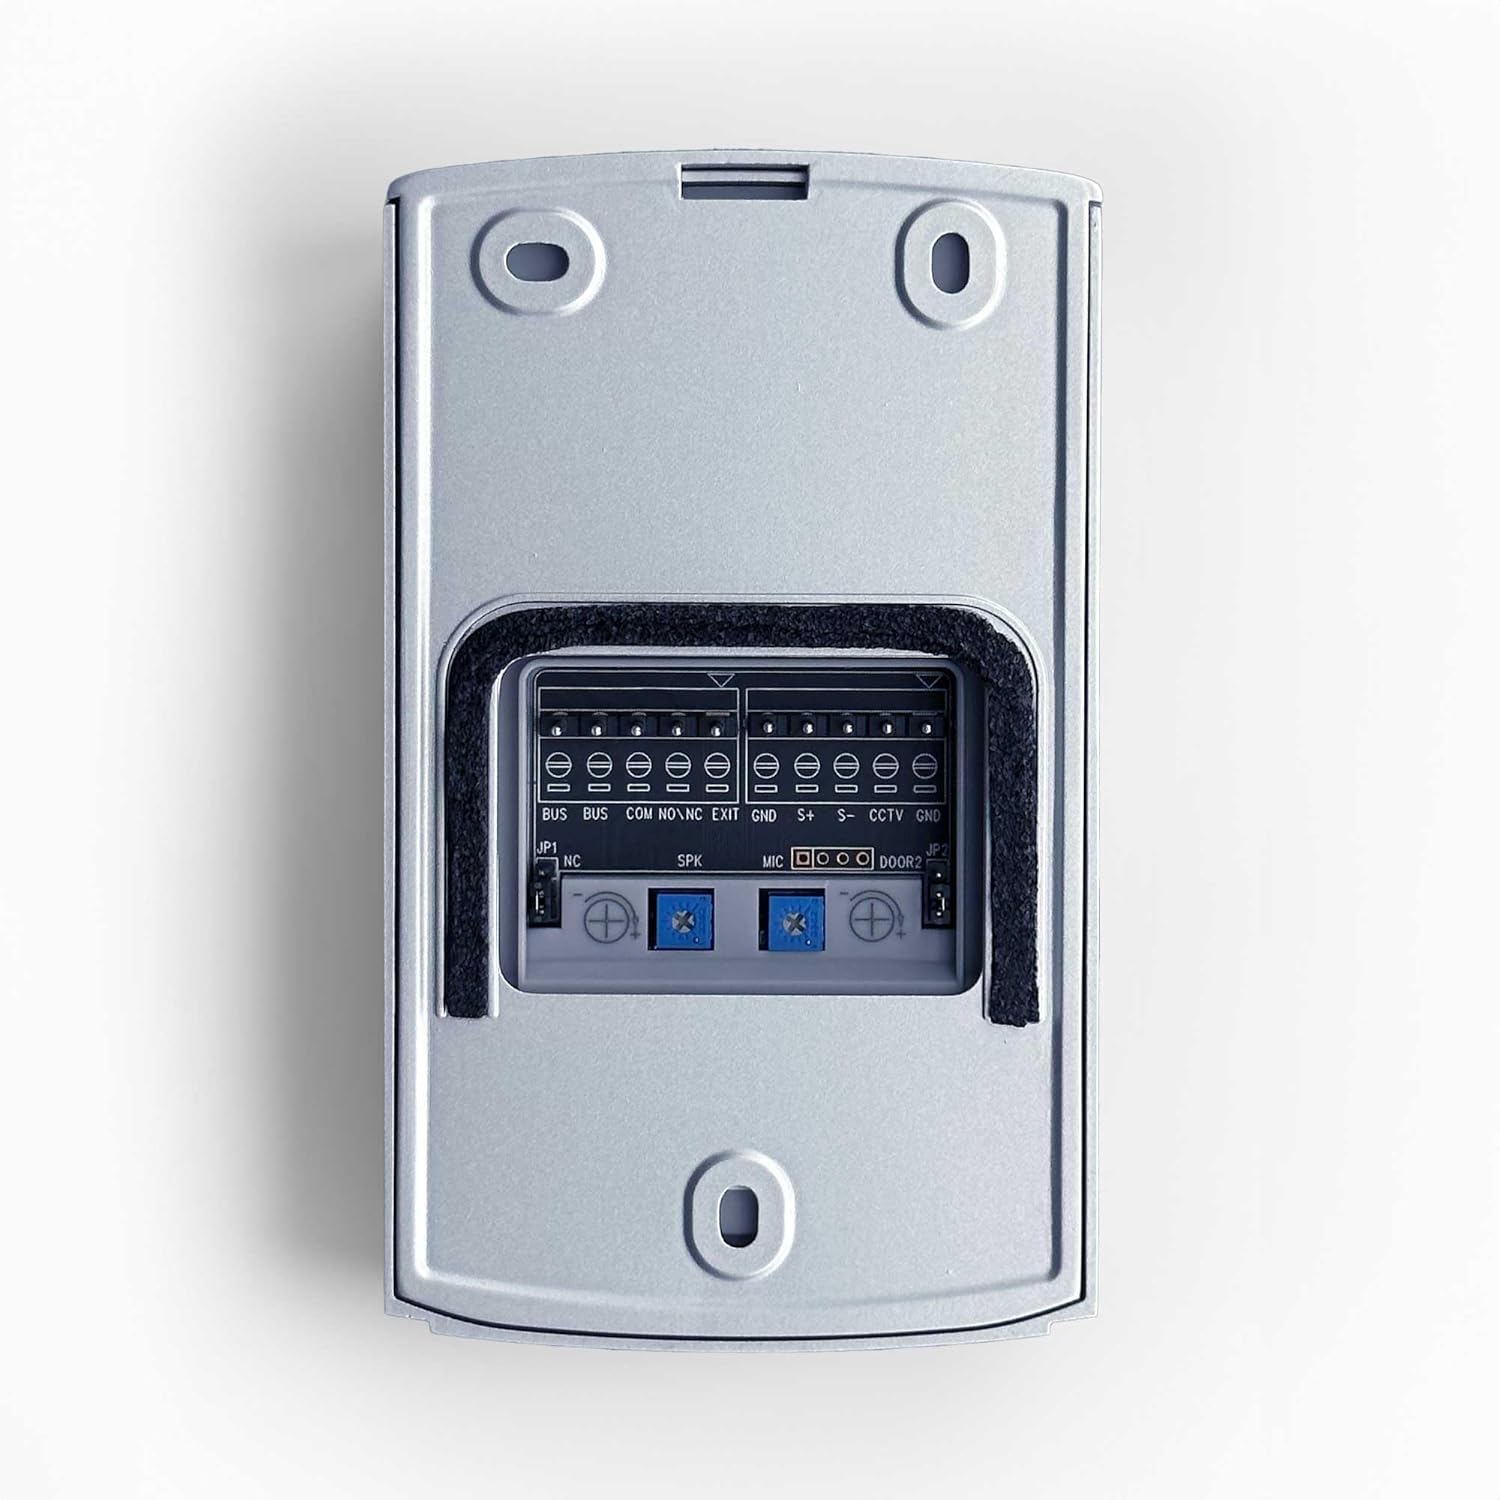
Figure 4.4.2: Back of the Fermax outdoor panel showing the terminal blocks for BUS, COM, NO/NC, EXIT, and CCTV/GND connections. The diagram indicates the correct wiring for the BUS terminals.
4.5. Connecting the Door Opener (Electric Strike)
If you wish to connect an electric door opener, use the 'S+' and 'S-' terminals on the outdoor panel's terminal block. It is crucial to use a 12Vdc low-consumption door opener with a maximum current draw of 250mA. Fermax recommends using door opener REF. 29588. Always use the provided varistors for protection.
- Connect Varistors: Connect one varistor across the S+ and S- terminals on the outdoor panel's terminal block.
- Connect Door Opener: Connect the door opener's wires to the S+ and S- terminals on the outdoor panel's terminal block.
- Connect Second Varistor: Connect the second varistor directly across the terminals of the door opener itself.
4.6. App Connection (WiFi Models)
For WiFi models, download the free SEE-U app from Play Store or App Store. Follow the in-app instructions to connect your monitor to your mobile device for call forwarding and remote functions. The system allows multiple mobile devices to be associated with a single monitor.
5. Nga Tohutohu Whakahaere
5.1. Te Whiwhinga Waea
When a visitor presses the call button on the outdoor panel, the indoor monitor will ring and display the visitor's image. If connected via WiFi, your mobile device will also receive a notification and allow you to answer the call remotely.
5.2. Whakawhitiwhiti
To speak with the visitor, press the communication button on the monitor. The monitor is hands-free. To end the conversation, press the communication button again.
5.3. Te Whakatuwheratanga i te Kūaha
During a call, press the key icon on the monitor to open the door. You will hear a click from the door opener if it functions correctly. By default, the door opener activates for 1 second.
Video 5.3.1: Checking the installation of the Fermax SEE-U NO WIFI Kit. This video demonstrates how to verify the monitor's functionality, including receiving calls and operating the door opener, and how to adjust the door opening time.
5.4. Adjusting Door Opener Time
To change the door opener activation time:
- Press the menu navigation button on the monitor.
- Navigate to 'Configuration' and then 'Additional Options'.
- From this menu, you can adjust the door opener time. For exampNa, ka taea e koe te whakarite ki te 5 hēkona.
- Whakaūhia te tautuhinga ka puta i te tahua.
5.5. Automatic Image Capture
The monitor features automatic image capture of callers, storing images with date and time on a micro SD card (not included). This function is also available via the mobile app, allowing manual capture of images and videos. Only manually captured images and videos from the mobile device can be viewed on that device.
5.6. Kaua e Whakararu i te Aratau
Activate the 'Do Not Disturb' function on the monitor to silence incoming calls. The monitor also offers up to 16 melodies, adjustable call volume, and configurable ring duration up to 30 seconds.
6. Tiaki
- Te horoi: Use a soft, dry cloth to clean the monitor and outdoor panel. Avoid abrasive cleaners or solvents.
- Papa o Waho: Periodically check the outdoor panel for any obstructions to the camera or microphone. Ensure the security screw is tight.
- Whakahōu Pūmanawa: Check the Fermax website or SEE-U app for any available software updates for your monitor.
7. Te Raru
- Kāore he Whakaahua/Kounga Whakaahua Kino: Ensure all wiring connections are secure and correctly terminated. Issues with cable section or power supply can affect image quality, especially during conversation. Professional installation can help prevent these issues.
- Kore oro/Kounga oro kino: Check wiring connections for the audio lines. Ensure the monitor's volume is adjusted correctly.
- Kāore te Kaiwhakatuwhera Tatau e Mahi ana: Verify the door opener is 12Vdc and its current draw does not exceed 250mA. Check the wiring to the S+ and S- terminals and ensure varistors are correctly installed. Confirm the door opener time setting in the monitor's menu.
- No Mobile Notifications/Remote Access: Ensure the monitor is correctly connected to your home WiFi network and the SEE-U app is properly configured on your mobile device. Check your internet connection and router settings.
- Uauatanga Tāutatanga: If you encounter significant difficulties during installation, it is strongly recommended to contact a qualified professional for assistance.
8. Whakatakotoranga
| Āhuahira | Whakatakotoranga |
|---|---|
| Kaihanga | Fermax |
| Tau tauira | F01393 |
| Hunga Hua | 26.5 x 10.8 x 20 cm |
| Taumaha Hua | 1.25 kg |
| Tae | Gray Panel, White Monitor |
| Rauemi | Kirihou |
| Tauwehe Puka | Tapawhā |
| Pūnaha Voltage | 15V |
| Hiko Hiko | 2.5 watts |
| Mata Aroturuki | 7-inch Color Touchscreen (16:9) |
| Outdoor Panel Rating | IP54 IK07 (Waterproof, Vandal-resistant) |
| Kāmera | Wide-angle Color (H=115°, V=65°, D=130°), Night Vision |
| Hononga | 2-wire Bus, WiFi for mobile app |
| Additional Monitors | Supports up to 4 additional monitors without extra power |
| Hopu Atahanga | Automatic (Micro SD slot), Manual via mobile app |
| Hototahi ki te Kaiwhakatuwhera Kūaha | 12Vdc, Max. 250mA |
9. Raihana me te Tautoko
For warranty information and technical support, please refer to the documentation included with your product or visit the official Fermax webpae. Ka taea hoki e koe te toro ki te Fermax Brand Store on Amazon mo etahi atu rauemi me nga korero whakapā.