
1. Kupu Whakataki
Thank you for choosing the Aigo Q2503 Mini-Tower PC Case. This manual provides detailed instructions for the proper installation, operation, and maintenance of your new computer chassis. Please read this guide thoroughly before beginning assembly to ensure optimal performance and longevity of your system components.
2. Hua Neke Atuview
The Aigo Q2503 is a compact Mini-Tower PC case designed for M-ATX and ITX motherboards. It offers a streamlined design with essential features for building a functional and efficient computer system. Its robust construction provides a secure environment for your components.
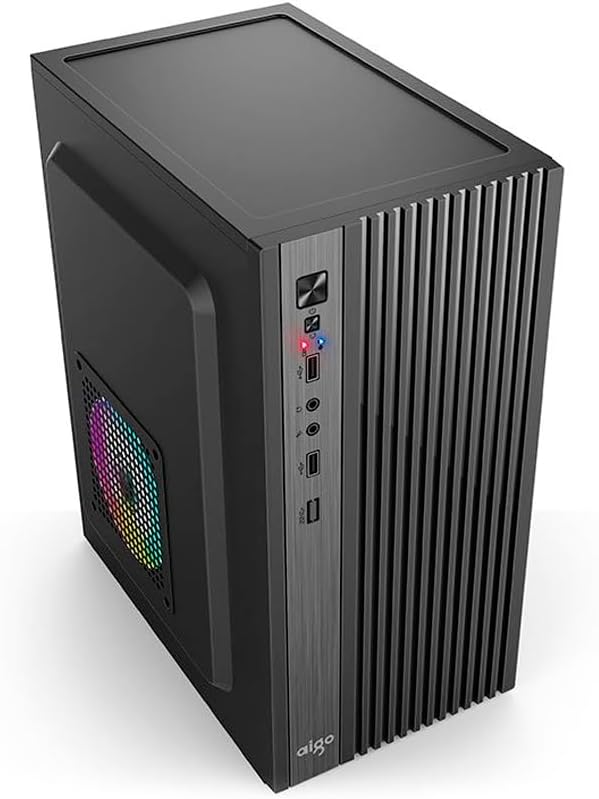
Whakaahua 2.1: Taha-mua view of the Aigo Q2503 Mini-Tower PC Case, showcasing its compact design and front panel I/O ports.
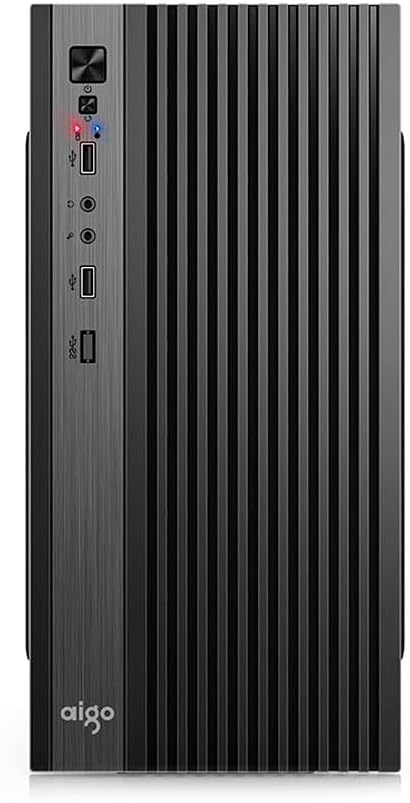
Whakaahua 2.2: Mua view of the Aigo Q2503 Mini-Tower PC Case, highlighting the vertical ventilation slats and front panel controls.
3. Tatūnga me te Tāuta
Follow these steps for proper component installation within the Aigo Q2503 case.
3.1 Te Whakarite i te Take
- Unpack the case and remove all packaging materials.
- Carefully remove the side panels by unscrewing the thumbscrews at the rear of the case and sliding the panels backward.
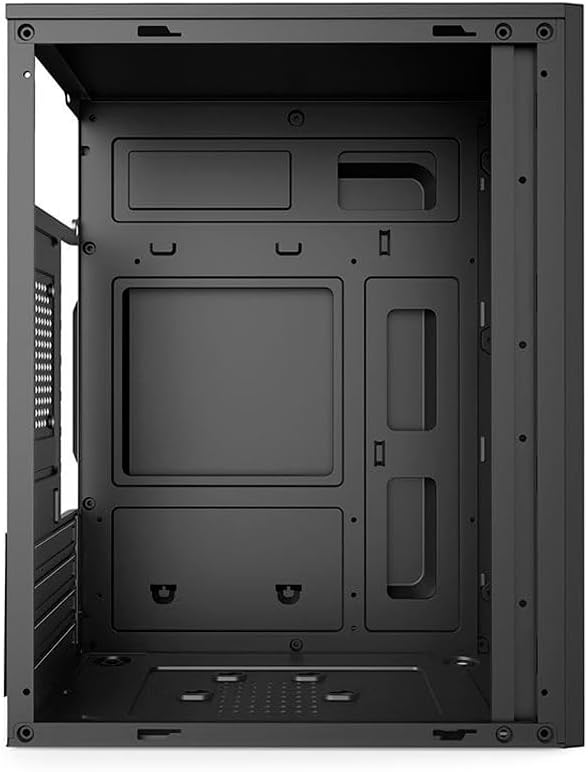
Whakaahua 3.1: Roto view of the Aigo Q2503 PC Case, showing the motherboard tray and drive mounting points.
3.2 Whakaaturanga Papa Pouaka
- Install the I/O shield provided with your motherboard into the rear opening of the case.
- Align your M-ATX or ITX motherboard with the standoffs inside the case. Ensure all standoffs match the motherboard's mounting holes.
- Whakauhia te papahoahoa ki ngā tīwiri e tika ana.
3.3 Tāuta Puku
- SSD (1x): Locate the dedicated SSD mounting point (typically on the motherboard tray or behind it). Secure the SSD using screws.
- HDD (1x): Locate the HDD bay. Slide the HDD into the bay and secure it with screws.
3.4 Expansion Card Installation (VGA)
- Tangohia ngā taupoki mokowā whakawhānui e tika ana mai i te tuarongo o te pouaka.
- Insert your graphics card (VGA) or other expansion cards into the PCIe slots on your motherboard.
- Secure the expansion cards with screws. Note the maximum VGA length supported is 150 mm.
3.5 Tāutanga o te Pūwhakamatao CPU
Install your CPU cooler according to its manufacturer's instructions. Ensure the cooler's height does not exceed the maximum supported height of 250 mm for this case.
3.6 Tāutanga Pūnaha Hiko
The Aigo Q2503 supports ATX power supplies. Mount your ATX power supply in the designated area, typically at the top or bottom rear of the case, and secure it with screws.
3.7 Whakauru Fan
The case supports the following fan configurations (fans are not included):
- muri: 1 x 80 mm fan
- Taha: 1 x 120 mm fan
Install fans in the specified locations to optimize airflow.
3.8 Hononga Paewhiri Mua
Connect the front panel cables (Power SW, Reset SW, HDD LED, Power LED, USB 2.0, Audio/Mic) to the corresponding headers on your motherboard. Refer to your motherboard manual for exact pin layouts.
4. Te Whakahaere i tō Pūkoro Rorohiko
Once all components are installed and connected, replace the side panels and secure them. Connect your monitor, keyboard, mouse, and power cable to your system. Press the power button on the front panel to start your computer.
Mā te papa o mua ka taea te uru atu ki:
- Pātene Hiko
- Patene Tautuhi
- 2 x USB 2.0 Tauranga
- Audio Out (Headphone) Jack
- Puorooro Kei Jack
5. Tiaki
Regular maintenance helps ensure optimal performance and extends the lifespan of your PC components.
5.1 Te horoi
- Waho: Whakamahia he ngohengohe, damp he kakahu hei muru i ngā mata o waho. Āta karohia ngā kaihoroi whakakoi.
- roto: Periodically open the case and use compressed air to remove dust buildup from components, fans, and filters. Ensure the system is powered off and unplugged before cleaning the interior.
5.2 Rererangi
Ensure that the case's ventilation openings are not obstructed to maintain proper airflow and prevent overheating.
6. Te Raru
If you encounter issues with your PC build, consider the following general troubleshooting steps:
- Kore Mana: Double-check all power connections, including the power supply to the wall, the power supply to the motherboard, and the front panel power switch cable to the motherboard.
- Te wera nui: Verify that all case fans and CPU cooler fans are spinning correctly. Ensure proper airflow within the case and that ventilation openings are clear.
- Kāore e Mahi ana ngā Tauranga o te Paewhiri o Mua: Confirm that the USB and Audio/Mic cables from the front panel are correctly connected to the motherboard headers.
- Ngā Take Taurite o ngā Wāhanga: Ensure that all components, especially the graphics card and CPU cooler, are within the specified maximum dimensions for the case.
7. Whakatakotoranga
Below are the detailed specifications for the Aigo Q2503 Mini-Tower PC Case:
| Āhuahira | Whakatakotoranga |
|---|---|
| Waitohu | Aigo |
| Tauira | Q2503-BK |
| Momo Take | Mini-Tower |
| Tautoko Papamatua | M-ATX / ITX |
| Rauemi | 0.4mm SPCC (Steel Alloy) |
| Peia Bays | 1 x SSD, 1 x HDD |
| Roha Slots | 4 |
| Tuhinga o mua | 2 x USB 2.0, Audio/Mic |
| Te Roa VGA Mōrahi | 150 mm |
| Max CPU Cooler Teitei | 250 mm |
| Tautoko Hiko Hiko | ATX |
| Supported Fans (not included) | Rear: 1 x 80 mm, Side: 1 x 120 mm |
| Ahu (L x W x H) | 265 x 165 x 340 mm |
| Tae | Pango |
8. Nga Korero Whakaputanga
The Aigo Q2503 Mini-Tower PC Case comes with a manufacturer's warranty of 12 marama from the date of purchase. This warranty covers defects in materials and workmanship under normal use. Please retain your proof of purchase for warranty claims. The warranty does not cover damage caused by improper installation, misuse, accidents, modifications, or unauthorized repairs.
9. Tautoko
For technical assistance, troubleshooting, or warranty inquiries, please contact your retailer or the official Aigo support channels. Refer to the Aigo official webpae mo nga korero whakapā hou me nga rauemi tautoko.
Before contacting support, please have your product model (Q2503-BK) and proof of purchase readily available.