VTech 80-581405
VTech DJ Studio Magic Light User Manual
Tauira: 80-581405
1. Kupu Whakataki
The VTech DJ Studio Magic Light is an interactive mixing table designed to introduce children aged 3 to 7 years to the world of music and creativity. This manual provides essential information on how to set up, operate, and maintain your DJ Studio Magic Light, ensuring a safe and enjoyable experience.
With over a thousand unique musical combinations, educational games, and a recording function, this device allows young aspiring DJs to explore different music styles and create their own tracks.
Whakatupato Haumaru:
Not suitable for children under 36 months due to small parts that could be ingested.
2. Hua Neke Atuview
Familiarize yourself with the main components of your VTech DJ Studio Magic Light.
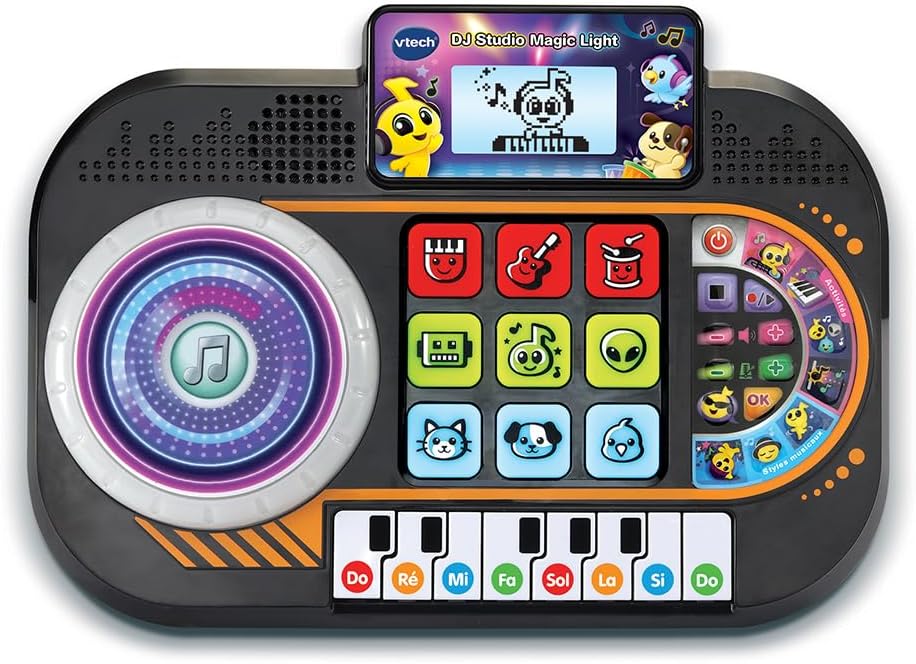
Whakaahua 2.1: Mua view of the VTech DJ Studio Magic Light, showing the scratch disk, control pads, screen, and piano keys.
- Scratch Disk: Large, illuminated disk for adding sound effects and scratching.
- Papa Mana: Nine light-up pads for selecting instruments, characters, and mixing tracks.
- Mata LCD: Backlit display showing animations, rhythm patterns, and game progress.
- Kī Piano: Eight piano keys for playing melodies and engaging in educational games.
- Mana Rōrahi: Whakaritea ai te taumata oro katoa.
- Mana Tempo: Adjusts the speed of the music.
- DJ Button: Activates DJ mode features.
- Patene Hopu: Initiates and stops recording of mixes.
3. Tatūnga
3.1 Tāuta Pūhiko
The DJ Studio Magic Light requires 3 LR6-AA batteries (included). Follow these steps for proper battery installation:
- Kimihia te wāhanga pākahiko i te taha raro o te waeine.
- Using a screwdriver, loosen the screw on the battery compartment cover and remove the cover.
- Insert 3 new LR6-AA batteries, ensuring correct polarity (+/-) as indicated inside the compartment.
- Whakakapia te uhi o te wahanga o te pākahiko me te whakakaha kia mau te huri.
Tuhipoka: Always use new batteries of the same type. Do not mix old and new batteries or different types of batteries. Remove batteries if the unit will not be used for an extended period.
3.2 Hiko Tuatahi
After installing the batteries, press the Power button (usually located on the top right of the unit) to turn on the DJ Studio Magic Light. The screen will light up, and a welcome sound will play.
4. Nga Tohutohu Whakahaere
4.1 Nga Mahi Taketake
- Hiko Whakaka/Weto: Pehia te Pātene hiko to turn the unit on or off. The toy features an automatic shut-off function to preserve battery life if left inactive.
- Mana Rōrahi: Whakamahia te Pātene rōrahi (usually + and -) to adjust the sound output.
- Mana Tempo: Whakamahia te Tempo buttons to increase or decrease the speed of the music.
4.2 DJ Mode and Creative Play
In DJ Mode, children can experiment with various sounds and create their own mixes.
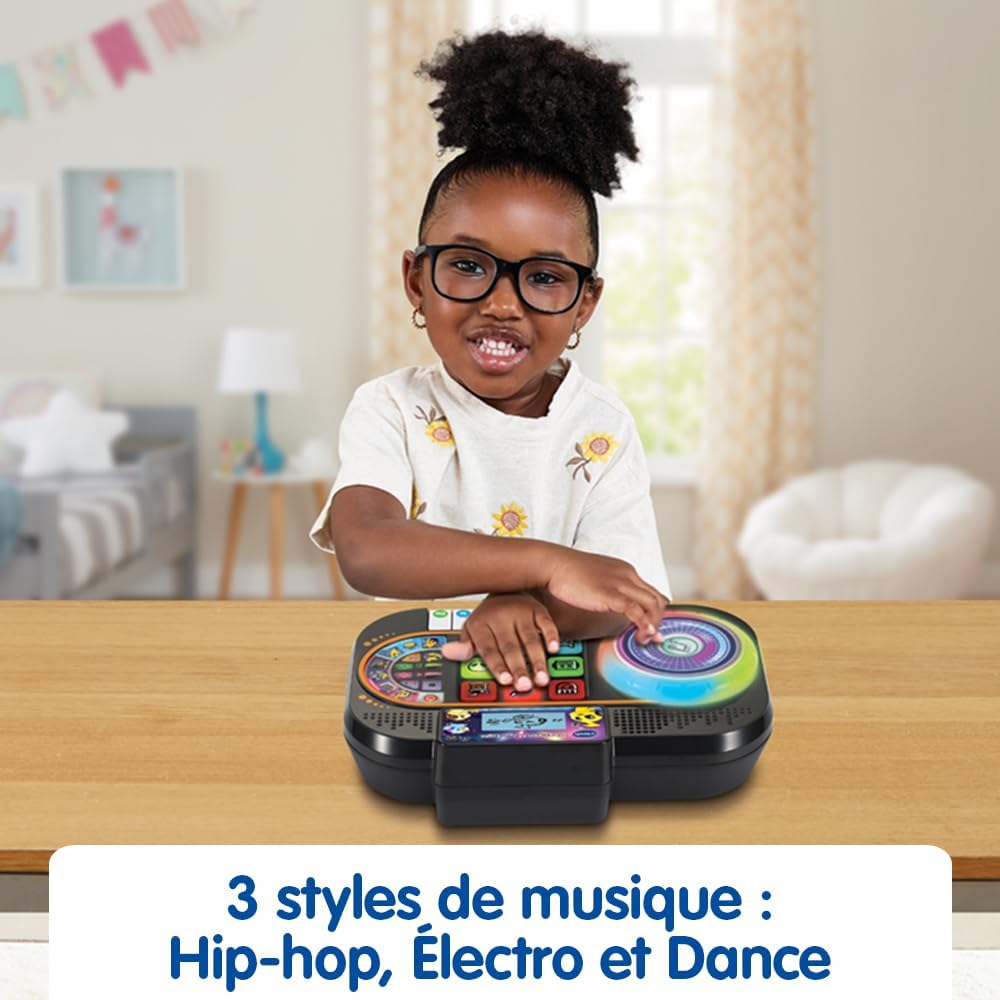
Figure 4.1: A child's hands engaging with the interactive pads and scratch disk, demonstrating active play.
- Scratch Disk: Rotate the illuminated scratch disk to add sound effects and create scratching sounds, mimicking a real DJ.
- Papa Mana: Press the nine light-up pads to select different instruments and characters. Combine them to form a musical group and mix up to four musical tracks simultaneously.
- Ngā Kāhua Waiata: Explore 9 songs and 27 melodies across various styles including Hip-hop, Electro, and Dance.
4.3 Keemu Matauranga
The DJ Studio Magic Light includes educational games designed to teach music notes and improve rhythm.

Figure 4.2: The screen displays a character playing the piano, guiding the child through rhythm exercises.
- Rhythm Reproduction: When a rhythm pattern appears on the screen, reproduce it using the piano keys.
- Progressive Levels: Successfully playing at least 50% of the notes correctly advances the child to the next level. The game is won after 4 successful sequences.
4.4 Mahinga Rekoata
Children can record their own musical creations in DJ and Creative game modes.
- Pehia te Patene tuhi to start recording. All sounds from the scratch disk, piano keys, DJ button, and tempo changes will be saved.
- Pehia te Patene tuhi kia mutu ano te tuhi.
- Whakamahia te Pātene purei anō (if available, or re-press record button in some models) to listen to the recorded track.
4.5 Screen and Light Adjustments
- Scratch Disk Lights: The illuminated effects of the scratch disk can be deactivated. Refer to the specific button or setting on your unit for this function.
- LCD Screen Brightness: The brightness of the backlit LCD screen can be adjusted for optimal viewing.
5. Tiaki
5.1 Te horoi
To keep your DJ Studio Magic Light clean, wipe the surface with a slightly damp cloth. Do not use harsh chemicals or abrasive cleaners. Ensure the unit is dry before storage or next use.
5.2 Tiaki Pūhiko
Always remove exhausted batteries promptly. If the unit will not be used for an extended period, remove the batteries to prevent leakage and damage.
5.3 Rokiroki
Store the DJ Studio Magic Light in a cool, dry place away from direct sunlight and extreme temperatures.
6. Te Raru
| Raruraru | Take pea | Rongoā |
|---|---|---|
| Karekau te waeine e ka ana. | He iti, he hē ranei te whakaurunga o nga pākahiko. | Whakakapihia nga pākahiko ki nga mea hou, kia tika te polarity. |
| Kaore he tangi, he tangi iti ranei. | He iti rawa te reo, he wahangu ranei. | Increase the volume using the Volume + button. Check battery level. |
| Kaore nga rama e mahi. | Lights may be deactivated or batteries are low. | Check settings to ensure lights are enabled. Replace batteries. |
| Unit freezes or behaves erratically. | Temporary electronic malfunction. | Turn the unit off and then on again. If problem persists, remove batteries for a few minutes and reinsert. |
7. Whakatakotoranga
| Āhuahira | Taipitopito |
|---|---|
| Rahi Hua (L x W x H) | 27.5 x 19.8 x 6.3 cm |
| Taumaha | 599 karamu |
| Te Tau Manakohia | 36 marama - 7 tau |
| Ngā Uara Mātauranga | Learning music notes, improving rhythm, discovering different music styles |
| Tau tauira | 80-581405 |
| Te maha o nga wahi | 1 |
| Nga Pikohiko e hiahiatia ana | Āe (3 x LR6-AA) |
| Kei roto nga pākahiko | Ae |
| Rauemi Matua | Kirihou |
| Tae | Pango |
8. Pūtāhui me te Tautoko
For warranty information and customer support, please refer to the warranty card included with your product or visit the official VTech webpae. Puritia to riiki hoko hei tohu mo te hoko.
VTech is committed to providing high-quality products. If you encounter any issues not covered in this manual, please contact VTech customer service for assistance.
Ka kitea e koe etahi atu korero me te tautoko i: www.vtech.com
Ask a question about this manual
Ask about setup, troubleshooting, compatibility, parts, safety, or missing instructions. Manuals+ will review the question and use this page’s manual context to help answer it.