
1. Kupu Whakataki
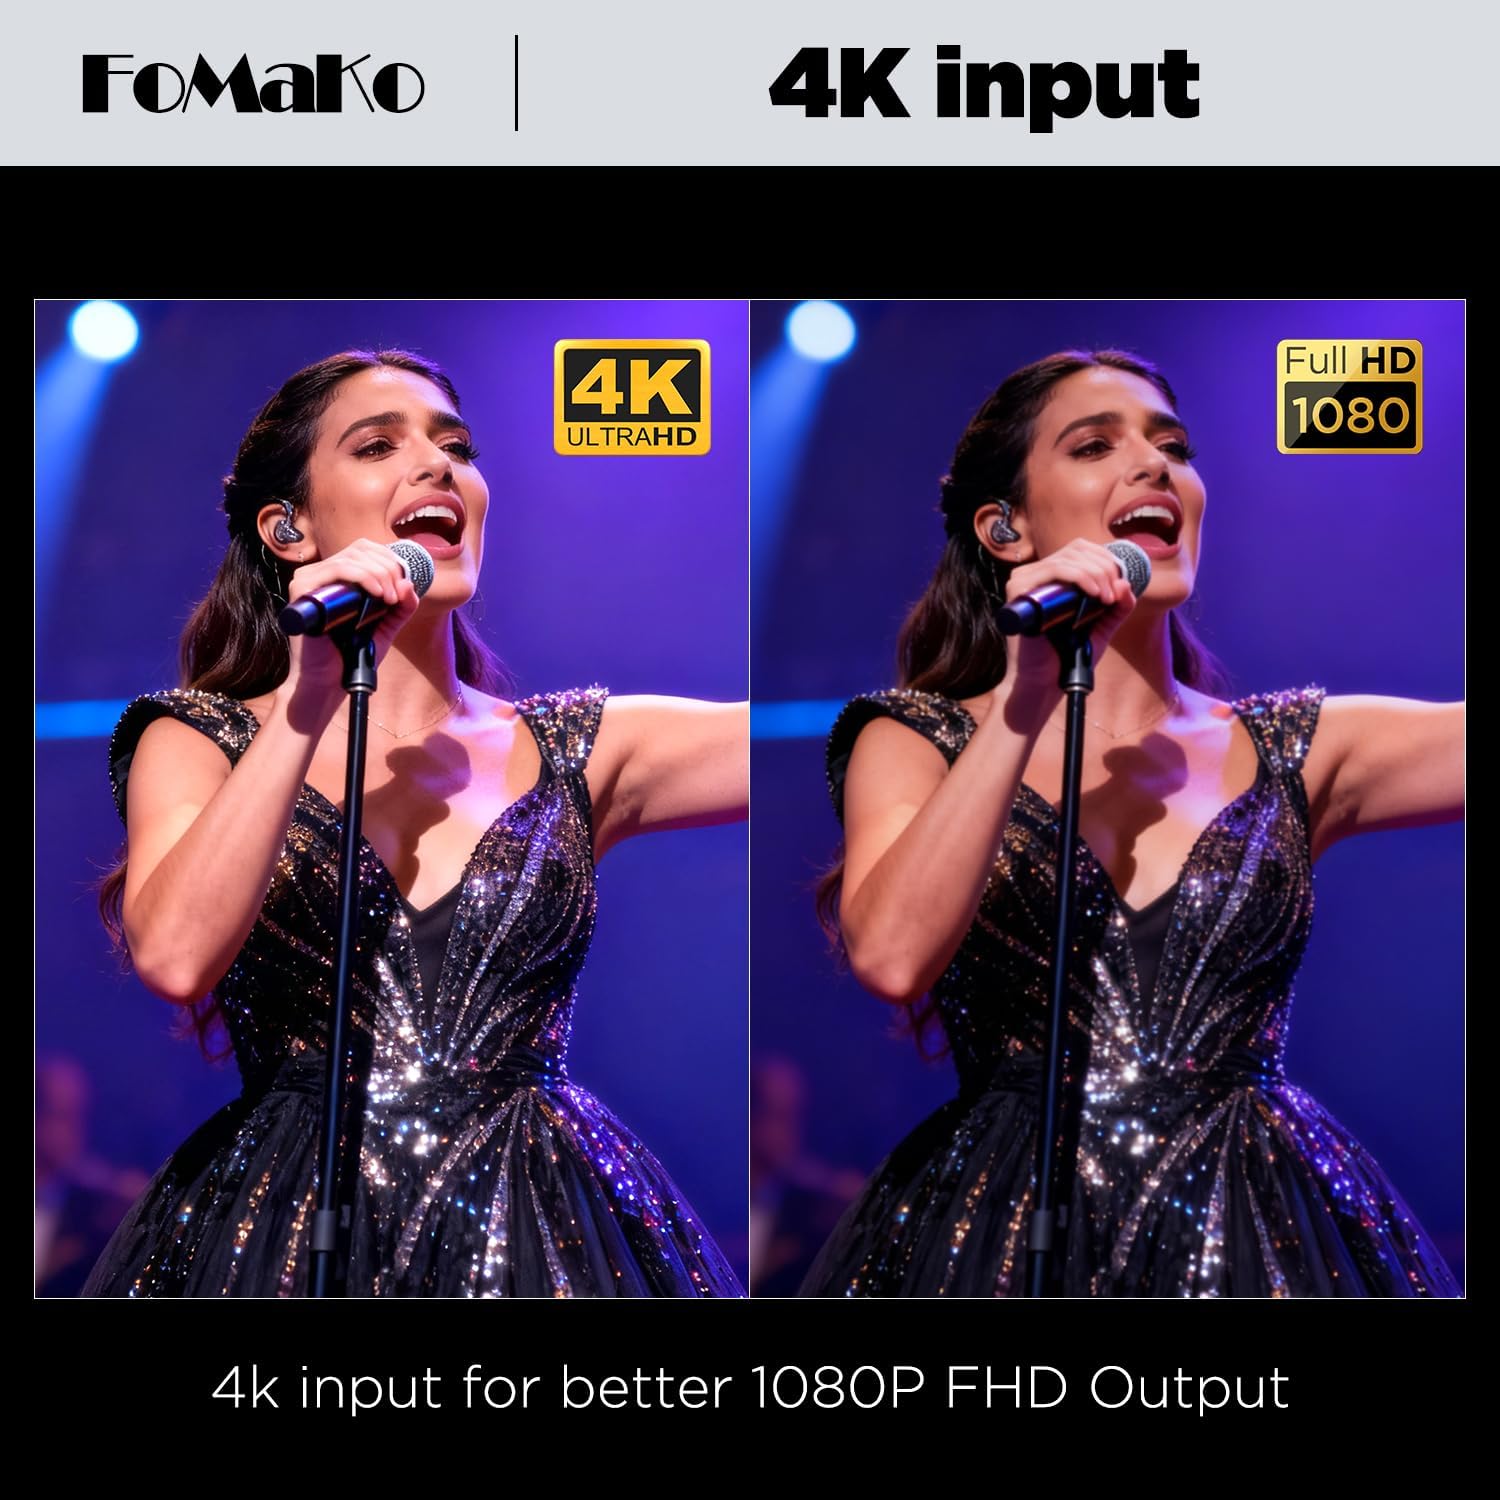
The FoMaKo M3 is a versatile 5-channel 4K HDMI video mixer switcher designed for professional live streaming and video production. It features a 5.5-inch Full HD LCD screen for direct multi-screen signal monitoring and flexible menu operations. This device supports 4K 60FPS input and 1080p 60FPS output, offering extensive compatibility with popular streaming platforms and software.
Ataata: Kua mutuview of the FoMaKo M3 4K HDMI Video Mixer Switcher, highlighting its 5.5-inch FHD LCD screen and key features.
2. Nga Hua o te Hua
- Integrated 5.5-inch FHD LCD Screen: Provides real-time monitoring of multi-screen signals and facilitates menu navigation.
- Multi-Camera Live Production: Equipped with 4 HDMI inputs, 1 USB input, 1 HDMI PGM output, and 1 HDMI AUX output. Supports USB 3.1 lossless output up to YUV2 1080P60.
- Te Hototahi Pūmanawa Nui: Seamlessly integrates with streaming platforms and software such as Facebook, YouTube, OBS, and vMix for simultaneous broadcasting.
- Paewhiri Mana Intuitive: Features an ergonomic design with a T-Bar and joystick for precise control over switching and live productions.
- Te hopu me te purei hoki: Supports dual recording to SD card and U Flash drive. Utilizes H.264 encoding for simultaneous recording and streaming at separate bitrates.
- Tukatuka Ororongo Arā Atu Anō: Includes 4 HDMI digital audio inputs and 2 independent 3.5mm microphone inputs. Each audio channel offers independent volume, switch, mixing, and delay controls. Supports Audio Follow Video (AFV) mode and has a built-in headphone output for monitoring.
- Live Streaming Destinations: Supports simultaneous streaming to up to two platforms via Ethernet RJ45 network streaming and one USB Type-C for UVC streaming.
- Built-in Fan Temperature Adjustment: Allows automatic or manual control of fan speed based on temperature to prevent overheating.
- NDI Upgradeable: The device is NDI upgradeable upon request.
3. Aratohu Tatūnga
Follow these steps to set up your FoMaKo M3 Video Mixer Switcher:
Video: An unboxing video of the FoMaKo M3 All-in-one 4K Video Production Switcher, showing included components.
- Wewete pouaka me te Tirotiro: Carefully remove all components from the packaging. Verify that all accessories, including the power supply, USB 3.1 cable, and instruction manual, are present.
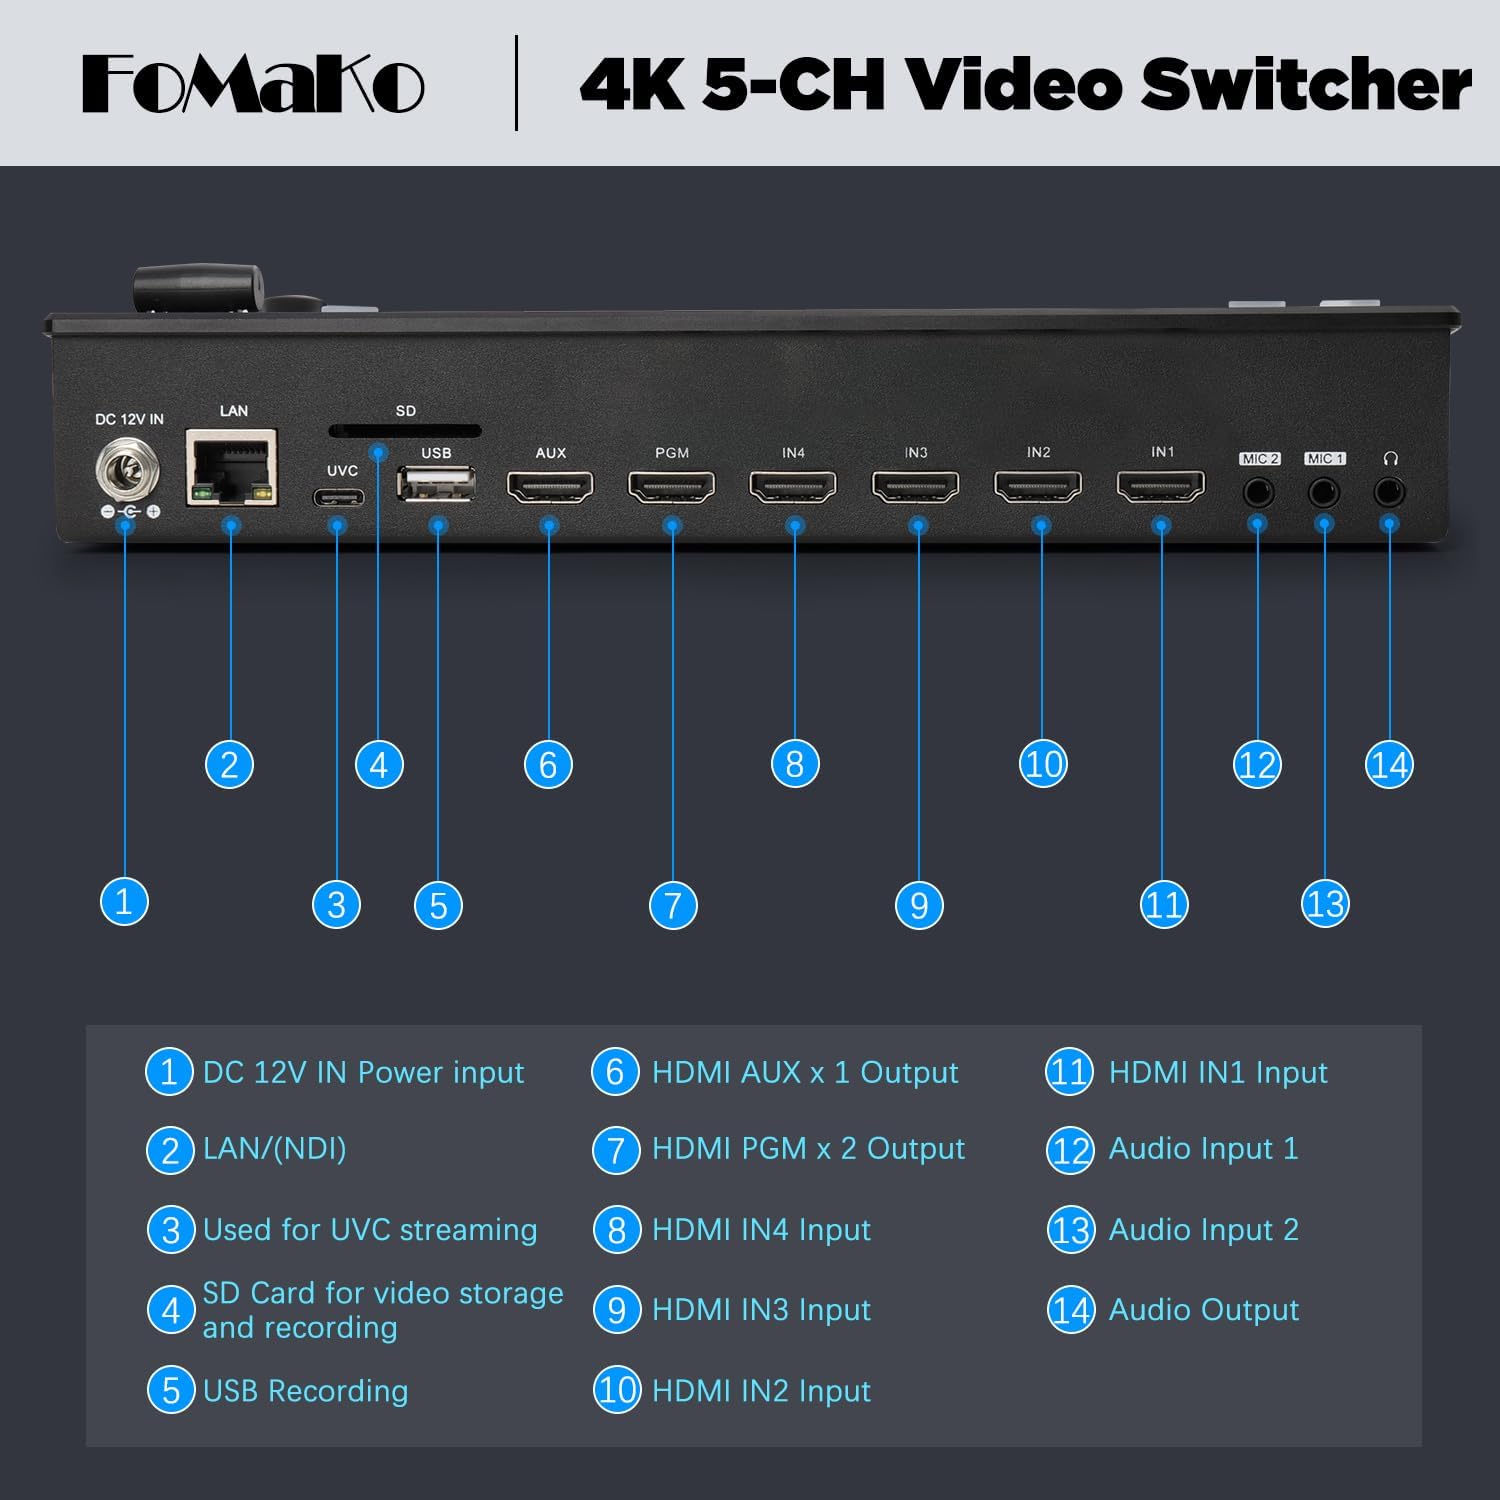
- Hononga Hiko: Connect the DC 12V power adapter to the "DC 12V IN" port on the rear panel of the switcher. Plug the adapter into a suitable power outlet.
- Hononga Whakauru: Connect your HDMI video sources (cameras, laptops, etc.) to the HDMI IN1, IN2, IN3, and IN4 ports. For USB video sources, use the USB input port.
- Hononga Huaputa: Connect your program monitor to the HDMI PGM output and an auxiliary monitor to the HDMI AUX output. For streaming to a computer, connect the USB Type-C port to your computer.
- Hononga Ororongo: Connect microphones to the 3.5mm MIC IN1 and MIC IN2 ports. Use the Audio Output port for external audio monitoring.
- Hononga Whatunga (Kōwhiringa): For NDI or network streaming, connect an Ethernet cable to the LAN (NDI) port and to your network router or switch.
- Storage Devices (Optional): Insert an SD card into the SD card slot for video storage and recording. Connect a U Flash drive to the USB port for additional recording options.
- Whakahiko: Press the power button to turn on the device. The integrated 5.5-inch LCD screen will display the multi-view atanga.

4. Nga Tohutohu Whakahaere
4.1 Whakawhiti Taketake
The FoMaKo M3 allows for seamless switching between multiple video sources. Use the numbered buttons (1-4) to select your preview and program sources. The T-Bar or CUT/AUTO buttons can be used to transition between sources.

Video: A guide for beginners on using the FoMaKo Switcher (applicable for M3/M4 models), demonstrating basic operations and features.
Video: Detailed usage and instruction for the panel buttons on the FoMaKo M3/M4 switcher.
4.2 Reretere Ora
The M3 supports streaming to multiple platforms simultaneously.
- RTMP Streaming: Connect the device to your network via the LAN port. Configure streaming settings through the device's menu to stream to platforms like YouTube, Facebook Live, Twitch, etc.
- UVC Streaming: Connect the USB Type-C port to your computer. The switcher will be recognized as a webcam, allowing you to use it with software like OBS, vMix, Zoom, or Microsoft Teams.


4.3 Te Rekoata me te Purei
Insert an SD card or U Flash drive into the designated slots. The M3 supports dual recording of your program output. Use the joystick and knob to select and play back recorded videos on the AUX port.
4.4 Special Effects and Overlays
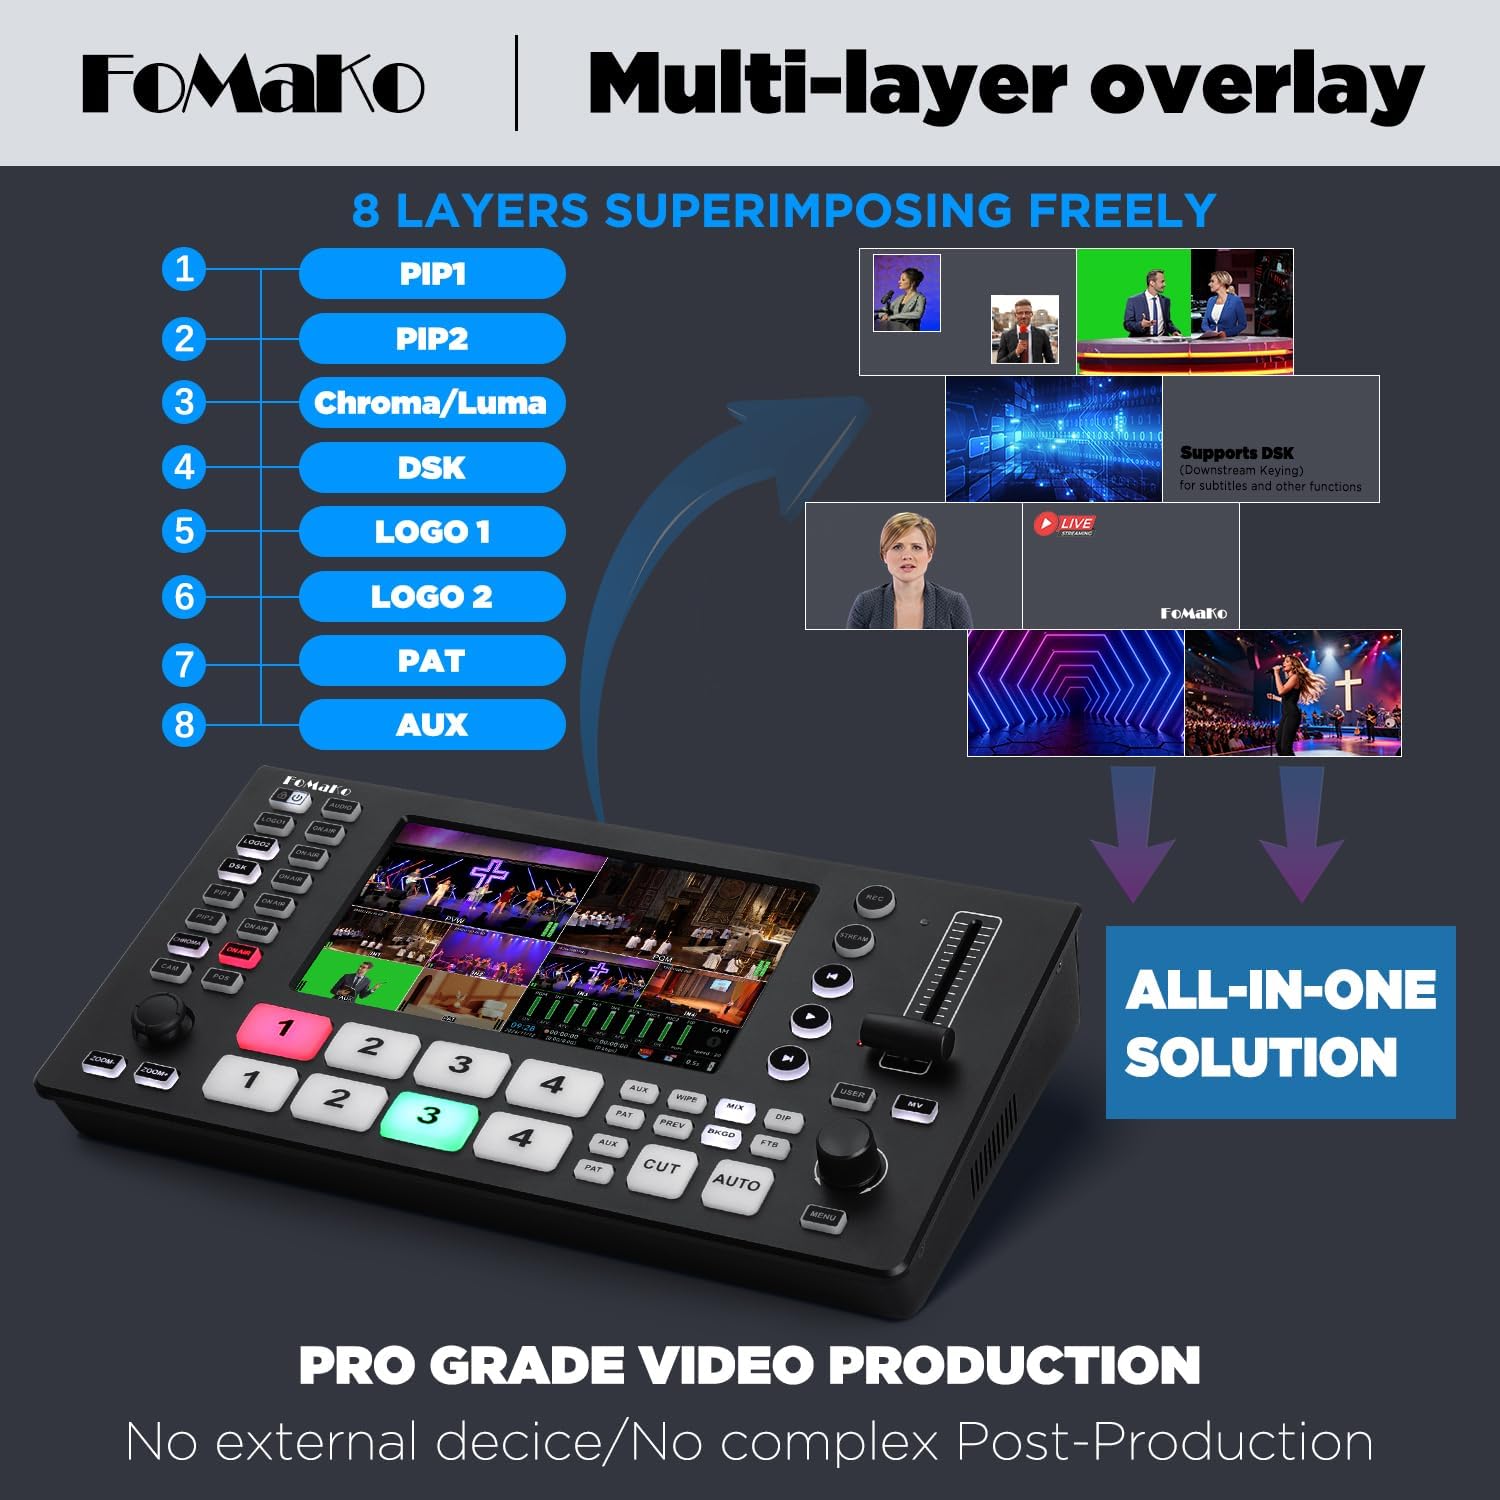
The M3 offers various special effects and multi-layer overlay capabilities.
- Ngā Pānga Whakawhiti: Access over 30 transition effects (Mix, Dip, Wipe) using the dedicated buttons or knob.
- Multi-Layer Overlay: Supports up to 8 layers for superimposing elements like Picture-in-Picture (PIP1, PIP2), Chroma/Luma key, Downstream Key (DSK) for subtitles, and custom logos (LOGO1, LOGO2).
- PTZ Camera Control: The integrated PTZ control allows for precise motion control and instant preset access for compatible PTZ cameras.

Video: Demonstration of importing logos, images, and video sources on the FoMaKo M3/M4 switcher.
Video: Demonstration of Picture-in-Picture (PIP) and Meeting Mode functions on the FoMaKo Video Switcher.
4.5 Fan Temperature Adjustment
The built-in fan can be adjusted to manage the device's temperature. Use the menu and knob to select from the following modes:
- Aunoa: Default mode where fan speed adjusts with temperature.
- Weto: Fan is off, but will automatically enable if the device overheats.
- Kei runga: Fan runs continuously during operation.
5. Tiaki
To ensure optimal performance and longevity of your FoMaKo M3 Video Mixer Switcher, follow these maintenance guidelines:
- Te horoi: Regularly clean the exterior of the device with a soft, dry cloth. Avoid using liquid cleaners or solvents that could damage the finish or internal components.
- Whakahau: Ensure that the ventilation openings are clear and unobstructed to allow for proper airflow and prevent overheating. Utilize the built-in fan temperature adjustment feature as needed.
- Rokiroki: When not in use for extended periods, store the switcher in a cool, dry place away from direct sunlight and extreme temperatures.
- Whakaha Uepu: Keep all cables organized and free from kinks or excessive bending to prevent damage to the cables and ports.
- Whakahōu Firmware: Check the official FoMaKo website periodically for any available firmware updates to ensure your device has the latest features and performance enhancements.
6. Te Raru
This section addresses common issues you might encounter with your FoMaKo M3 Video Mixer Switcher.
- Kore Mana:
- Me mohio kei te hono pai te urutau hiko ki te taputapu me te putanga hiko mahi.
- Verify the power button has been pressed.
- No Video Input Signal:
- Check all HDMI and USB input cables for secure connections.
- Confirm that the video sources (cameras, laptops) are powered on and outputting a signal.
- Verify the input resolution and frame rate are compatible with the M3 switcher (up to 4K 60FPS input).
- Kāore he Putanga Ataata i runga i te Aroturuki:
- Ensure the HDMI PGM or AUX output cable is securely connected to your monitor.
- Tirohia kei te whakahikohia te kaitirotiro me te tautuhi ki te puna whakauru tika.
- Confirm the output resolution and frame rate are compatible with your monitor (up to 1080p 60FPS output).
- Flickering Screen on Integrated Display:
- If the integrated 5.5-inch display flickers, try powering the unit off and then on again.
- While the flickering may not affect the program output, if the issue persists, contact customer support for assistance.
- Ngā Take Rere:
- Verify your network connection (for RTMP streaming).
- Ensure streaming settings (RTMP URL, stream key) are correctly configured in the device's menu.
- For UVC streaming, confirm the USB Type-C cable is connected and your computer recognizes the switcher as a video device.
- Raruraru Ororongo:
- Check microphone connections and ensure they are powered (if required).
- Adjust volume levels for each audio channel in the device's menu.
- Verify headphone output for monitoring is connected and volume is adjusted.
7. Whakatakotoranga
| Āhuahira | Taipitopito |
|---|---|
| Waitohu | FoMaKo |
| Tau tauira | M3 |
| Tae | Maama Pango |
| Tauranga Whakauru | 4x HDMI, 1x USB |
| Tauranga Huaputa | 1x HDMI PGM, 1x HDMI AUX, 1x USB 3.1 Type-C (UVC) |
| He urunga ororongo | 4x HDMI Digital Audio, 2x 3.5mm Microphone |
| Putanga Ororongo | 1x Headphone Output |
| Taumira Tauru Max | 4K 60FPS |
| Taumira Huaputa Max | 1080p 60FPS |
| Whakaatu Mata | 5.5-inihi FHD LCD |
| Te tuhi | SD Card, U Flash (H.264 encoding) |
| Nga Ahinga (D x W x H) | 7"D x 14"W x 4"H |
| Taumaha | 1 Kirokaramu |
| UPC | 735530570654 |
8. Pūtāhui me te Tautoko
FoMaKo provides comprehensive support for your M3 Video Mixer Switcher:
- Kaupapa Whakahoki 30-Ra: Hassle-free returns and refunds within 30 days of purchase.
- 1-Tau Pūtāhui Kaihanga: Covers quality defects with free replacement (excludes misuse, accident, water damage, or normal wear).
- 3-Year Optional Trade-in Program: Available for upgraded models.
- Tautoko Hangarau Ora: Access to technical assistance with a 24-hour response time.
- Free Setup Guidance and Remote Assistance: Available with your order ID.
For support, please visit the official FoMaKo website or contact their customer service with your order ID.