1. Kupu Whakataki
This manual provides detailed instructions for the installation, operation, and maintenance of your Fuers 8-Channel 5MP H.265+ Hybrid Security DVR Recorder. This DVR system is designed to support various camera types, including TVI, AHD, CVBS, CVI, XVI, and IP cameras, offering a versatile surveillance solution. It features advanced H.265+ video compression, AI human detection, and remote access capabilities.
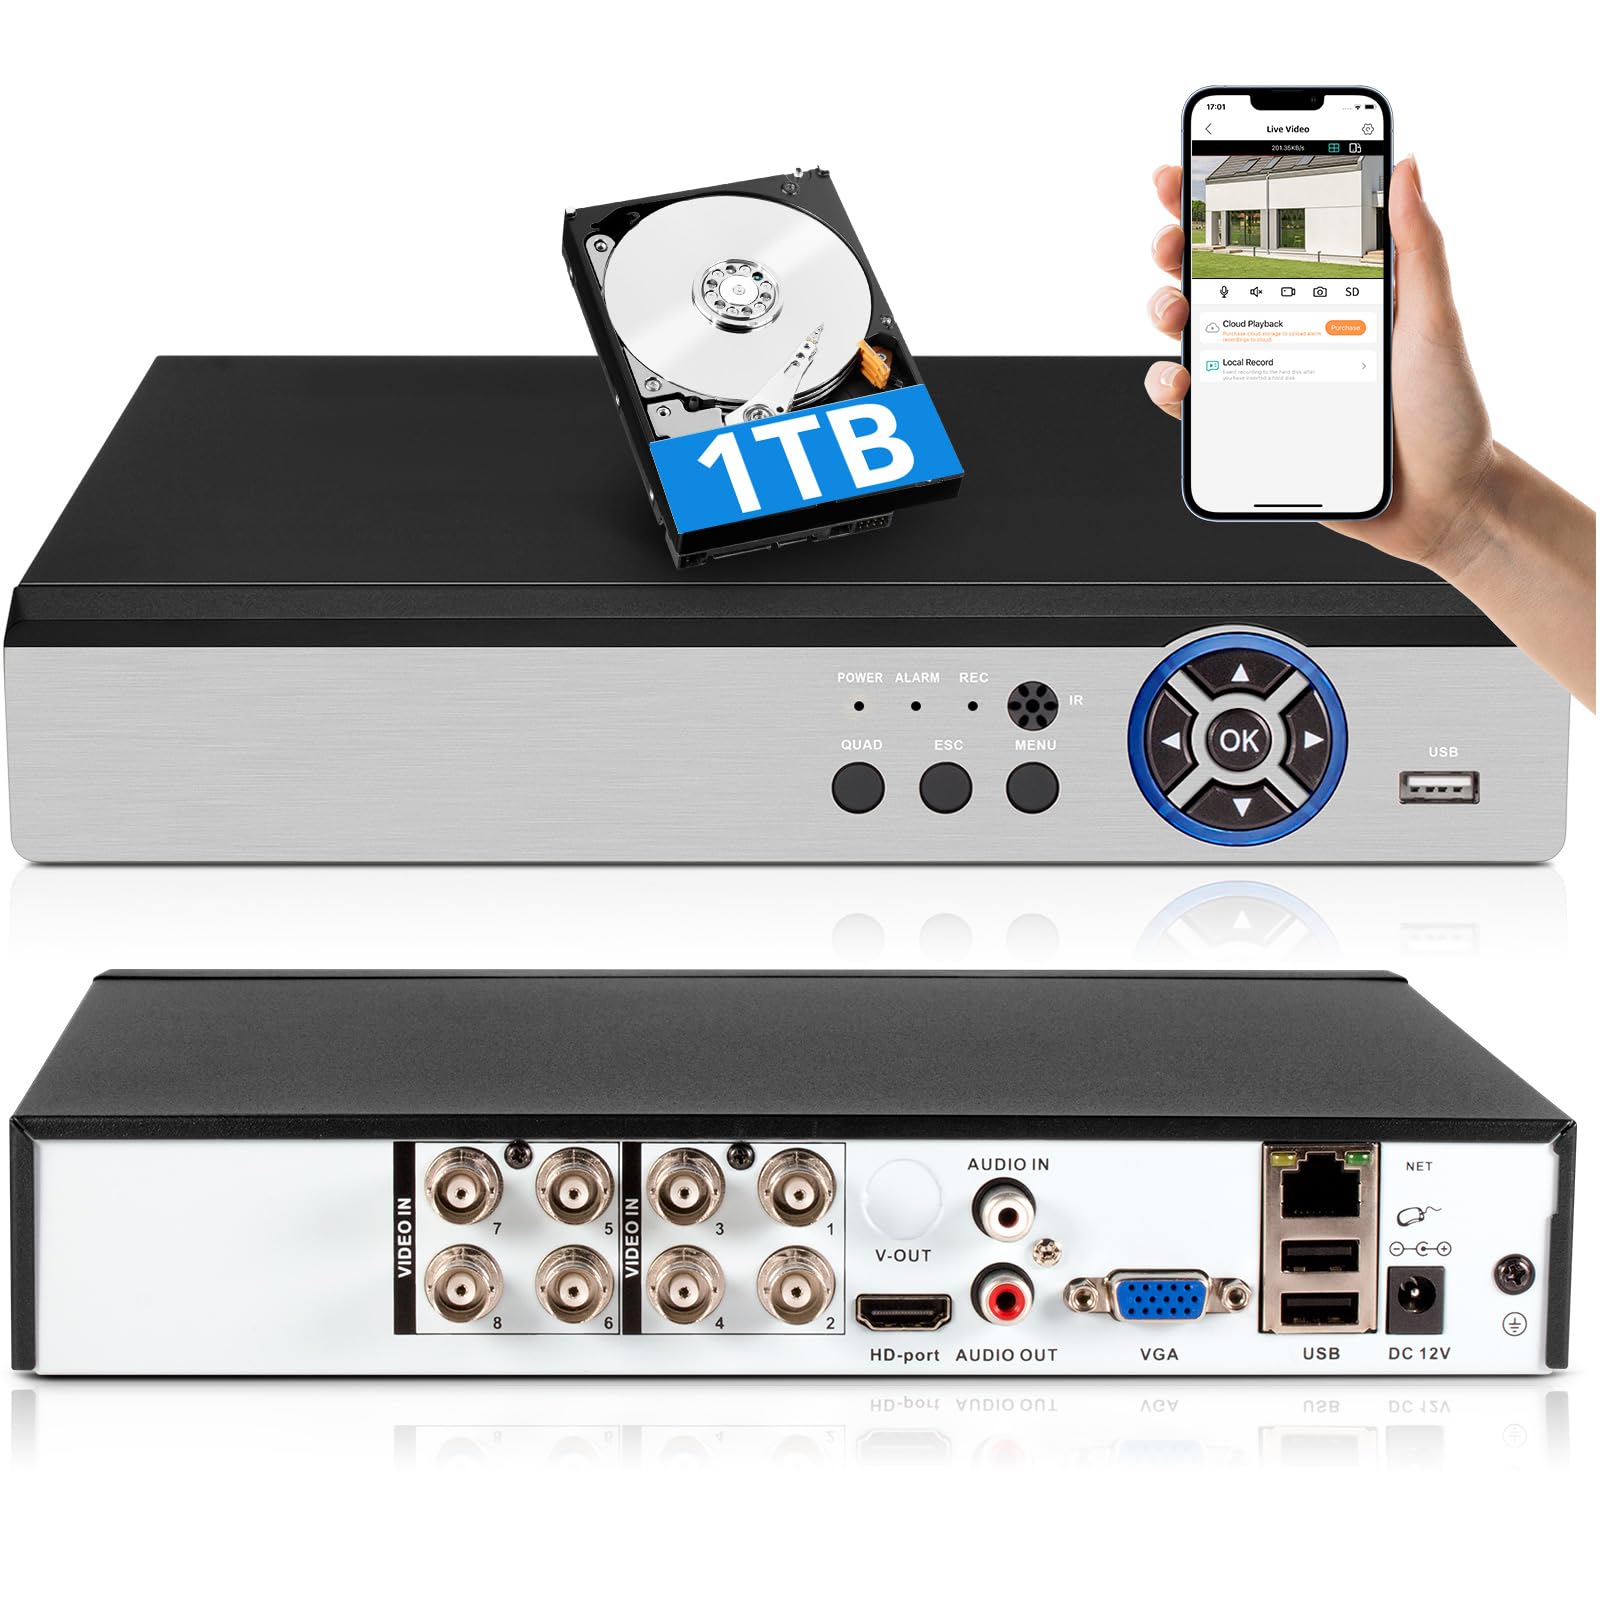
Image: The Fuers 8-Channel 5MP H.265+ Hybrid Security DVR Recorder unit.
2. He aha kei roto i te Pouaka
Tirohia koa ko nga mea katoa kei raro nei kei roto i to kete:
- 1x 5MP 8CH DVR
- 1x 1TB Hard Drive (Pre-installed on DVR)
- 1x DVR Power Supply
- 1x Kiore USB
- 1x Manual Kaiwhakamahi

Image: The DVR unit and its included accessories: 1TB HDD, power supply, USB mouse, and user manual.
3. Nga Hua o te Hua
- 5MP 6-in-1 Hybrid DVR: Supports up to 8 TVI, AHD, CVBS, CVI, XVI, Analog cameras and IP cameras.
- Hōputu Ataata H.265+ Matatau: Offers longer recording times and up to 50% storage space savings compared to H.264 systems.
- AI Hunga Tangata: Advanced algorithms detect human presence, reducing false alarms.
- Uru Mamao: Te whakahaere me te view footage remotely via the iCSee App on smartphones, tablets, and PCs (Google Chrome, Microsoft Edge, Internet Explorer).
- Mahi Tuimotu: The DVR can function without an internet connection for local recording and viewing. Internet is only required for remote access features.
- Pre-installed 1TB Hard Drive: Ready for immediate recording, expandable up to 14TB via SATA.
- Simultaneous VGA/HDMI Output: Connects to PC monitors and TVs concurrently.

Whakaahua: Ka mutuview of the DVR's key features including AI Human Detection and remote access.
4. Aratohu Tatūnga
4.1 Hononga Tinana
- Tūhono Aroturuki: Plug the HDMI or VGA cable from your monitor into the corresponding port on the DVR.
- Honoa te Kiore USB: Insert the USB mouse into one of the USB ports on the DVR.
- Tūhono Kāmera: Connect your analog cameras (TVI, AHD, CVBS, CVI, XVI) to the BNC 'VIDEO IN' ports. For IP cameras, connect them to your network and ensure the DVR is also connected to the same network.
- Connect Network (Optional for Remote Access): Connect an Ethernet cable from the DVR's 'NET' port to your router for remote viewnga kaha.
- Hono Hono: Plug the DVR power supply into the DC 12V input port on the DVR, then plug the adapter into a power outlet.

Whakaahua: Taipitopito view of the DVR's rear panel showing video input, audio input/output, VGA, HDMI, USB, and network ports.
4.2 Mobile App Setup (iCSee)
To access your DVR remotely, download and configure the iCSee mobile application:
- Tikiake App: Scan the QR code displayed on your monitor or search for "iCSee" in your device's app store.
- Android: Toa Play Google
- iOS: Apple App Store
- Rēhita/Takiuru: Open the iCSee app and create a new account or log in if you already have one.
- Tāpiri Pūrere: In the app, select the option to add a new device. You can typically scan the QR code found in the DVR's menu (Main Menu > Info > Version) to bind the device.
- View Whangai Ora: Once the device is added, you can view your camera feeds live from anywhere with an internet connection.

Image: Visual guide for connecting the DVR to a network and setting up the iCSee mobile application for remote viewing.
5. Nga Tohutohu Whakahaere
5.1 Purei Whakaata Ataata
Ki te review tuhia footage:
- Pāwhiri-matau i runga i te ora view screen to open the main menu.
- Select "Record" then "Playback".
- Choose the desired channel(s) and date from the calendar.
- Click "Start Playback" to view nga rekoata.
Video: Demonstration of DVR video playback settings and navigation.
5.2 Arotake Mamao
After completing the mobile app setup (Section 4.2), you can monitor your surveillance system from any location with internet access. The iCSee app allows for live viewte purei anō i ngā waiata kua tuhiatage, and receiving alerts.
Ataata: Ka mutuview of the H.265+ 5MP 8 Channel CCTV DVR Recorder with 1TB HDD, demonstrating its features and remote access capabilities.
5.3 Te Motini me nga Matohi
The DVR supports customizable motion detection zones and AI human detection to minimize false alarms. When motion is detected, the system can send real-time app notifications and email alerts with snapshots.

Image: Illustration of AI human detection and the alert notification system.
6. Tiaki
- Whakapai auau: Keep the DVR unit free from dust and debris to ensure proper ventilation. Use a soft, dry cloth for cleaning.
- Whakahōu Firmware: Tirohia i ia wa i te kaihanga webte waahi mo nga whakahoutanga firmware kia pai ai te mahi me te haumarutanga.
- Whakahaere Puku Maama: The DVR features automatic overwrite functionality, ensuring continuous recording by replacing older footage with new. Regularly back up important footage to external storage if needed.
- Haumarutanga Kupuhipa: Use strong, unique passwords for your DVR and mobile app accounts. Change passwords regularly.
7. Te Raru
| Raruraru | Take pea | Rongoā |
|---|---|---|
| Kāore he whakaaturanga ataata i runga i te mata | Ko te hononga taura wetewete, he he te puna whakauru i runga i te aroturuki, karekau te DVR i te hiko. | Check HDMI/VGA cable connections. Ensure monitor input source matches. Verify DVR power. |
| Kāore e taea te uru atu ki te DVR mai i tawhiti | No internet connection, incorrect app settings, firewall issues. | Ensure DVR is connected to the internet. Verify app login details and device binding. Check router/firewall settings. |
| Kaore he rekoata | Hard drive full, recording schedule not set, hard drive malfunction. | Check hard drive status and capacity. Configure recording schedule. If HDD is faulty, replace it. |
| Ngā whakatūpato nekehanga teka maha | Sensitive motion detection settings, environmental factors (e.g., moving branches). | Adjust motion detection sensitivity. Configure AI human detection. Define specific detection zones to exclude irrelevant areas. |
If you encounter issues not covered here, please refer to the comprehensive user manual included in your package or contact Fuers customer support.
8. Whakatakotoranga
- Tau tauira: A6908-1TB
- Rahi Hua: 9.84 x 8.26 x 1.57 inihi
- Taumaha Tūemi: 3.72 pauna
- Hangarau Hononga: HDMI, USB, VGA, Ethernet
- Ngā Pūrere Hototahi: Analog Cameras (TVI, AHD, CVBS, CVI, XVI), IP Cameras, Smartphone, Tablet, Computer
- Te Rokiroki Mahara: 1 TB (kua tāutahia i mua), ka taea te whakawhanui ki te 14 TB
- Kōpeketanga Ataata: H.265 +
- Hongere: 8-Channel Analog, expandable with IP channels
- Kaihanga: Puhipuhi
9. Pūtāhui me te Tautoko
For warranty information and technical support, please refer to the warranty card included in your product packaging or visit the official Fuers website. You may also contact the seller, MBANGDE-COM, for assistance with your purchase.