
1. Kupu Whakataki
The ESX DRDS14 is a 4-channel smart remote switch designed to optimize the turn-on and turn-off sequence of car audio amplifiers and other components. It effectively eliminates the common 'PLOPP' noise often heard from speakers or subwoofers when amplifiers are activated or deactivated. This device provides variable turn-on and turn-off delays for up to four remote outputs, ensuring a smooth power transition and protecting your high-quality audio components. Additionally, it features a digital voltage indicator and integrated overvoltage/undervoltagtiaki.
2. Nga korero haumaru
Please read and understand all safety instructions before installing or operating the ESX DRDS14. Failure to follow these instructions may result in injury or damage to the device or vehicle.
- Always disconnect the vehicle's battery negative terminal before beginning any electrical installation to prevent short circuits.
- E taunakihia ana kia tāutahia e te ngaio mō te mahi tino pai me te haumaru.
- Ensure all wiring is correctly connected and insulated to prevent electrical hazards.
- Kaua e whakaatuhia te taputapu ki te makuku, te wai, te pāmahana tino kino rānei.
- Mount the device securely in a dry, well-ventilated area away from heat sources.
- Verify that the total current draw of connected remote devices does not exceed 500 mA per output.
3. Hua Neke Atuview me nga ahuatanga
The ESX DRDS14 offers advanced control and protection for your car audio system.
Āhuatanga matua:
- 4-channel smart remote switch for sequential ampwhakahohenga whakaahuru.
- Variable turn-on delays (0-30 seconds) for each output.
- Variable turn-off delays (0-30 seconds) for each output.
- Mamati voltage indicator, calibratable for accuracy.
- Automatic output shutdown in case of overvoltage rarovol raneitage.
- Compact design with removable mounting feet.
- Connections: 1 remote input, 4 remote outputs (up to 500 mA/output).
He aha kei roto i te Pouaka:
- 1 x ESX DRDS14 Smart Remote Delay Switch
4. Tatūnga me te Tāuta
Follow these steps for proper installation of your ESX DRDS14.
4.1 Tāutanga Tinana
Choose a suitable, dry location in your vehicle for mounting the DRDS14. The device features removable mounting feet for flexible installation. Secure the unit firmly to prevent movement.
4.2 Hononga Waea
The DRDS14 has a terminal block for power and remote connections. Ensure all connections are secure and correctly polarized.
- GND: Connect to a solid chassis ground point in the vehicle.
- KAUPAPA I: Connect to the remote output of your head unit or DSP. This is the trigger signal for the DRDS14.
- + 12V: Connect to a constant +12V power source (fused, if not already).
- Putanga 1-4: Connect these to the remote inputs of your amplifiers or other components. Each output can supply up to 500 mA.
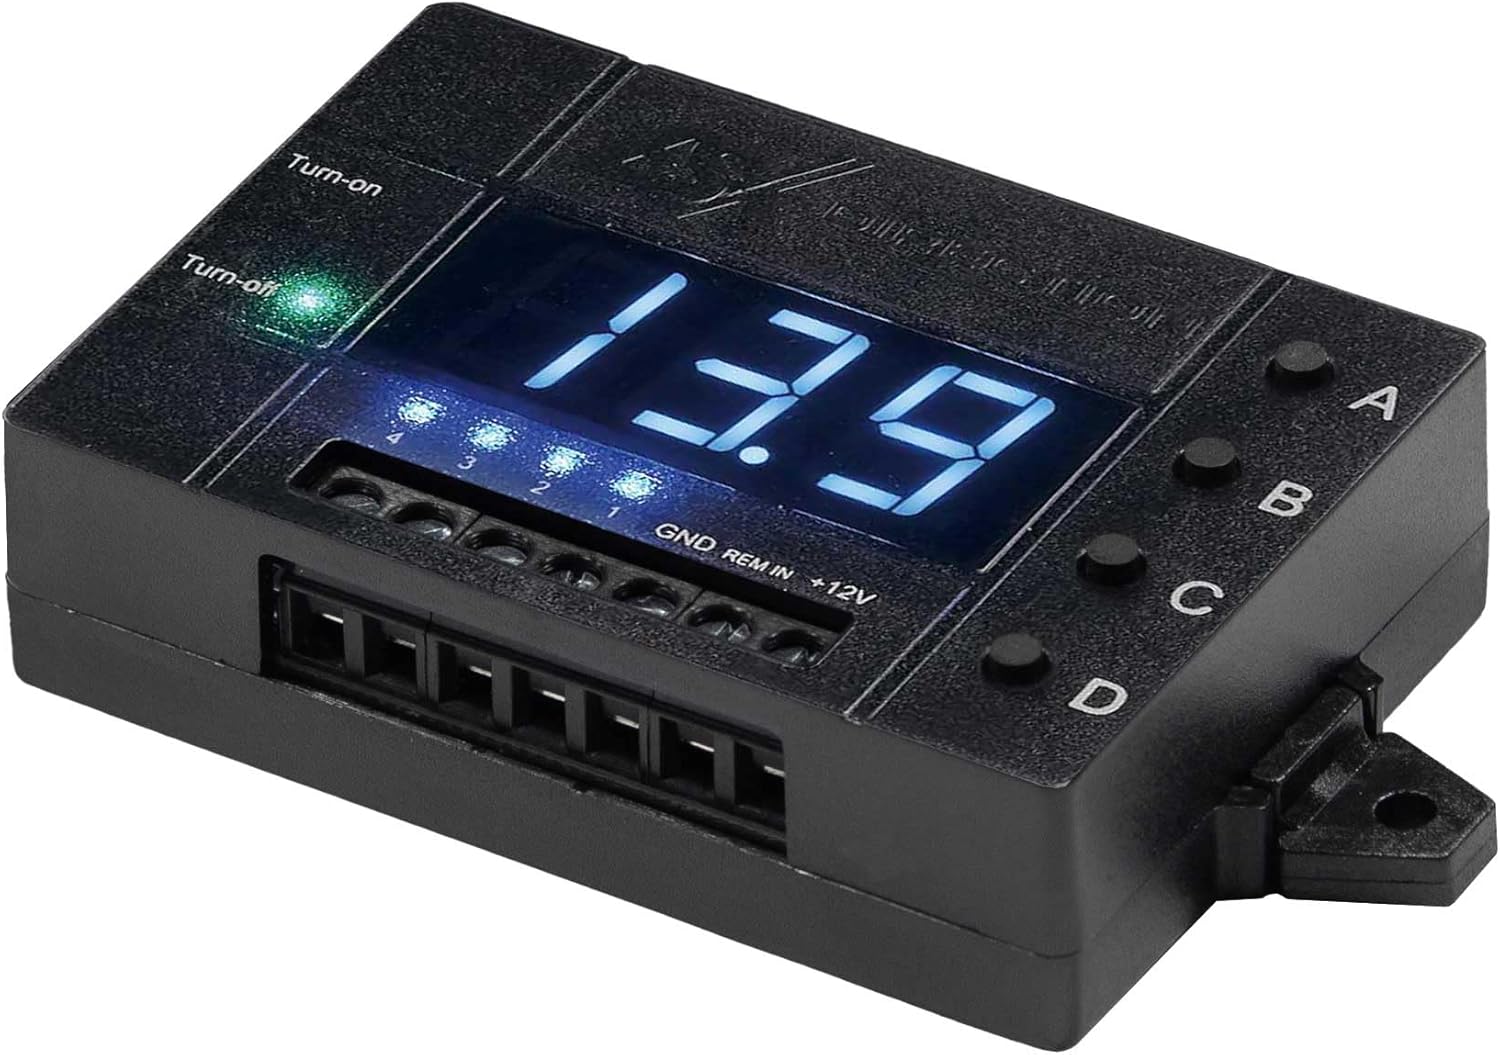
Whakaahua 1: Runga-raro view of the ESX DRDS14 showing the digital display, control buttons (A, B, C, D), and wiring terminals (GND, REM IN, +12V, and four remote outputs).
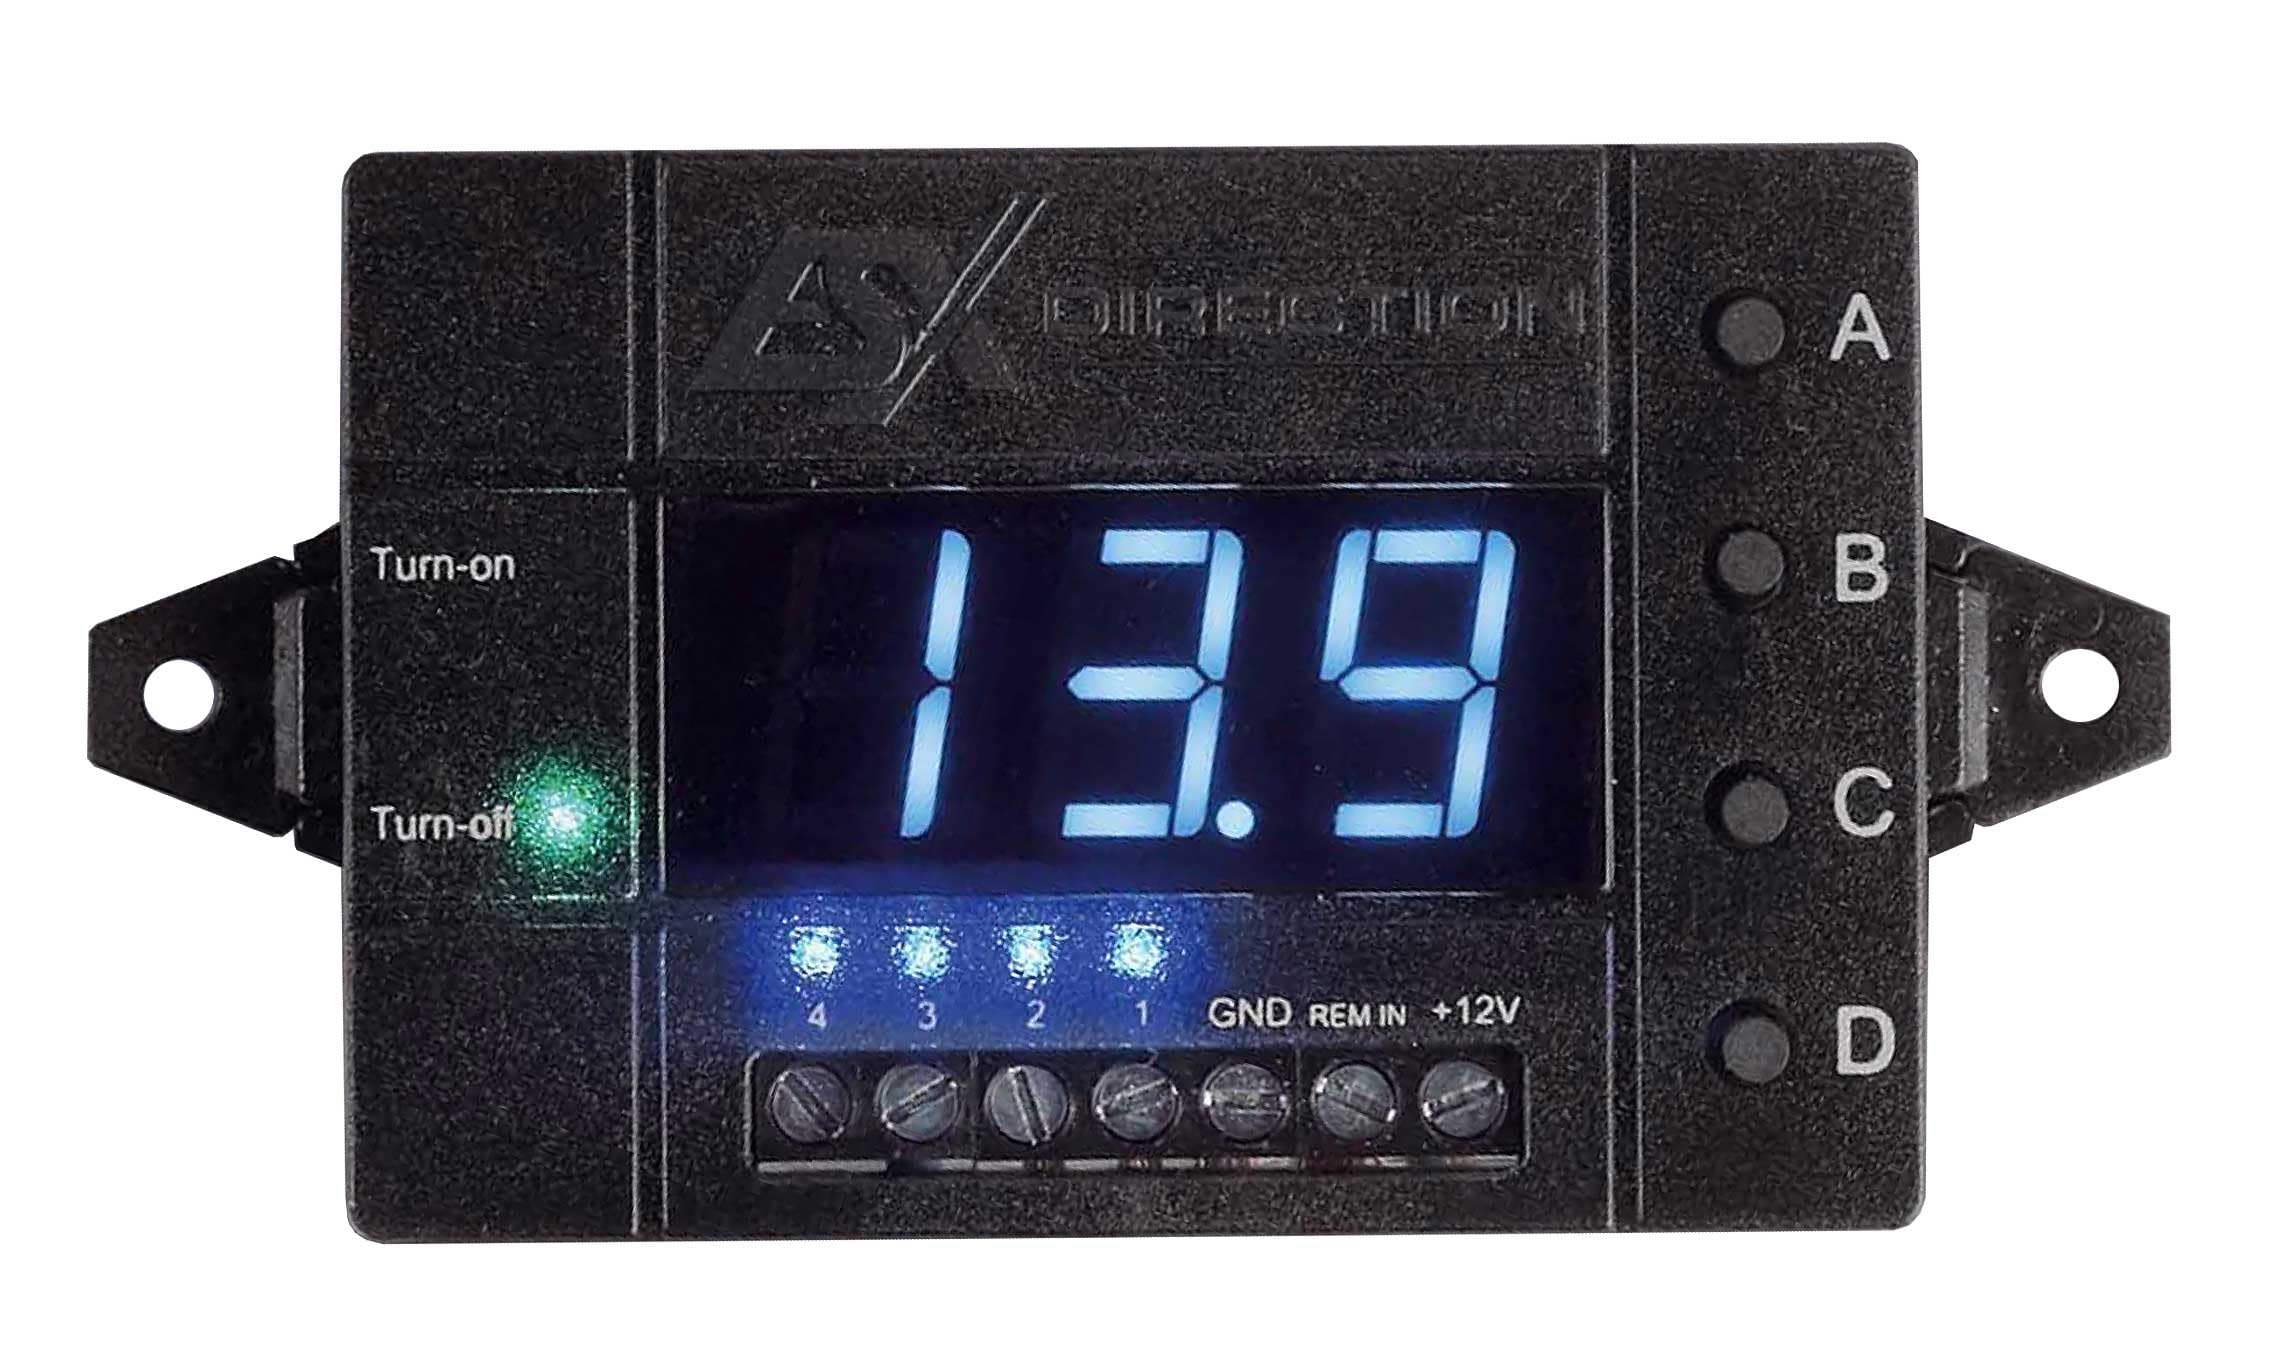
Whakaahua 2: Koki view of the ESX DRDS14, highlighting the 'Turn-on' and 'Turn-off' indicator LEDs, the digital voltage display showing '13.9', and the four channel indicator LEDs (1, 2, 3, 4) below the display.
5. Nga Tohutohu Whakahaere
The DRDS14 allows for precise control over your system's power sequencing.
5.1 Setting Turn-on and Turn-off Delays
The four buttons labeled A, B, C, and D correspond to the four remote outputs. Each button allows individual programming of turn-on and turn-off delays from 0 to 30 seconds.
- To set Turn-on Delay: With the unit powered on, press and hold the desired channel button (A, B, C, or D) until the digital display shows 'ON' followed by a number. Use short presses of the same button to cycle through delay times (0-30 seconds). Release the button to save the setting.
- To set Turn-off Delay: With the unit powered on, press the desired channel button (A, B, C, or D) briefly. The display will show 'OFF' followed by a number. Use short presses of the same button to cycle through delay times (0-30 seconds). Release the button to save the setting.
- The 'Turn-on' and 'Turn-off' indicator LEDs will illuminate to show the current state of the remote input signal.
5.2 Puka Mamatitage Tohu
The DRDS14 features a digital display that shows the current system voltage. This can be calibrated to match other voltage meters in your vehicle.
- Whakatikatika: Refer to the detailed calibration procedure in the full user manual (not provided in this summary) or contact ESX support for instructions.
5.3 Taikahatage me Undervoltage Tiaki
The DRDS14 includes a protection function that automatically shuts off connected components if the vehicle's voltage exceeds or falls below user-defined limits. This prevents damage to sensitive equipment.
- Tautuhi Tepe: Ko te overvoltage me raro voltage limits can be set individually. Consult the full user manual for the specific steps to configure these protection thresholds.
6. Tiaki
The ESX DRDS14 requires minimal maintenance.
- Puritia te taputapu kia ma, kia kore he puehu me te para. Whakamahia he kakahu ngohengohe, maroke mo te horoi.
- A ape i te whakamahi matū kino, whakarewa ranei.
- Ensure all wiring connections remain tight and free from corrosion.
7. Te Raru
If you encounter issues with your ESX DRDS14, refer to the following common problems and solutions.
- No Power to DRDS14:
- Check the +12V and GND connections for proper contact and polarity.
- Ensure the remote input (REM IN) from your head unit/DSP is active.
- Verify any inline fuses are intact.
- Amplifiers Not Turning On/Off Correctly:
- Check the remote output connections from the DRDS14 to the ampkaikawe
- Verify the turn-on and turn-off delay settings for each channel (A, B, C, D).
- Ensure the total current draw of connected devices does not exceed 500 mA per output.
- 'PLOPP' Noise Still Present:
- Adjust the turn-on and turn-off delays to ensure proper sequencing. Experiment with different delay times.
- Ensure all ground connections in your audio system are solid and free from interference.
- Digital Display Shows Error or Incorrect Voltage:
- Check the +12V and GND connections.
- Mahi voltage calibration if necessary (refer to the full manual).
- Ki te overvoltage/undervoltage protection is active, check the vehicle's battery voltage.
If problems persist, contact your ESX dealer or technical support.
8. Whakatakotoranga
| Waitohu | ESX |
| Tauira | DRDS14 |
| Tauira Tuemi | DRDS14 |
| Hunga Hua | 5 x 7.3 x 2 cm |
| Nga Waahanga kei roto | 1 remote delay switch |
| Te maha o nga mea | 1 |
| Kei roto nga pākahiko | Kao |
| Nga Pikohiko e hiahiatia ana | Kao |
9. Pūtāhui me te Tautoko
For warranty information, please refer to the documentation provided with your purchase or contact your authorized ESX dealer. For technical support or further assistance, please visit the official ESX webpaetukutuku, whakapā atu ranei ki ta raatau tari ratonga kaihoko.


