1. Kupu Whakataki
Thank you for choosing the lightmaXX DJ Scan LED. This professional LED scanner is designed to provide dynamic lighting effects for various applications, including DJ sets, clubs, and events. Featuring a powerful LED light source and precise scanning capabilities, it offers vibrant colors and versatile patterns to enhance any performance space.
This manual provides essential information for the safe and efficient operation of your lightmaXX DJ Scan LED. Please read it thoroughly before installation and use, and keep it for future reference.

Whakaatu 1: Neke Atuview of the lightmaXX DJ Scan LED unit.
2. Nga Tohutohu Haumaru
Hei whakarite i te mahi haumaru, kia mau ki nga tikanga haumaru e whai ake nei:
- Me hono tonu te waeine ki te putanga hiko kua mau ki te whenua.
- Kaua e tukuna te waeine ki te ua me te makuku.
- Me whakarite kia pai te hau huri noa i te waahanga kia kore ai e wera rawa.
- A ape i te toronga kanohi ki te puna marama.
- Momotuhia mai i te hiko i mua i te horoi, te mahi ranei.
- Ko nga kaimahi whai tohu anake me mahi whakatikatika.
- Kia matara atu i nga taonga ka mura.
3. Ihirangi mokete
Manatokona kei roto katoa nga mea kei roto i te kete:
- lightmaXX DJ Scan LED unit
- taura hiko
- Pukapuka Kaiwhakamahi (tenei tuhinga)
- Mounting bracket (if included)
4. Nga ahuatanga
The lightmaXX DJ Scan LED offers a range of features for dynamic lighting:
- Puna Maama: Powerful LED technology for bright and efficient illumination.
- Whakaranu Tae: RGBAW (Red, Green, Blue, Amber, White) color mixing for a wide spectrum of colors.
- Momo Matawai: Designed as a scanner for precise beam movement and pattern projection.
- Mana: DMX control for integration into professional lighting setups.
- Whakaatu: Digital display for easy navigation and setting adjustments.

Whakaahua 2: Mua view showing the LED lens and light output.
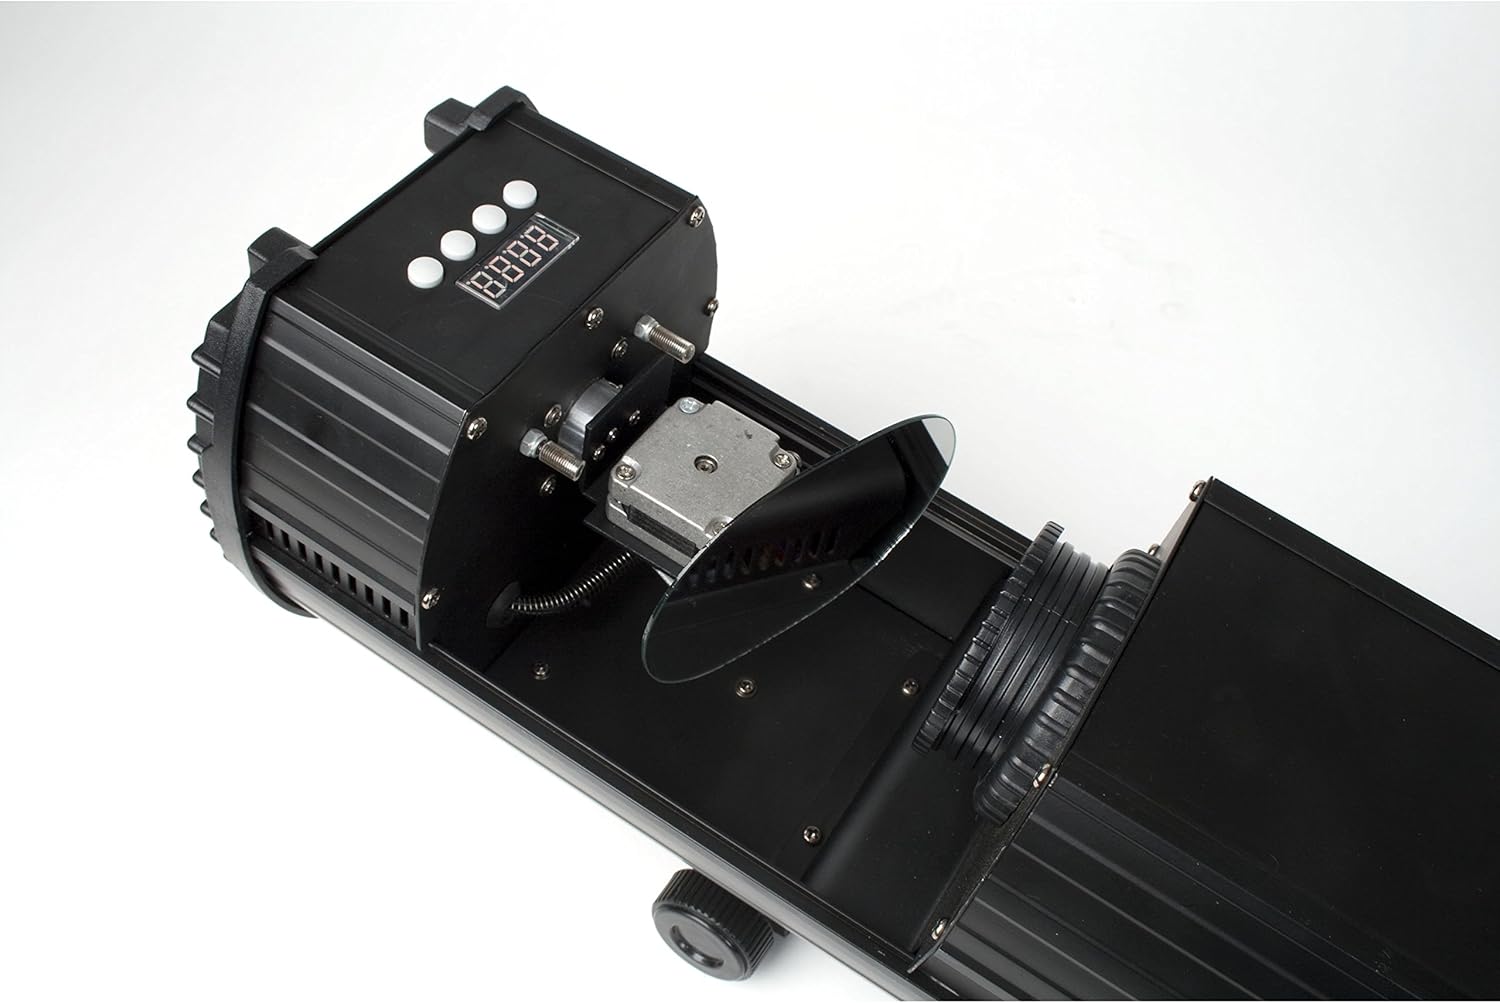
Figure 3: Internal mirror mechanism for dynamic scanning effects.
5. Tatūnga
5.1 Whakapiki
The lightmaXX DJ Scan LED can be mounted on a truss, stand, or placed on a flat surface. Ensure the mounting surface or structure can support the weight of the unit securely. Use appropriate clamps and safety cables when mounting overhead.
5.2 Hononga Hiko
Connect the supplied power cable to the power input on the rear of the unit and then to a suitable grounded power outlet (230V AC, 50Hz). Ensure the power switch is in the OFF position before connecting.

Figure 4: Rear panel with power input and cooling fan.
5.3 Hononga DMX (Kōwhiringa)
For DMX control, connect a standard 3-pin DMX cable from your DMX controller's output to the DMX IN port on the lightmaXX DJ Scan LED. If connecting multiple units, daisy-chain them by connecting the DMX OUT of the first unit to the DMX IN of the next.

Figure 5: Control panel and DMX input/output ports.
6. Mahi
6.1 Paewhiri Mana
The control panel features a digital display and several buttons for navigating menus and adjusting settings. Refer to Figure 5 for the location of the control panel.
- MENU: Accesses the main menu or goes back to the previous menu.
- Runga / Raro: Ka whakatere i roto i ngā kōwhiringa tahua, ka whakarerekē rānei i ngā uara.
- Whakauru: Confirms a selection or saves a setting.
6.2 Aratau Mahi
The lightmaXX DJ Scan LED typically supports the following operating modes:
- Aratau DMX: Allows full control over all functions via a DMX controller. Set the DMX address using the control panel.
- Aratau Hohe oro: The unit reacts to sound via a built-in microphone, creating dynamic light shows synchronized with music.
- Aratau Auto: Runs pre-programmed light sequences automatically.
- Aratau Rangatira/Taurekareka: Connect multiple units where one acts as the master, controlling the others (slaves) for synchronized operation without a DMX controller.

Whakaahua 6: Example of a green light beam projection.

Whakaahua 7: Example of a red light beam projection.
7. Tiaki
7.1 Te horoi
Regular cleaning helps maintain optimal performance. Disconnect the unit from power before cleaning.
- Use a soft, lint-free cloth to wipe the exterior.
- For lenses and mirrors, use a specialized lens cleaning solution and cloth to avoid scratches.
- Horoia te pā hau whakamatao me ngā pūhaumātao i ia wā, i ia wā, kia tika ai te rere o te hau.
7.2 Rokiroki
When not in use, store the unit in a dry, dust-free environment, preferably in its original packaging or a protective case.
8. Te Raru
Mena ka tūtaki koe ki ngā raruraru, tirohia te ripanga i raro nei mō ngā raruraru me ngā otinga e kitea whānuitia ana:
| Raruraru | Take pea | Rongoā |
|---|---|---|
| Karekau te waeine i te hiko. | No power connection; faulty cable; blown fuse. | Check power cable connection; try another outlet; replace fuse if necessary. |
| Kaore he putanga marama. | Unit in standby; DMX signal issue; LED failure. | Check operating mode; verify DMX connection and address; contact support if LED is faulty. |
| Kāore he mana whakahaere DMX. | Wāhitau DMX hē; taura DMX hē; raruraru pūmana DMX. | Set correct DMX address; test DMX cable; check DMX controller settings. |
| Beam movement is erratic. | Obstruction; internal mechanism issue. | Ensure no physical obstructions; contact support if issue persists. |
9. Whakatakotoranga
| Āhuahira | Taipitopito |
|---|---|
| Tau tauira | LCD-502 |
| Puna Maama | LED |
| Momo Maama | Matawai |
| Whakaranu Tae | RGBAW (Red, Green, Blue, Amber, White) |
| Tuku Hiko | 230V AC, 50Hz (typical) |
| Aratau Mana | DMX, Sound Active, Auto, Master/Slave |
| ASIN | B004CTLQXK |

Figure 8: Energy efficiency information for the LED light source.
10. Pūtāhui me te Tautoko
lightmaXX products are designed for reliability and performance. For warranty information and technical support, please refer to the warranty card included with your product or visit the official lightmaXX webpae. Puritia to tohu hoko mo etahi kereme whakamana.
For further assistance, please contact lightmaXX customer service.


