1. Kupu Whakataki me Nekeview
The OSD Audio ATM-7 is a sophisticated 7-zone automatic speaker selector designed to distribute amplified audio signals to various zones within a home or commercial space. It allows users to select between two distinct music sources for each designated zone, providing flexible audio management. This passive device is engineered for seamless integration into existing audio systems, offering remote control capabilities for enhanced convenience.
For optimal performance and to prevent potential damage to your amplifier, it is highly recommended to use impedance matching in-wall volume controls in conjunction with the ATM-7, as this unit does not include built-in impedance protection.

Figure 1.1: OSD Audio ATM-7 Speaker Selector and its accompanying remote control, showcasing the front panel and rear connections.
2. Nga waahanga matua
- 7-Zone Audio Distribution: Distributes amplified audio signals to up to seven independent zones.
- Dual Source Selection: Allows selection between two distinct music sources (A or B) in each zone when operating in 2-input mode.
- Mana Mamao: Includes an IR remote control for convenient operation from a distance of up to 10 meters.
- Front Panel Controls & LEDs: Features status LEDs for Power, Multi-zone, Master/Slave, Zone In/Out Select, In/Out Mode, and Zone Out/In Selector.
- Master-Slave Functionality: A Master-Slave switch on the rear panel enables parallel connection of two ATM-7 units for expanded zone control.
- Mahi Mahara: The remote control includes a backup memory function to retain settings.
- Hoahoa Āhuakore: A passive device, requiring external impedance matching for ampwhakamarumaru riipene.
3. Ihirangi mokete
Tena koa tirohia kei te noho nga taonga katoa, kei te pai te ahua ina wetewetehia.
- OSD Audio ATM-7 Speaker Selector Unit
- Mana Mamao IR
- Pūurutau Hiko (DC 12V 1.5A)
- External IR Receiver (for remote placement)
- Pukapuka Kaiwhakamahi (tenei tuhinga)
4. Nga korero haumaru
Hei whakarite i te mahi haumaru me te aukati i te kino, me whai i nga whakatupato e whai ake nei:
- Puna Hiko: Whakamahia anake te urutau hiko kua whakaratohia. Me whakarite te voltage ōrite ana ki to tuku hiko rohe.
- Whakahau: Kaua e araia nga whakatuwheratanga hau. Me whakarite kia pai te rere o te hau huri noa i te waahanga kia kore ai e wera rawa.
- makuku: Do not expose the unit to water, moisture, or excessive humidity. Avoid placing liquids near the device.
- Turanga: Whakanohoia te waeine ki runga i te mata papatahi. A ape i te whakanoho kia tata ki nga puna wera, ki te ra tika ranei.
- Ratonga: Kaua e ngana ki te mahi i a koe ake. Tukuna atu nga ratonga katoa ki nga kaimahi whai tohu.
- Whakaōrite impedance: As a passive device, the ATM-7 does not provide impedance protection. Always use impedance matching volume controls or ensure your amplifier can handle the combined speaker load to prevent damage to your ampkaikawe
5. Tatūnga me te Tāuta
Follow these steps to connect your OSD Audio ATM-7 speaker selector:
- Whakawetohia ngā taputapu katoa: Before making any connections, ensure your amplifier and all audio sources are powered off and unplugged from the wall outlet.
- Tūhono AmpPutanga whakaahuru: Honoa ngā pūrua putanga o te kaikorero mai i tō amplifier to the "ZONE IN/OUT" terminals on the rear of the ATM-7. The ATM-7 supports two input modes: 2-input (for dual source selection) or 7-input (for individual zone control). Refer to the rear panel diagram for correct wiring.
- Tūhono Kaikōrero: Connect your speakers to the corresponding "ZONE OUT" terminals on the rear of the ATM-7. Ensure correct polarity (+ to + and - to -) for all connections.
- Install Impedance Matching Volume Controls (Recommended): For optimal performance and amplifier protection, install impedance matching in-wall volume controls between the ATM-7 and your speakers. This is crucial to maintain a safe impedance load for your amplifier, especially when multiple zones are active.
- Honoa te Kaiwhiwhi IR: If the ATM-7 unit will be placed out of direct line of sight for the remote control, connect the external IR receiver to the "EXT IR Receiver" port on the rear panel. Position the IR receiver in a location where it can receive signals from the remote.
- Hono Hono: Plug the provided DC 12V 1.5A power adapter into the "DC 12V 1.5A" input on the rear of the ATM-7, then plug the adapter into a wall outlet.

Figure 5.1: Rear panel connections of the ATM-7, including speaker terminals, IR receiver port, and power input.

Whakaatu 5.2: Taipitopito view of the speaker wire terminals on the rear of the ATM-7, showing positive and negative connections for a zone.
6. Nga Tohutohu Whakahaere
The ATM-7 can be operated using the front panel controls or the included IR remote control.
6.1 Mana Paewhiri Mua

Figure 6.1: Front panel of the ATM-7, displaying power button, status LEDs, and zone selectors.
- Pihi POWER: Press to turn the unit On or Off. The "ON" LED indicates power status.
- Multi Zone Enable: Activates or deactivates multi-zone operation.
- Patene Mute: Mutes all active audio outputs.
- Master/Slave Control Select (M/S): Toggles between Master and Slave mode when chaining two ATM-7 units.
- Zone In/Out Select: Toggles individual zones between input and output modes.
- IN/OUT Mode (2 IN / 7 IN): Selects between 2-input mode (allowing selection of Source A or B for each zone) or 7-input mode (where each zone acts as an independent input/output).
- ZONE OUT/IN SELECTOR (ZONE1-ZONE7): Buttons to individually activate or deactivate each of the seven zones. Corresponding LEDs indicate active zones.
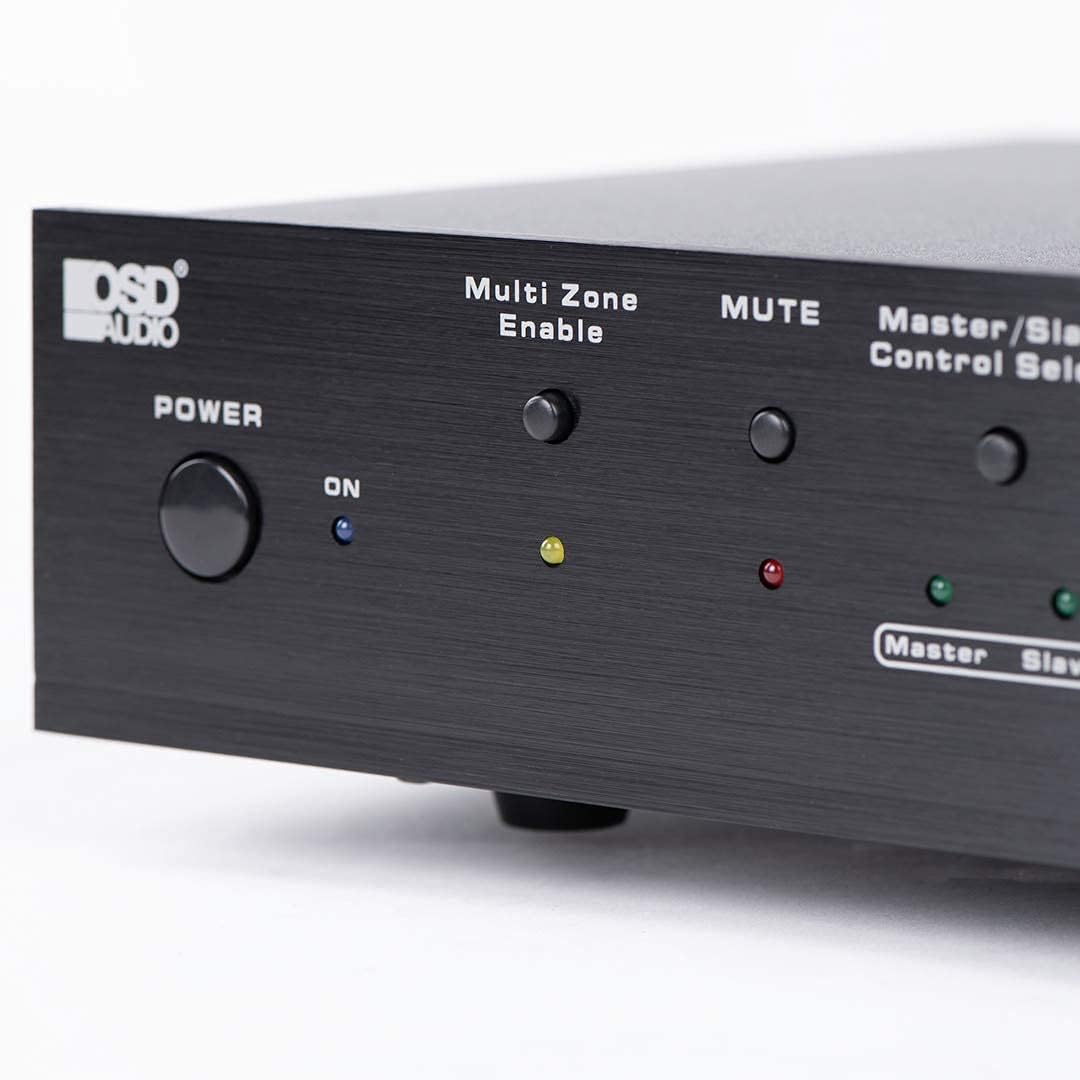
Figure 6.2: Detail of the Power and Multi Zone Enable buttons on the ATM-7 front panel.

Figure 6.3: Detail of the IN/OUT Mode (2 IN / 7 IN) and individual Zone Selector buttons on the ATM-7 front panel.
6.2 IR Mana Mamao
The included IR remote control provides full functionality for the ATM-7. Point the remote towards the unit's IR sensor or the external IR receiver.
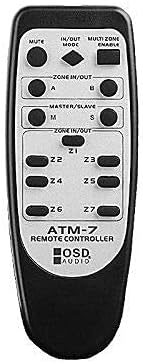
Figure 6.4: The ATM-7 remote control, featuring buttons for mute, input/output mode, master/slave, and individual zone selection.
- NGARU: Wahangu katoa nga putanga ororongo.
- IN/OUT MODE: Toggles between 2-input and 7-input modes.
- MULTI ZONE ENABLE: Activates or deactivates multi-zone operation.
- ZONE IN/OUT (A/B): In 2-input mode, selects between Source A and Source B for the active zones.
- MASTER/SLAVE (M/S): Selects Master or Slave mode for multi-unit configurations.
- Z1-Z7 Buttons: Individually activate or deactivate each of the seven zones.
The remote control has a backup memory function, retaining the last settings even after power cycling the unit. This allows for integration with smart plugs or switched outlets.
7. Tiaki
The OSD Audio ATM-7 requires minimal maintenance. Follow these guidelines to ensure longevity:
- Te horoi: Use a soft, dry cloth to clean the exterior of the unit. Do not use liquid cleaners or abrasive chemicals.
- Whakahau: I ia wa, tirohia kei te noho marama nga tuwhera hau i te puehu me te otaota.
- Hononga: Ensure all speaker wire connections remain secure and free from corrosion.
8. Te Raru
| Raruraru | Take pea | Rongoā |
|---|---|---|
| No audio output from speakers. |
|
|
| Kaore e mahi te mana mamao. |
|
|
| Sound distortion or low volume. |
|
|
9. Whakatakotoranga
| Āhuahira | Whakatakotoranga |
|---|---|
| Tau tauira | ATM-7 |
| Hunga Hua | 21.5 x 12 x 5.5 inihi |
| Taumaha Tūemi | 7 pauna |
| Tae | Pango |
| Momo Tuhono | Speaker Wire (Banana Plugs compatible) |
| Momo Tauera | Waea Korero |
| Kaihanga | OSD Ororongo |
| Whakauru Mana | DC 12V 1.5A |
| Remote Operating Distance | Tae atu ki te 10 mita |
10. Nga Korero Whakaputanga
Warranty information for the OSD Audio ATM-7 Speaker Selector is typically provided with the product at the time of purchase or can be found on the official OSD Audio website. Please retain your proof of purchase for warranty claims. For detailed terms and conditions, please visit the OSD Audio official webpaetukutuku, whakapā atu ranei ki a raatau tautoko kaihoko.
11. Tautoko Kiritaki
For technical assistance, troubleshooting, or general inquiries regarding your OSD Audio ATM-7, please contact OSD Audio customer support. You can find contact information, FAQs, and additional resources on the official OSD Audio webpae:


