1. Kupu Whakataki
Thank you for choosing the Thrustmaster F1 Dual Analog Gamepad Ferrari 150th Italia Exclusive Edition. This manual provides essential information for setting up, operating, and maintaining your new PC game controller. Please read these instructions carefully before use and retain them for future reference.
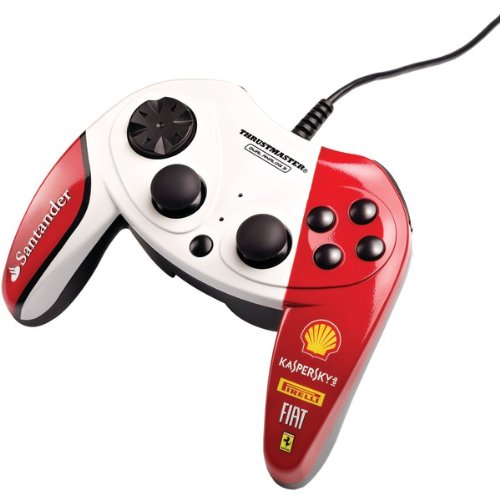
Image 1.1: The Thrustmaster F1 Dual Analog Gamepad Ferrari 150th Italia Exclusive Edition.
2. Ihirangi mokete
Me mohio kei roto i to kete nga mea katoa kei raro nei:
- Thrustmaster F1 Dual Analog Gamepad Ferrari 150th Italia Exclusive Edition
- Pukapuka Tohutohu (tenei tuhinga)
3. Nga ahuatanga
The Thrustmaster F1 Dual Analog Gamepad offers a range of features designed for an immersive gaming experience:
- Dual Analog Control: Equipped with two mini-sticks featuring a rubber texture for precise control.
- Comprehensive Button Layout: Features 10 action buttons and an 8-way D-pad for versatile gameplay.
- Mono USB & Purei: Simple connectivity for quick setup.
- Hototahi Whānui: Compatible with Windows 7, Windows Vista, and Windows XP operating systems.
4. Tatūnga
4.1 Connecting the Gamepad
- Kia mahara kei te kaha to rorohiko.
- Kimihia he tauranga USB e waatea ana i runga i to rorohiko.
- Plug the USB connector of the gamepad into the USB port.
- Ko te punaha whakahaere ka kitea aunoa me te whakauru i nga taraiwa e tika ana. He wa poto pea tenei tukanga.
4.2 Tāuta Atekōkiri
The Thrustmaster F1 Dual Analog Gamepad is designed for Plug & Play functionality. For Windows 7, Vista, and XP, drivers should install automatically upon connection. No manual driver installation is typically required.
If the gamepad is not recognized, try connecting it to a different USB port or restarting your computer.
5. Nga Tohutohu Whakahaere
5.1 Gamepad Layout
The gamepad features a standard layout for PC gaming:
- 2 Mini-Sticks: Located on the left and right, these provide analog control for movement and camera. They have a rubber texture for enhanced grip.
- 8-Way D-Pad: Positioned on the left, offering digital directional input.
- 10 Action Buttons: These buttons are typically used for in-game actions, menu navigation, and other commands. Their specific functions will vary depending on the game.
5.2 Using the Gamepad in Games
Once connected and recognized by your computer, the gamepad should be ready for use. Most modern PC games automatically detect and configure gamepads. If a game does not automatically recognize the gamepad, check the game's control settings menu to configure the buttons and axes manually.
For optimal performance, ensure your game is updated to the latest version.
6. Tiaki
6.1 Te horoi
To clean your gamepad, use a soft, dry cloth. For stubborn dirt, slightly dampen the cloth with water. Do not use abrasive cleaners, solvents, or harsh chemicals, as these can damage the surface and internal components.
6.2 Rokiroki
When not in use, store the gamepad in a clean, dry place away from direct sunlight, extreme temperatures, and excessive dust. Avoid placing heavy objects on the gamepad.
7. Te Raru
- Gamepad not recognized by the computer:
- Me mohio kua honoa te taura USB ki tetahi tauranga USB mahi.
- Try connecting the gamepad to a different USB port.
- Tīmataria anō tō rorohiko.
- Check your computer's Device Manager to see if the gamepad is listed and if there are any driver issues.
- Buttons or sticks not responding correctly in a game:
- Verify that the gamepad is properly connected.
- Check the in-game control settings and ensure the gamepad is selected and configured correctly.
- Some games may require specific gamepad profiles or configurations. Refer to the game's documentation.
- Gamepad disconnects intermittently:
- Ensure the USB connection is stable and not loose.
- Avoid using unpowered USB hubs; connect directly to the computer if possible.
- Check for any physical damage to the USB cable or connector.
8. Whakatakotoranga
| Tau tauira | F1DualAnalogF150 |
| ASIN | B009WEL9S2 |
| Kaihanga | ThrustMaster |
| Hononga | USB Mono & Purei |
| Mana whakahaere | 2 Mini-Sticks (rubber texture), 10 Buttons, 8-Way D-Pad |
| Hototahi | Windows 7, Windows Vista, Windows XP |
9. Pūtāhui me te Tautoko
Thrustmaster products are designed for reliability and performance. For information regarding warranty coverage, terms, and conditions, please refer to the warranty card included with your product or visit the official Thrustmaster webpae.
For technical support, driver updates, or frequently asked questions, please visit the official Thrustmaster support website. You can typically find contact information and support resources there.
Tuhipoka: Ko nga korero me nga ahuatanga o te hua ka huri noa me te kore panui i mua.


