1. Kupu Whakataki
Mauruuru koe mo te hokoasing the COBY DTV-700 Digital to Analog TV Converter. This device allows you to receive digital broadcast television signals and convert them for display on older analog televisions. It also functions as a multimedia player, supporting various audio, video, and image formats via its USB port, and offers recording capabilities. Please read this manual thoroughly before operating the device to ensure proper use and to maximize your viewte wheako.
2. Ihirangi mokete
Tena koa tirohia te pouaka mo nga mea e whai ake nei:
- COBY DTV-700 Digital to Analog TV Converter
- Mana Mamao
- AC/DC Pūurutau Hiko
- Taura AV (RCA)
- Pukapuka Kaiwhakamahi (tenei tuhinga)
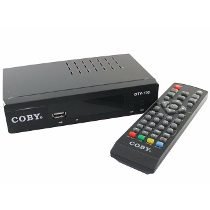
Image 2.1: The COBY DTV-700 Digital to Analog TV Converter. This image shows the compact design of the converter unit, typically black with various ports and indicators.
3. Nga korero haumaru
Hei whakarite i te mahi haumaru me te aukati i te kino, me whai i nga whakatupato e whai ake nei:
- Kaua e tukuna te waeine ki te ua, te makuku, te wera nui ranei.
- Kaua e whakatuwheratia te casing; tirohia nga ratonga katoa ki nga kaimahi whai tohu.
- Me whakarite kia tika te hau huri noa i te waahanga kia kore ai e wera rawa.
- Whakamahia anake te urutau hiko kua whakaratohia.
- Puritia te waeine mai i te ra tika, nga puna wera, me nga papa autō kaha.
- Dispose of batteries and electronic waste responsibly according to local regulations.
4. Hua Neke Atuview
4.1 Paewhiri Mua
The front panel typically includes:
- Tohu Hiko: Ka rama ina ka ana te waeine.
- Patene Whakarunga/Whakararo: For changing channels.
- Patene Tahua: Ka uru ki te tahua matua.
- Tauranga USB: For connecting USB storage devices for media playback and recording.
4.2 Paewhiri Whakamuri
Kei te papa o muri ngā tauranga hononga katoa e tika ana:
- ANT IN: Connects to your antenna for receiving digital signals.
- HDMI PUTA: Connects to an HDMI-compatible TV for high-definition output.
- AV OUT (RCA): Connects to older analog TVs using composite video (yellow) and stereo audio (red/white) cables.
- COAXIAL OUT: Digital audio output (if available).
- DC IN: Connects to the provided AC/DC power adapter.
5. Tatūnga
5.1 Te Hononga i te Pūtahuri
- Tūhono Antenna: Connect your digital antenna to the ANT KI port on the rear of the DTV-700.
- Hono ki te pouaka whakaata:
- For Analog TVs: Use the supplied AV cable. Connect the yellow plug to the video input of your TV, and the red/white plugs to the corresponding audio inputs. Connect the other end to the AV MAI ports on the DTV-700.
- For Digital/HDTVs: Use an HDMI cable (not included). Connect one end to the HDMI PUTA port on the DTV-700 and the other end to an available HDMI input on your TV.
- Hono Hono: Plug the AC/DC power adapter into the DC IN port on the DTV-700, then plug the adapter into a wall outlet.
5.2 Tatūnga Tuatahi me te Matawai Hongere
- Turn on your TV and select the correct input source (e.g., AV1, HDMI1) that corresponds to your connection.
- Power on the DTV-700 using the remote control or the power button on the front panel.
- The first time you power on, an initial setup wizard may appear. Follow the on-screen prompts to select your language and country.
- Initiate an automatic channel scan. This will search for all available digital channels in your area. This process may take several minutes. Do not interrupt the scan.
- Once the scan is complete, the converter will tune to the first available channel.
6. Nga Tohutohu Whakahaere
6.1 Nga Mahi Mana Mamao
The remote control provides full functionality for your DTV-700. Ensure two AAA batteries are inserted correctly (batteries not included).
- MANA: Ka whakakā, whakaweto rānei i te kōwae.
- CH +/-: Ka huri i nga hongere ki runga, ki raro ranei.
- VOL +/-: Te whakatika i te rahinga.
- MENU: Ka uru ki te tahua matua.
- EXIT: Ka puta i te tahua, mahi ranei o naianei.
- KORERO: E whakaatu ana i ngā mōhiohio hongere o nāianei.
- Āe / Pātene Whakatere: Ka whakaū i ngā kōwhiringa me te whakatere i ngā tahua.
- REKE: Starts recording the current program.
- PUREI/WHAKAMUTUNGA, MUTU, FF, REW: Mana purei pāpāho.
- USB: Switches to USB media playback mode.
6.2 Channel Navigation
Whakamahia te CH +/- buttons on the remote or front panel to browse channels. You can also directly enter a channel number using the numeric keypad on the remote.
6.3 Tahua Matua
Pehia te MENU button to access settings for Program, Picture, Sound, Time, Option, and System. Use the navigation buttons to select options and OK ki te whakau.
7. Whakahoki Media
The DTV-700 supports media playback from a USB storage device (e.g., USB flash drive, external hard drive). Insert your USB device into the USB port on the front panel.
7.1 Ngā Hōputu Tautoko
- Waiata: MP3, WMA
- Whakaahua: JPG, BMP, PNG
- Ataata: MKV, AVI, DIVX, XVID, MOV, VOB, FLV, DAT, MPEG, MP4, TS
7.2 Te purei Media
- Whakauruhia he taputapu rokiroki USB ki te tauranga USB.
- Pehia te USB button on the remote control or navigate to the 'Multimedia' section in the main menu.
- Select the desired media type (Music, Photo, Video) and browse your files.
- Use the navigation buttons to select a file me te pehi OK ki te takaro.
8. Recording Features
The DTV-700 allows you to record live TV programs to a connected USB storage device.
8.1 Hopu Inamata
I a koe e mātaki ana i tētahi hōtaka, pēhi i te pātene REC button on the remote control to start recording. Press KATI ki te whakamutu i te rekoata.
8.2 Scheduled Recording (PVR)
Access the PVR (Personal Video Recorder) or Schedule menu via the main menu to set up timed recordings. You will need to specify the channel, start time, end time, and date for the recording.
9. Te Raru
| Raruraru | Te Take Taea / Rongoa |
|---|---|
| Kaore he pikitia, he tangi ranei |
|
| Poor picture quality / No channels |
|
| Ko te mana mamao kaore e mahi |
|
| Ko te pāpāho USB kaore i te purei |
|
10. Whakatakotoranga
- Tauira: DTV-700
- Waitohu: Coby
- Tāuru: Digital TV Antenna (ATSC/DVB-T/T2 compatible, depending on region)
- Putanga: HDMI, AV (RCA Composite Video/Audio)
- Tauranga USB: Yes (for media playback and PVR)
- Supported Media Formats:
- Music: MP3, WMA
- Whakaahua: JPG, BMP, PNG
- Video: MKV, AVI, DIVX, XVID, MOV, VOB, FLV, DAT, MPEG, MP4, TS
- Mana: AC/DC Adapter (Input: 100-240V ~ 50/60Hz, Output: typically 5V-12V DC)
- Ahu: Approximately 20 x 15.6 x 6.2 cm (Package dimensions)
- Taumaha: Approximately 490 g (Package weight)
- Pūhiko Mana Mamao: 2 x AAA (kaore i whakauruhia)
11. Tiaki
To ensure the longevity and optimal performance of your DTV-700 converter:
- Te horoi: Use a soft, dry cloth to clean the exterior of the unit. Do not use liquid cleaners or abrasive chemicals.
- Whakahau: Me whakarite kia kaua e araia nga kohao hau kia kore e wera rawa.
- Rokiroki: Mēnā he roa te wā e penapena ana i te kōwae, momotuhia mai i te hiko ka penapena ki tētahi wāhi mātao, maroke.
12. Pūtāhui me te Tautoko
For warranty information and technical support, please refer to the warranty card included with your product or visit the official Coby webpae. Puritia to riirii hoko hei tohu mo te hoko mo nga kereme whakamana.
Coby is committed to providing quality products and customer satisfaction. If you encounter any issues not covered in this manual, please contact Coby customer service for assistance.


