1. Kupu Whakataki
Mauruuru koe mo te whiriwhiri i te KOLINK Refractor Midi-Tower computer case. This manual provides essential information for the proper installation, operation, and maintenance of your new PC chassis. Please read this manual carefully before beginning the assembly process to ensure a smooth and safe build.
1.1 Nga Korero Haumaru
- Momotuhia i nga wa katoa te hiko mai i te putanga o te pakitara i mua i te whakauru, te tango ranei i etahi waahanga.
- Mauria he whitiki ringaringa ārai-pūmau hei ārai i te kino o te tukunga hiko pūmau (ESD) ki ngā wāhanga tairongo.
- Handle components with care. Avoid touching pins or circuit boards directly.
- Tiakina nga waahanga iti me nga taputapu mai i nga tamariki.
- Me whakarite kia tika te hau huri noa i te pouaka hei ārai i te wera nui.
2. Ihirangi mokete
Tena koa manatoko kei roto i tō kete ngā taonga katoa e whai ake nei:
- KOLINK Refractor Midi-Tower Chassis
- Accessory Box (containing screws, standoffs, cable ties, etc.)
- Pukapuka Kaiwhakamahi (tenei tuhinga)
If any items are missing or damaged, please contact your retailer or KOLINK support.
3. Hua Neke Atuview
Familiarize yourself with the key features and components of your KOLINK Refractor Midi-Tower.
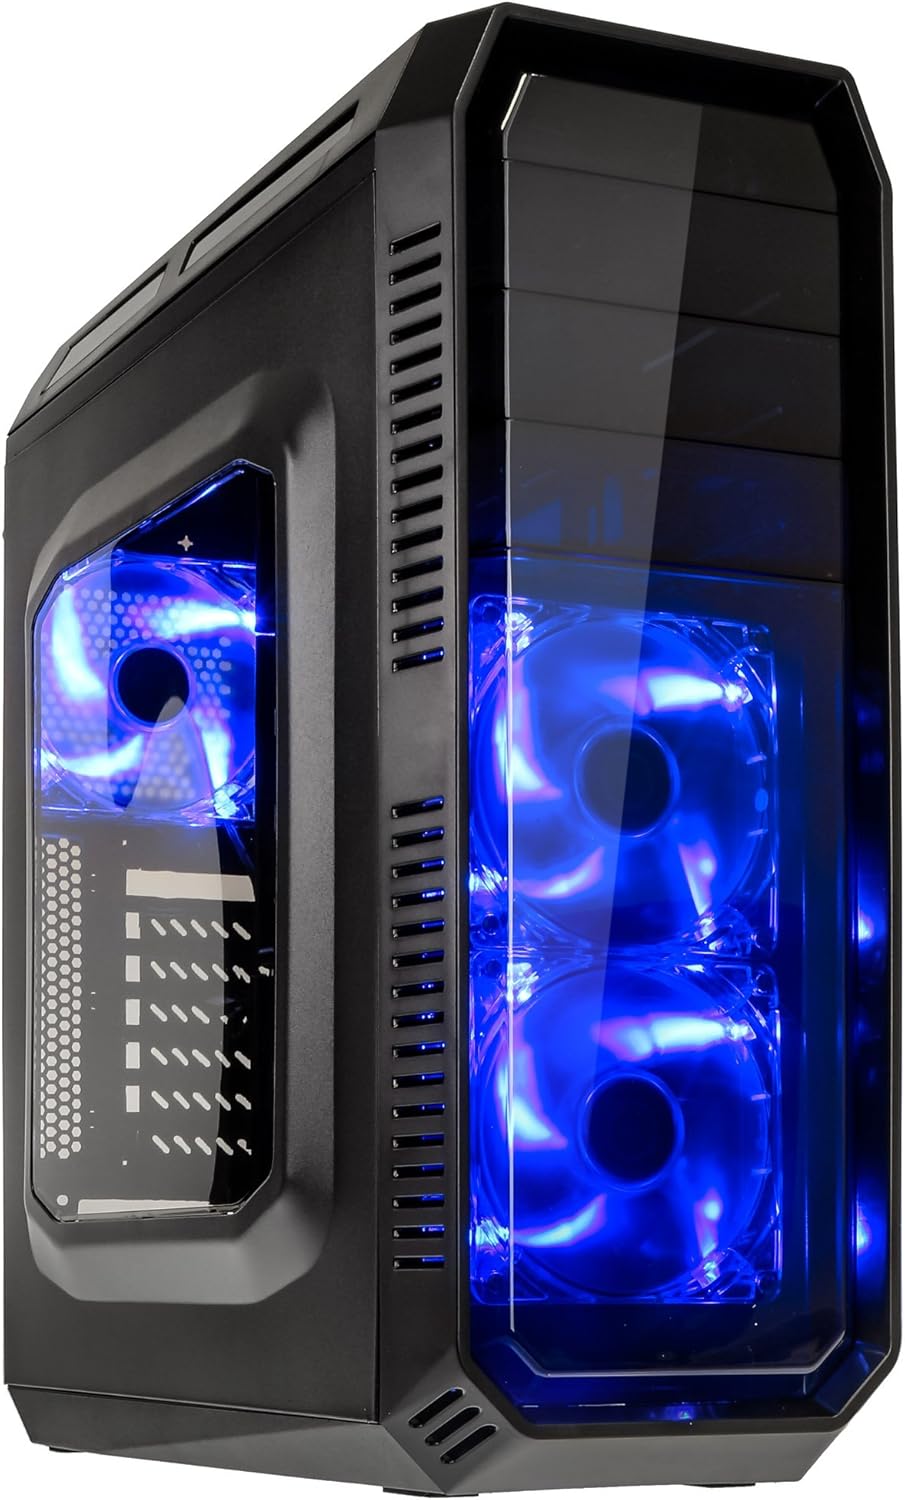
This image displays the KOLINK Refractor Midi-Tower from a front-left perspective, highlighting its sleek black design. The front panel features two pre-installed 120mm blue LED fans, visible through a transparent section, providing both cooling and aesthetic appeal. The left side panel includes a window, allowing visibility of internal components.

A top-front view of the case, illustrating the conveniently located I/O panel on the top. This panel includes two USB 3.0 ports, two USB 2.0 ports, and audio input/output jacks. The top surface also features a mesh area for additional ventilation, contributing to optimal airflow.

This image shows the right side panel of the KOLINK Refractor Midi-Tower. It is a solid black panel, designed for cable management behind the motherboard tray, ensuring a clean and organized interior.

This composite image provides three distinct views of the case. The left panel shows the front with its blue LED fans. The middle panel displays the rear of the case, featuring the motherboard I/O cutout, seven expansion slots, and a 120mm fan mount. The right panel offers a close-up of the top I/O ports, including USB 3.0, USB 2.0, and audio jacks.

A detailed close-up of the top I/O panel. It clearly shows the power and reset buttons, two USB 3.0 ports, two USB 2.0 ports, and the microphone and headphone jacks, providing easy access for peripherals.
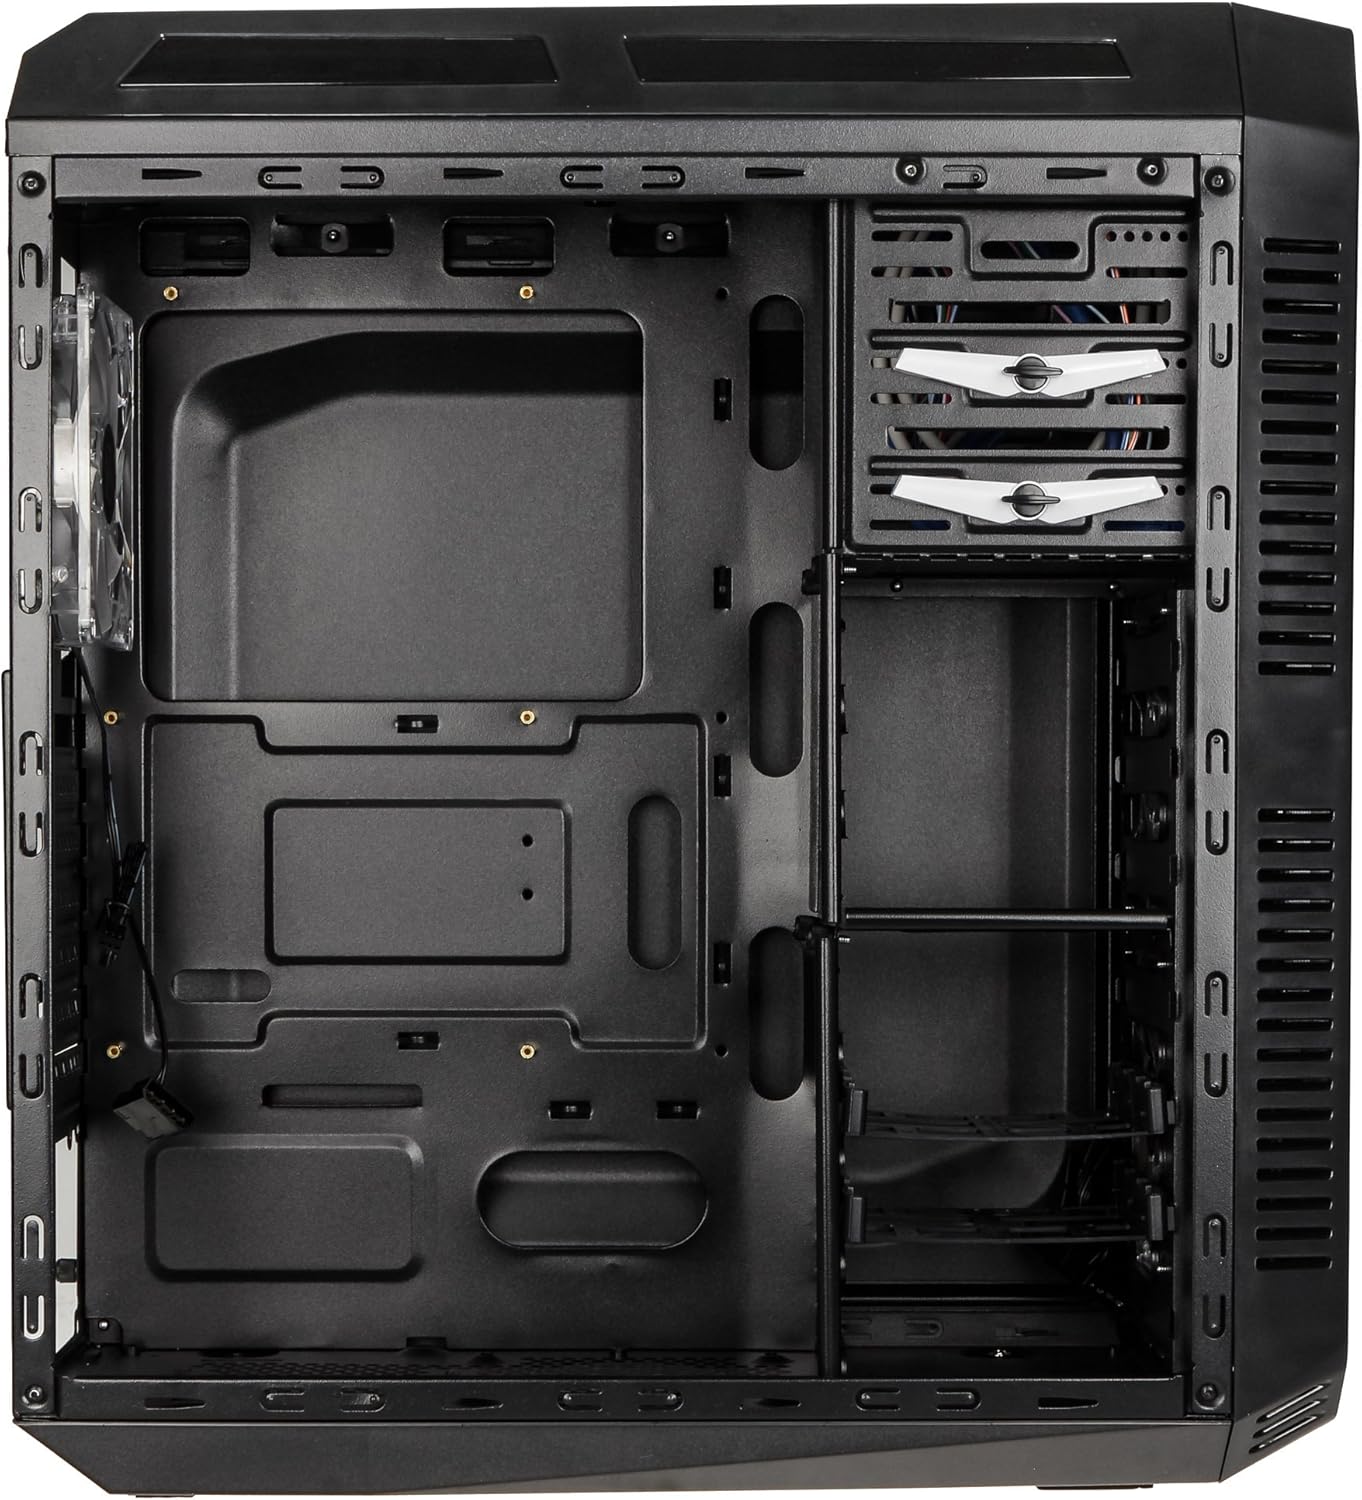
This image presents the interior of the case from the left side, revealing the spacious motherboard tray compatible with ATX motherboards. It features a large cutout behind the CPU area for easy cooler installation and multiple grommeted holes for efficient cable routing.

He roto view from the right side, focusing on the drive bay configuration. The case offers three external 5.25-inch bays and seven internal 2.5/3.5-inch drive bays, providing ample storage expansion options.

A closer look at the internal drive bays, illustrating the design for mounting 2.5-inch or 3.5-inch storage drives. These bays are designed for easy installation and removal of hard drives and SSDs.

Ka whakaratohia e tēnei whakaahua he āhua ā-roto view looking down from the top, showcasing the pre-installed 120mm blue LED fan at the rear for exhaust. The top panel's mesh area for additional fan mounting is also visible, contributing to overall system cooling.
4. Tatūnga me te Tāuta
Follow these steps to install your computer components into the KOLINK Refractor Midi-Tower.
4.1 Te Whakarite i te Take
- Whakanohoia te keehi ki runga i te mata papatahi, pumau.
- Remove the left and right side panels by unscrewing the thumbscrews at the rear of the case and sliding the panels backward.
4.2 Whakaaturanga Papa Pouaka
- Install the I/O shield that came with your motherboard into the cutout at the rear of the case.
- Ensure the correct motherboard standoffs are installed for your ATX motherboard. Adjust or add standoffs as necessary using the provided accessory kit.
- Āta whakanohoia tō papahoahoa ki runga i ngā tūāpapa, me te whakarite i ngā kōhao tīwiri.
- Whakauhia te papahoahoa ki ngā tīwiri e tika ana mai i te kete taputapu.
4.3 Tāutanga Pūnaha Hiko
- Position your ATX power supply unit (PSU) in the designated compartment at the bottom rear of the case.
- Align the PSU with the screw holes at the rear of the case.
- Secure the PSU using the screws provided with your power supply.
4.4 Tāuta Puku
5.25-inch External Drives:
- Remove the desired 5.25-inch bay cover from the front panel.
- Slide your optical drive or other 5.25-inch device into the bay from the front.
- Secure the drive using the tool-less clips or screws.
2.5/3.5-inch Internal Drives:
- Locate the internal drive bays.
- Mount your 2.5-inch SSD or 3.5-inch HDD into the drive trays.
- Slide the populated drive trays back into the drive cage until they click into place.
4.5 Tāutanga Kāri Whakawhanui
- Tangohia nga uhi mokamoka roha e tika ana kei muri o te keehi.
- Insert your graphics card or other PCIe expansion card into the corresponding slot on the motherboard.
- Secure the card with the provided screws.
4.6 Whakahaere taura
Utilize the cable routing holes and tie-down points behind the motherboard tray to organize cables. This improves airflow and gives your build a cleaner appearance.
4.7 Fan Installation (Optional)
The case comes with two 120mm blue LED fans pre-installed at the front and one 120mm blue LED fan at the rear. Additional fan mounting locations include:
- Top: 1x 120/140mm fan
- Bottom: 1x 120mm fan (under the PSU)
Install additional fans as needed for optimal cooling, ensuring proper airflow direction.
5. Nga Tohutohu Whakahaere
5.1 Hiko Tuatahi
- Once all components are installed and cables are connected, replace both side panels.
- Tūhonohia tō mata, papapātuhi, kiore me ētahi atu taputapu tāpiri.
- Connect the power cable to the PSU and then to a wall outlet.
- Press the power button on the top I/O panel to start your system.
5.2 Front Panel I/O Usage
The top I/O panel provides convenient access to:
- Tauranga USB 3.0 (x2): Mō te whakawhiti raraunga tere-teitei me ngā pūrere hototahi.
- Tauranga USB 2.0 (x2): Hei hono i ngā taputapu USB paerewa.
- Audio Jacks (Headphone/Microphone): Hei hono i ngā pane whakarongo, i ngā taputapu oro o waho rānei.
- Pātene Hiko: Hei whakakā/whakaweto i te pūnaha.
- Patene Tautuhi Anō: Hei whakaara ano i te punaha.
5.3 rama rama
The pre-installed front and rear fans feature blue LED lighting, which illuminates when the system is powered on, adding an aesthetic element to your build.
6. Tiaki
Regular maintenance helps ensure optimal performance and longevity of your computer system.
6.1 Te horoi
- Tātari Puehu: The case includes a removable dust filter under the PSU. Regularly remove and clean this filter to prevent dust buildup and maintain airflow.
- Waho: Horoia nga mata o waho ki te ngohengohe, damp kakahu. A ape i nga kai horoi abrasive.
- roto: Periodically use compressed air to remove dust from internal components and fan blades. Ensure the system is powered off and unplugged before cleaning the interior.
6.2 Arotautanga Rererangi
Ensure that the case's ventilation areas (front, top, rear, bottom) are not obstructed. Proper cable management also contributes significantly to unrestricted airflow within the case.
7. Te Raru
Ko tenei waahanga e aro ana ki nga take noa ka pa ki a koe.
7.1 Nga take noa
- Kāore te Pūnaha i te Hiko:
- Check if the power cable is securely connected to both the PSU and the wall outlet.
- Me whakarite kei te tūranga 'ON' te pana PSU.
- Manatokohia kei te hono tika te taura pātene mana o te papa o mua ki te papahoahoa.
- Confirm all internal power cables (24-pin ATX, CPU, GPU) are properly seated.
- Ngā Pā Kāore e Hurihuri:
- Check if the fan power cables are correctly connected to the motherboard or fan controller.
- Ensure the system is receiving power.
- Tauranga USB Kaore i te Mahi:
- Verify that the front panel USB 3.0 and USB 2.0 headers are correctly connected to the motherboard.
- Me whakarite kei te tika te mahi a te pūrere e hono ana koe.
- Audio Ports Not Working:
- Check that the front panel audio header (HD Audio) is correctly connected to the motherboard.
- Confirm your audio drivers are installed and up to date.
For further assistance, please refer to your motherboard manual or contact KOLINK support.
8. Whakatakotoranga
Nga korero taipitopito hangarau mo te KOLINK Refractor Midi-Tower.
| Āhuahira | Whakatakotoranga |
|---|---|
| Ingoa Tauira | Refractor Midi-Tower |
| Ahu (W x H x D) | 190 x 475 x 445 mm (7.5 x 18.7 x 17.5 inihi) |
| Rauemi | Steel (body), Plastic (front) |
| Taumaha | Approx. 4.8 kg (10.6 lbs) |
| Tae | Pango |
| Tauwehe Puka | Pourewa Midi |
| Papamatua Hototahi | ATX |
| Ngā Wāhi Puku o Waho | 3x 5.25-inihi |
| Nga whanga Puku Roto | 7x 2.5/3.5-inch |
| Roha Slots | 7 |
| Paanui kua whakauruhia i mua | 2x 120mm (front, blue LED), 1x 120mm (rear, blue LED) |
| Fan Support (Total Possible) | Front: 2x 120mm, Top: 1x 120/140mm, Bottom: 1x 120mm, Rear: 1x 120mm |
| Paepae I/O | 2x USB 3.0, 2x USB 2.0, 1x Audio In/Out |
| Morahi Te Roa Kaari Whakairoiro | 360 mm |
| Teitei Matao CPU Morahi | 174 mm |
| PSU Compatibility | Standard ATX (optional) |
| Tātari Puehu | Floor (under PSU, removable) |
9. Pūtāhui me te Tautoko
KOLINK products are manufactured to high-quality standards. This product is covered by a manufacturer's warranty against defects in materials and workmanship. The specific terms and duration of the warranty may vary by region and retailer.
Please retain your proof of purchase for warranty claims. For technical support, warranty inquiries, or to report missing/damaged parts, please contact your point of purchase or visit the official KOLINK webpae mo nga rauemi tautoko.
KOLINK Official Webpae: www.kolink.eu (Please note: This is a general link and may not lead directly to a support page for this specific model.)


