1. Kupu Whakataki
This user manual provides comprehensive instructions for the assembly, operation, maintenance, and troubleshooting of your Amazon Basics LCD Computer Monitor Free-Standing Desk Stand Riser. Designed to enhance your ergonomic workspace, this stand allows for flexible adjustment of your monitor to achieve optimal viewnga koki me te whakamarie.

Whakaahua 1.1: Mua view of the Amazon Basics LCD Computer Monitor Stand Riser.
2. Nga ahuatanga
- Whakatikatika Teitei: Set the height of your LCD for a comfortable computing experience.
- Multi-directional Movement: With fingertip effort, raise or lower your display, pan left/right, tilt, and rotate.
- Raukaha Taumaha: Supports monitors weighing between 6-16 pounds.
- Hototahitanga Rahi Mata: Designed for screens up to 24 inches.
- Vertical Height Adjustment: Offers 5 inches of monitor height adjustability.
- Hurihuri: Monitor can be used in portrait or landscape orientation (360° rotation).
- Rangi Taputapu: +25/-5 degree tilt capability.
- Rawa Pan: 270° right/left pan from the base.
- Hototahitanga VESA: Supports VESA 100 x 100 mm and 75 x 75 mm mounting patterns.
- Whakaha Uepu: Integrated cable pass-through channel near the base keeps cables organized.
3. Ihirangi mokete
Kia tino mōhio kei te wātea ngā wāhanga katoa i mua i te tīmatanga o te huihuinga:
- Monitor Stand Base and Arm Assembly
- Pereti Whakamau VESA
- Mounting Screws (various sizes for VESA 75x75mm and 100x100mm)
- Allen Key (for adjustments and assembly)

Figure 3.1: Typical components included with the monitor stand.
4. Tohutohu Tatūnga
- Whakapaia te Tu: Place the monitor stand base on a stable, flat surface. Ensure the Allen key is accessible, often stored at the bottom of the base.
- Whakapirihia te Pereti VESA ki te Aroturuki: Carefully lay your monitor face down on a soft, clean surface to prevent scratches. Align the VESA mounting plate with the screw holes on the back of your monitor. Use the appropriate mounting screws (M4 or M5, depending on your monitor) to secure the plate to the monitor. Do not overtighten.
- Mount Monitor to Stand: With the VESA plate attached to your monitor, carefully lift the monitor and slide the VESA plate onto the arm of the stand. Ensure it clicks securely into place.
- Adjust Tension (if necessary): If the monitor sags or is too stiff to adjust, use the included Allen key to adjust the tension screws on the arm. These are typically located near the VESA plate attachment point or along the arm's pivot points. Turn clockwise to increase tension (stiffer movement) and counter-clockwise to decrease tension (looser movement).
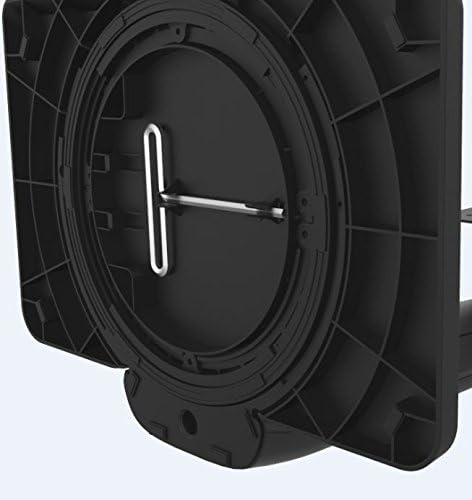
Figure 4.1: Allen key storage on the underside of the stand base.
5. Nga Tohutohu Whakahaere
The Amazon Basics LCD Monitor Riser offers a range of adjustments for optimal viewte whakamarie:
- Whakatikatika Teitei: Gently push or pull the monitor up or down to your desired height. The stand is designed to hold its position once released.
- Whakaritea Tita: Grasp the top and bottom edges of your monitor and gently tilt it forward or backward to achieve the perfect viewkoki.
- Te Whakarerekētanga o te Parai: Rotate the entire stand base left or right on your desk for horizontal viewnga whakatikatika.
- Rotation (Portrait/Landscape): Rotate the monitor 360 degrees to switch between landscape and portrait orientations. Ensure no cables are tangled during rotation.

Figure 5.1: Monitor on stand in landscape orientation.

Figure 5.2: Monitor on stand in portrait orientation, side view.
5.1. Ataata Hua Whaimana
Video 5.1: An official product video demonstrating the features and adjustments of the Amazon Basics LCD Monitor Stand Adjustable Riser.
6. Tiaki
- Te horoi: Whakamahia he kakahu ngohengohe, maroke hei muru i te turanga. Mo nga tohu pakeke, he paku damp ka taea te whakamahi i te kakahu me te hopi ngawari, me te whakamaroke. A ape i te kai horoi, te whakarewa ranei.
- Takitaki auau: Periodically check all screws and connections to ensure they are secure. Retighten if necessary using the provided Allen key.
- Whakaha Uepu: Ensure cables are routed neatly through the cable pass-through channel to prevent strain or damage.
7. Te Raru
- Aroturukihia te Heke, te Kore rānei e Noho Ara:
This indicates that the tension on the arm is too loose. Use the Allen key to tighten the tension screws on the arm until the monitor holds its position securely. Refer to Section 4, Step 4 for guidance.
- Monitor is Too Stiff to Adjust:
The tension on the arm may be too tight. Use the Allen key to loosen the tension screws slightly until movement is smooth but still holds position.
- Ngā wiri o te aroturuki:
Ensure the stand is placed on a stable, flat surface. Check that all assembly screws are tightened securely, including those attaching the VESA plate to the monitor and the monitor to the stand.
- Cables are Tangled:
Utilize the integrated cable pass-through channel at the base of the stand to route cables neatly. This prevents tangling and keeps your workspace tidy.
8. Whakatakotoranga
| Huanga | Uara |
|---|---|
| Tau tauira | K001575 |
| Waitohu | Amazon Basics |
| Rauemi | Konumohe |
| Tae | Pango |
| Taumaha Tūemi | 5 pauna (2.27 kg) |
| Rahi Hua (LxWxH) | 12 x 10.2 x 15.8 inihi (30.5 x 25.9 x 40.1 cm) |
| Rahi Mata Mōrahi e Tautokona ana | 24 Inihi |
| Weight Adjustable Range | 6-16 pounds (2.7-7.2 kg) |
| Te Whakaritenga Teitei | 5 inihi (12.7 cm) |
| Koki Honga | + 25 / -5 tohu |
| Koki Panui | 270 degrees (right/left from base) |
| Te hurihanga | 360 degrees (portrait/landscape) |
| VESA Hototahi | 75x75mm, 100x100mm |
9. Pūtāhui me te Tautoko
This product is backed by an Amazon Basics 1-Year Limited Warranty. For detailed warranty information or technical support, please refer to the official Amazon Basics webpaetukutuku, whakapā atu ranei ki te ratonga kaihoko a Amazon.
Tautoko Aipurangi: Haerenga Ratonga Kaihoko Amazon


