1. Kupu Whakataki
This manual provides detailed instructions for the operation and maintenance of your Electro-Harmonix Oceans 11 Reverb Pedal. Please read this guide thoroughly to ensure proper usage and to fully explore the capabilities of this versatile effects unit.
2. Hua Neke Atuview
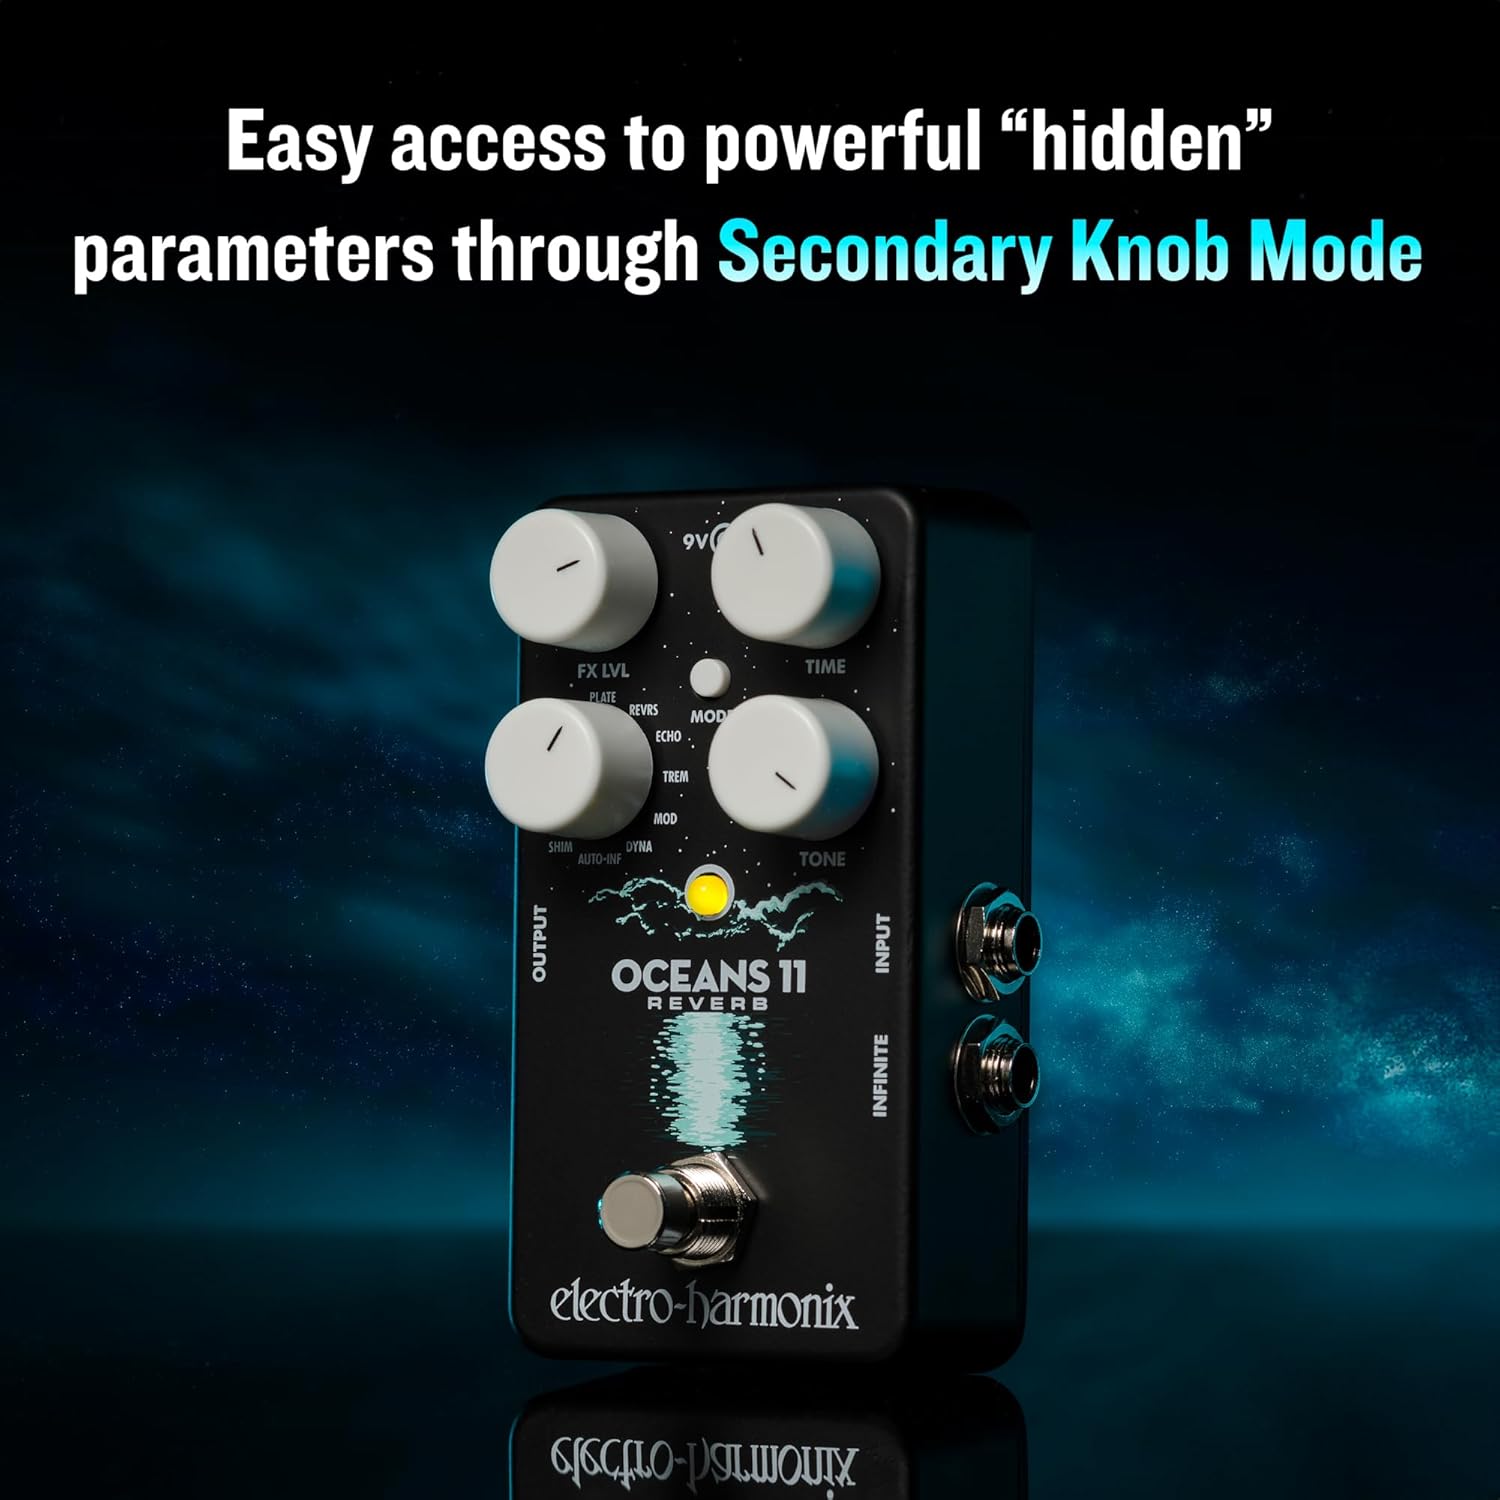
The Electro-Harmonix Oceans 11 is a compact and feature-rich reverb pedal offering 11 distinct reverb styles. It provides extensive control over various parameters, including access to powerful hidden functions through its Secondary Knob Mode. The pedal is designed to produce a wide range of reverberation effects, from classic sounds to unique ambient textures, and includes a power supply for immediate use.
Ko nga ahuatanga matua ko:
- Tails Switch: Selects whether the reverb fades out naturally or stops immediately upon bypass.
- Secondary Knob Mode: Provides access to additional parameters for fine-tuning each reverb algorithm.
- Infinite Reverb: Capable of generating sustained reverb washes that can be played over.
- Includes a dedicated power supply.

3. Nga Mana me nga Hononga
The Oceans 11 pedal features four primary control knobs, a mode button, a footswitch, and input/output jacks.
3.1 Pupuri Mana
- FX LVL: Controls the mix level of the reverb effect.
- WĀ: Adjusts the decay time or length of the reverb.
- TONE: Shapes the tonal character of the reverb.
- AHUNGA: Selects between the 11 different reverb algorithms.
3.2 Mode Button and Secondary Knob Mode
Pressing the small MODE button cycles through the 11 reverb types. Additionally, each reverb mode has hidden secondary parameters accessible by holding down the MODE button and then turning the FX LVL, WĀ, ranei TONE knobs. The LED will change color to indicate Secondary Knob Mode is active.
3.3 Footswitch and Infinite Reverb
The footswitch engages or bypasses the effect. It also has a dual function for activating infinite reverb. Pressing and holding the footswitch in most settings will sustain the current reverb, allowing you to play over it.

3.4 Tails Switch
A small toggle switch on the pedal allows you to select between two bypass modes: Tails On (reverb decays naturally after bypass) or Tails Off (reverb cuts off immediately upon bypass).

3.5 Input/Output Jacks and Power Input
- Whakauru: 1/4-inch audio input jack for your instrument.
- PUTANGA: 1/4-inch audio output jack to your ampte pētera whakakaha, te pētera rānei e whai ake nei.
- INFINITE: External jack for connecting an optional footswitch to control the Infinite Reverb function.
- Tāuru Mana 9V: Connect the provided 9V DC power supply here.

4. Reverb Modes
The Oceans 11 offers 11 distinct reverb algorithms. Each mode provides a unique sonic character and can be further customized using the secondary knob functions.

4.1 HRORO
Emulates the rich, reverberant sound of a large concert hall.
4.2 KOA
A new algorithm that pays homage to the classic Fender 6G15 tube spring reverb, delivering authentic drip and boing. (See video demonstration at 5:16)
4.3 PATI
Provides the lush, warm reverb sound originally created using large metal plates in recording studios. (See video demonstration at 0:55)
4.4 REVRS (Reverse)
Emulates the unique reverse reverb effect where a note's reverb fades in backwards. (See video demonstration at 2:33)
4.5 EHO
Sends a recirculating echo through the Plate reverb, creating crisp, clear delays smudged by airy plate reverb. (See video demonstration at 10:59)
4.6 TREM
Combines reverb with tremolo applied to both the wet and dry mix of a Hall reverb, offering three different tremolo shapes. (See video demonstration at 3:20)
4.7 MOD
Modulated reverb with three modes: Chorus laced onto reverb tails, Flanger wrapped around reverb tails, or a combination of both. (See video demonstration for Chorus at 9:48 and Flange at 10:31)
4.8 DYNA (Dynamic)
Offers three dynamic reverb effects: Swell (silences attacks before blooming tails), Gate (reverb tail passes through a noise gate), and Duck (compresses reverb while playing, fades in when resting). (See video demonstration for Swell at 6:52 and Gate at 7:37)
4.9 AUTO-INF (Auto-Infinite)
Automatically triggers a reverb wash for each note or chord, crossfading to the new reverb when a new note is struck. (See video demonstration at 8:46)
4.10 SHIM (Shimmer)
Generates a rich octave-shifted reverb wash that modulates and blossoms behind your signal. (See video demonstration at 1:51)
4.11 POLY (Polyphonic)
Features two configurable bi-directional pitch shifts operating on your pre-reverb signal, allowing for disorienting soundtracks or creative harmonies. (See video demonstration for 12 String at 7:55 and Organ at 8:21)
4.12 Ngā Whakaaturanga Ataata
For a comprehensive demonstration of the various reverb modes and their sounds, please watch the official product video below:
5. Tatūnga
5.1 Hononga Hiko
Connect the provided 9V DC power supply to the 9V power input jack on the side of the pedal. Ensure the power supply meets the pedal's requirements (9V DC, center-negative).
5.2 Hononga Ororongo
- Honoa to taputapu (hei tauira, kita) ki te WHAKATOHU Jack te whakamahi i te taura taputapu 1/4-inihi paerewa.
- Honoa te PUTANGA Jack ki to amplifier or the input of the next pedal in your signal chain using another 1/4-inch instrument cable.
6. Nga Tohutohu Whakahaere
6.1 Selecting Reverb Modes
Pehia te MODE button repeatedly to cycle through the 11 reverb types. The LED will indicate the currently selected mode (refer to the pedal's graphic for mode labels).
6.2 Using Secondary Knob Mode
To access secondary parameters for a selected reverb mode, hold down the MODE button. While holding, turn the FX LVL, WĀ, ranei TONE knobs to adjust their respective secondary functions. Release the MODE button to return to primary knob control.
6.3 Activating Infinite Reverb
To activate infinite reverb, press and hold the footswitch. The reverb will sustain indefinitely. Release the footswitch to disengage infinite reverb. An optional external footswitch can be connected to the KAUPAPA jack for this function.
6.4 Tails Switch Functionality
Whakaritea te NGA hiku switch to the desired position. In the 'On' position, reverb trails will naturally decay after the pedal is bypassed. In the 'Off' position, the reverb will cut off immediately when bypassed.
7. Whakatakotoranga
| Whakatakotoranga | Uara |
|---|---|
| Taumaha Tūemi | 1.28 pauna (0.58 Kirokaramu) |
| Hunga Hua | 4.5 x 2.75 x 2.1 inihi (11.43 x 6.98 x 5.33 cm) |
| Tauira Tuemi | Oceans 11 |
| Puna Mana | Electric (9 Volts DC, center-negative) |
| Momo Tuhono | 1/4 inihi (6.35mm) jack ororongo |
| Atanga Pūmārō | 1/4-inihi Ororongo |
| Hōputu Tohu | Tauritenga |
8. Tiaki
To ensure the longevity and optimal performance of your Oceans 11 pedal, follow these maintenance guidelines:
- Kia ma te hikoi me te noho kore i te puehu me te para. Whakamahia he kakahu ngohengohe, maroke mo te horoi.
- A ape i te tuku i te hikoi ki te wera nui, te makuku, te ra tika ranei.
- Do not use abrasive cleaners or solvents, as these can damage the finish and internal components.
- Ensure all cable connections are secure before operation.
- Always use the specified 9V DC center-negative power supply. Using an incorrect power supply can damage the unit and void the warranty.
9. Te Raru
If you encounter issues with your Oceans 11 pedal, refer to the following common troubleshooting steps:
- Kore Oro:
- Tirohia nga hononga taura katoa (taputapu ki te whakauru, putanga ki amp).
- Manatokohia kei te hono tika te pūnaha hiko, ā, kei te mahi tika hoki.
- Kia tino mohio koe ki tāu taputapu me amplifier are working correctly by testing them without the pedal.
- Check the FX LVL knob; if it's set to minimum, no effect sound will be heard.
- Te Painga Kaore i te Whakauru:
- Press the footswitch firmly to ensure it engages. The LED should illuminate when the effect is active.
- Haruru/Hūmu:
- Me whakarite kei te whakamahi koe i tētahi pūtake hiko kounga teitei, motuhake.
- Tirohia mo nga taura he.
- Nekehia te pētera kia matara atu i ētahi atu taputapu hiko ka pāngia pea e te pokanoa.
- Reverb Cuts Off Abruptly:
- Tirohia te turanga o te NGA hiku switch. If it's in the 'Off' position, the reverb will cut off when bypassed.
If these steps do not resolve your issue, please contact Electro-Harmonix customer support for further assistance.


