1. Kupu Whakataki
Welcome to the user manual for your Modecom Oberon Pro Glass USB 3.0 White PC Case. This manual provides essential information for the proper installation, operation, and maintenance of your computer chassis. Please read this manual thoroughly before beginning assembly to ensure correct setup and to prevent damage to your components or the case itself.
Whakatupato Haumaru:
- Momotuhia i nga wa katoa te hiko mai i te putanga o te pakitara i mua i te whakauru, te tango ranei i etahi waahanga.
- Handle components with care to avoid electrostatic discharge (ESD). Consider using an anti-static wrist strap.
- Kia matara atu nga waahanga iti me nga taonga takai mai i nga tamariki.
- Me whakarite kia tika te hau huri noa i te pouaka hei ārai i te wera nui.
2. Hua Neke Atuview
The Modecom Oberon Pro Glass is a stylish mid-tower PC case designed to house your computer components. It features a tempered glass side panel for showcasing your build and a clean white finish. The front panel includes convenient USB 3.0 ports for high-speed data transfer.
Whakaahua 2.1: Mua-matau view of the Modecom Oberon Pro Glass PC Case. This image displays the white exterior, the front panel with ventilation, and the top-mounted I/O ports including USB 3.0.
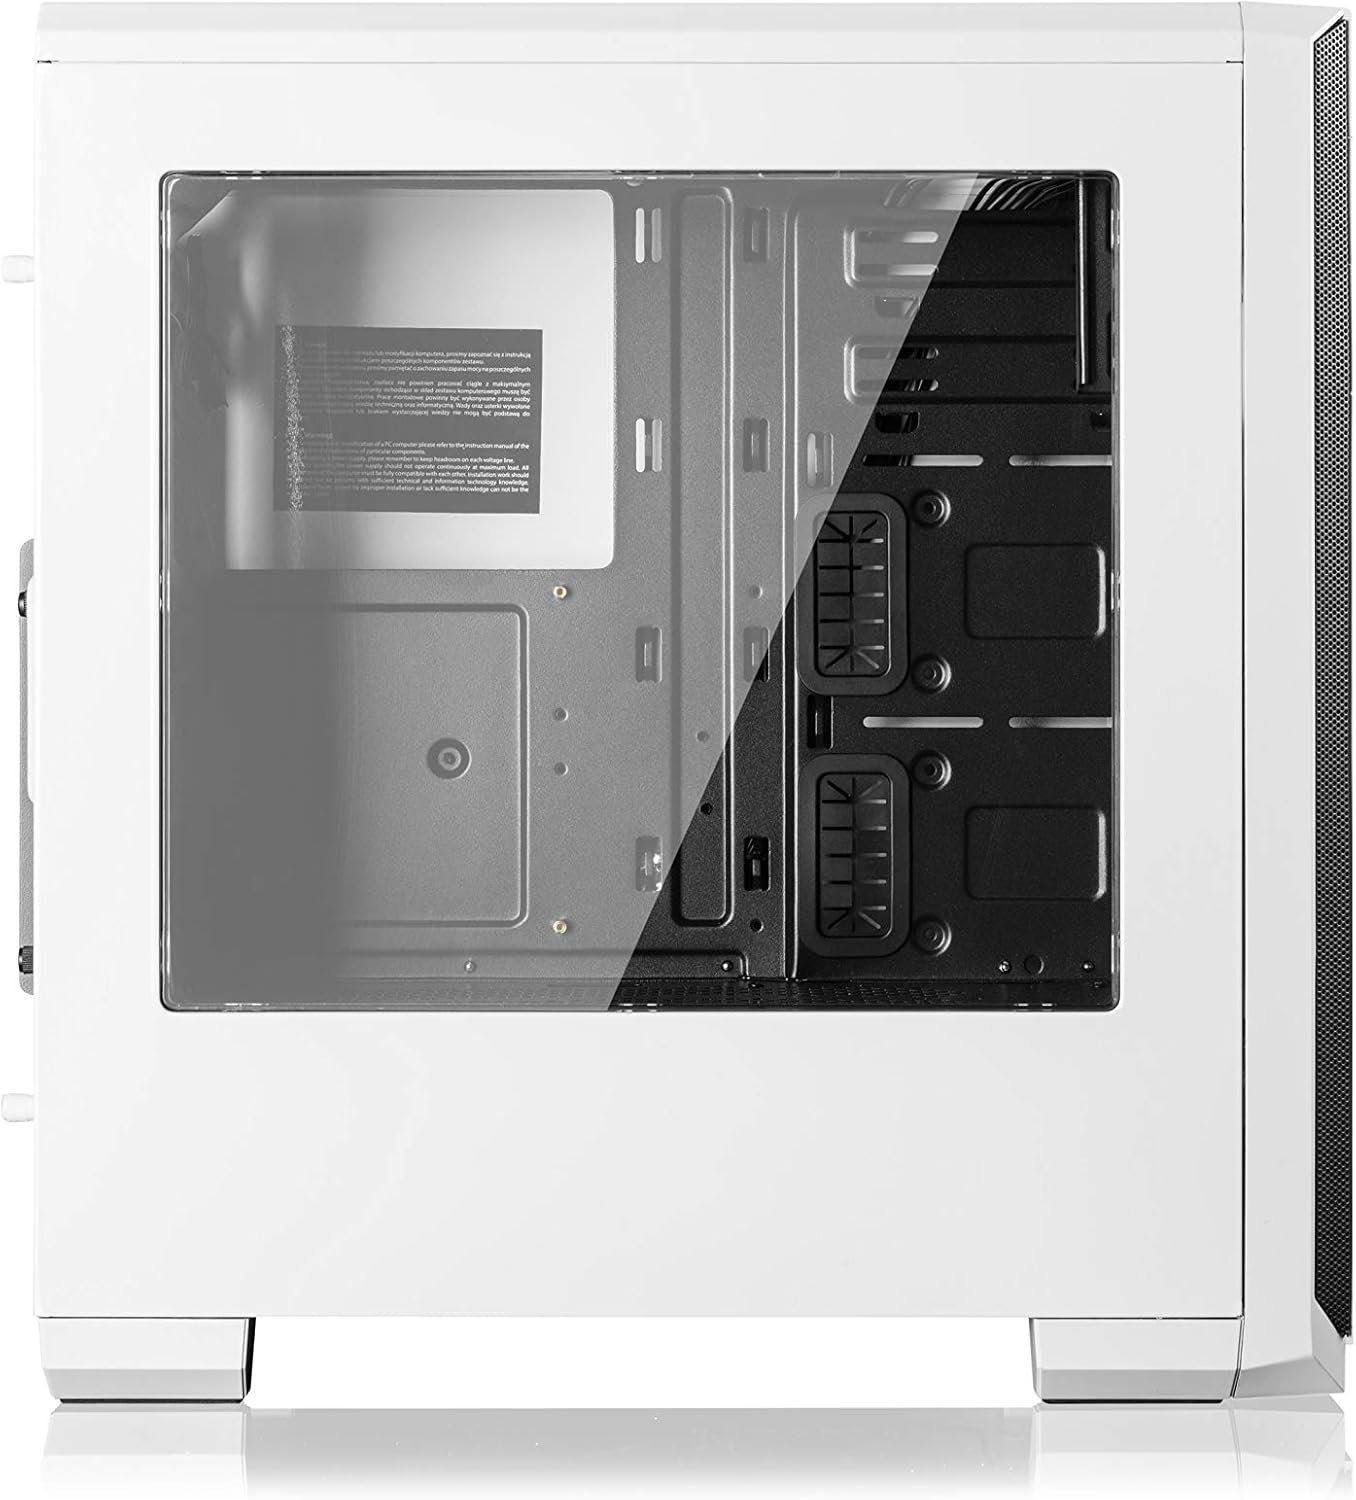
Whakaahua 2.2: Te taha view of the Modecom Oberon Pro Glass PC Case, highlighting the tempered glass side panel. This panel allows for a clear view of the internal components when installed.
3. Tatūnga me te Tāuta
Follow these steps to install your computer components into the Modecom Oberon Pro Glass PC Case.
3.1. Te Wetewete me te Tirotiro Tuatahi
- Tangohia marietia te pouaka rorohiko mai i tōna takai.
- Tirohia te pouaka mō ngā tohu pakaru i te wā e tukuna ana. Whakapā atu ki tō kaihokohoko tonu mēnā ka kitea he pakaru.
- Remove the tempered glass side panel by unscrewing the thumb screws, typically located at the rear corners of the panel. Set the panel aside on a soft, flat surface to prevent scratches.
3.2. Whakauranga Papa Matua

Whakaahua 3.1: o roto view of the Modecom Oberon Pro Glass PC Case, showing the motherboard tray, drive bays, and cable management cutouts.
- Install the I/O shield that came with your motherboard into the designated opening at the rear of the case.
- Ensure the motherboard standoffs are correctly aligned for your motherboard's form factor (ATX, Micro ATX, or ITX). Install additional standoffs if necessary.
- Āta whakanohoia tō papahoahoa ki runga i ngā tūāpapa, me te whakarite i ngā kōhao tīwiri.
- Whakamaua te papahoahoa ki ngā tīwiri kua whakaratohia. Kaua e whakakī rawa.
3.3. Te Waenga Whakawhiwhi Hiko (PSU).
- Position your PSU in the dedicated compartment, typically at the bottom rear of the case.
- Align the screw holes on the PSU with those on the case's rear panel.
- Secure the PSU with the provided screws.
3.4. Tāuta Puku Rokiroki (HDD/SSD)
- Locate the 3.5" HDD bays and 2.5" SSD mounting points within the case.
- For 3.5" HDDs, slide the drive into a bay and secure it with screws or tool-less clips if available.
- For 2.5" SSDs, mount them to the designated trays or screw points, typically behind the motherboard tray or in specific drive cages.
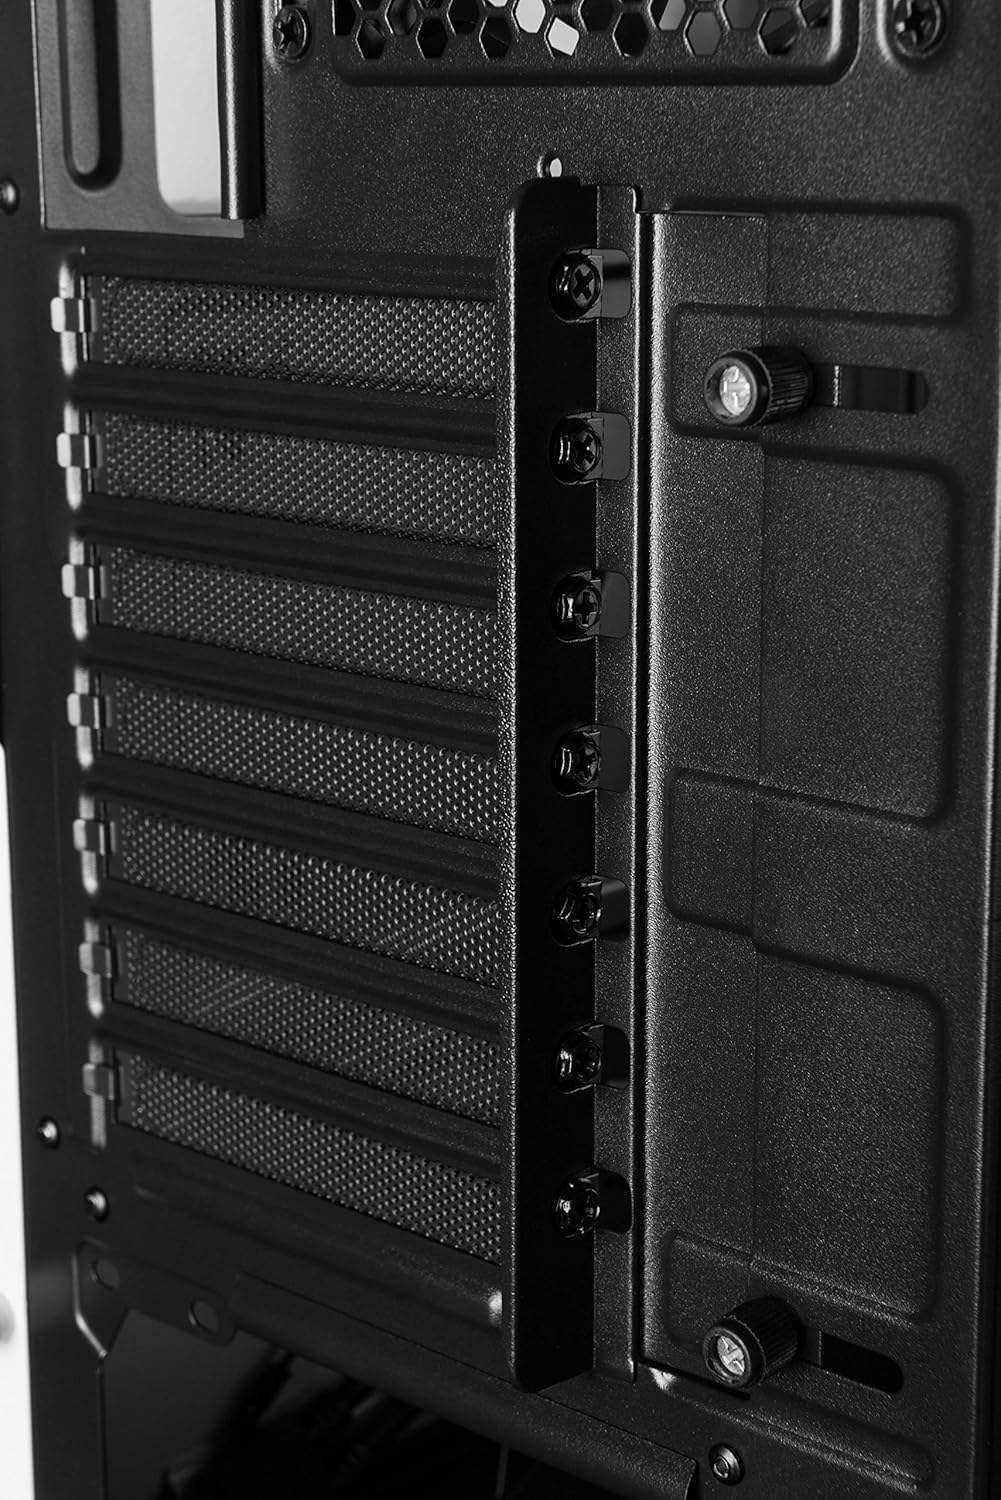
3.5. Expansion Card Installation (GPU, PCIe cards)

Whakaahua 3.2: o roto o muri view of the Modecom Oberon Pro Glass PC Case, illustrating the expansion slot covers and thumb screws for securing PCIe cards.
- Remove the necessary expansion slot covers from the rear of the case, corresponding to your card's slot on the motherboard.
- Insert your expansion card (e.g., graphics card) firmly into the PCIe slot on the motherboard.
- Secure the card to the case with the provided screws or retention mechanism.
3.6. Front Panel Connector Installation
- Connect the front panel cables (USB 3.0, HD Audio, Power Switch, Reset Switch, Power LED, HDD LED) to their respective headers on your motherboard. Refer to your motherboard manual for exact pin layouts.
3.7. Whakahaerenga Taura
- Whakamahia nga tapahi ararere taura me nga tohu here ki muri i te paepae papahoahoa hei whakarite taura. Ma tenei ka pai ake te rere o te hau me te rerehua.
- Once all components are installed and cables managed, reattach the tempered glass side panel and secure it with the thumb screws.
4. Mahi
After successful installation, your PC is ready for operation.
- Whakahiko ana: Press the power button located on the top I/O panel of the case.
- Using Front Panel Ports: The front panel includes USB 3.0 ports and audio jacks. Connect your USB devices (e.g., flash drives, external hard drives) to the USB ports for data transfer. Plug your headphones or microphone into the respective audio jacks.
5. Tiaki
Ko te tiaki i nga wa katoa ka awhina i te mahi tino pai me te roa o nga waahanga PC.
- Tātari Puehu: Periodically remove and clean the dust filters (if present) to maintain good airflow and prevent dust buildup inside the case. Use compressed air or a soft brush.
- Horoi o waho: Horoia ngā mata o waho o te pouaka ki te wai ngohengohe,amp kakahu. Āta karohia ngā kaihoroi whakakoi, ngā whakarewa rānei ka kino pea te whakaotinga, te karāhe kua whakapakeketia rānei.
- Paewhiri Karaehe Tempered: Clean the tempered glass with a glass cleaner and a microfiber cloth to avoid streaks and scratches.
6. Te Raru
Mena ka tūtaki koe ki ngā raruraru, whakaarohia ēnei mahi rapurongoā taketake e whai ake nei:
- Kāore te Pūnaha i te Hiko:
- Me whakarite kei te tahuri te PSU, ā, kei te hono tika ki te putanga pakitara.
- Manatokohia kei te tika te hono o te taura pana hiko o te papa o mua ki te pane o te papahoahoa.
- Tirohia nga hononga hiko katoa ki te papahoahoa me nga waahanga.
- Tauranga USB Kaore i te Mahi:
- Confirm that the front panel USB 3.0 cable is securely connected to the corresponding header on the motherboard.
- Test with different USB devices.
- Haruru nui:
- Identify the source of the noise (e.g., case fans, CPU cooler fan, GPU fan).
- Ensure all fans are free from obstructions and properly secured.
- Clean any dust buildup on fans.
Mō ngā take uaua ake, tirohia ō pukapuka ā-wāhanga, rapua rānei he āwhina ngaio.
7. Whakatakotoranga
| Āhuahira | Whakaahuatanga |
|---|---|
| Waitohu | Modecom |
| Ingoa Tauira | Oberon Pro Glass |
| Tau tauira | AT-OBERON-PG-20-000000-0002 |
| Momo Take | Pouwaenganui |
| Tae | Mā |
| Rauemi | Polycarbonate (PC) |
| Papamatua Hototahi | ATX, ATX Moroiti, ITX |
| Tuhinga o mua | USB 3.0, Audio In/Out |
| Tuku Hiko | W/O PSU (Power Supply Unit not included) |
| Taumaha Tūemi | 2 Kirokaramu |
| Waehere Tuhinga o te Ao | 05901885248370 |
8. Pūtāhui me te Tautoko
Mōhiohio Pūtāhui:
Modecom provides a guarantee of spare parts availability for 2 years from the date of purchase. This ensures that essential components for repair or replacement will be accessible within this period.
Tautoko Kiritaki:
For technical assistance, warranty claims, or further inquiries, please refer to the official Modecom website or contact your local retailer where the product was purchased. Ensure you have your product model number and proof of purchase available when seeking support.


