Kupu Whakataki
This manual provides detailed instructions for the safe and proper installation and use of your PERLESMITH PSML1-E TV Wall Mount. Please read all instructions carefully before beginning installation. If you have any questions, contact PERLESMITH customer support.
Nga korero haumaru
WHAKATŪPATO: Failure to read and follow these instructions may result in serious personal injury, property damage, or voiding your warranty. Do not install this product on plasterboard, hollow walls, drywall, or soft walls. Only install on solid concrete walls, brick walls, or solid wood stud walls.
- Me whakarite kia taea e te mata whakairi te tautoko i te taumaha o te whakairinga me te pouaka whakaata.
- Kaua e neke ake i te kaha o te taumaha o te 52 kg (114 lbs).
- I hangaia tenei maunga mo nga pouaka whakaata i waenga i te 26 me te 75 inihi.
- Use appropriate safety gear during installation, including eye protection.
- Whakamahia i nga wa katoa he kairapu tiu hei kimi tika i nga tiu rakau.
- Mena kāore koe i te tino mōhio ki tētahi wāhanga o te tāutanga, rapua he āwhina ngaio.

Image: Diagram highlighting the robust construction and 52kg weight capacity of the PERLESMITH TV mount, featuring secure dual hooks and a 3-layer solid steel plate.
Tirohanga Hototahi
Before installation, verify the following:
- Rahi pouaka whakaata: Your TV must be between 26 and 75 inches.
- Taumaha TV: Your TV must weigh no more than 52 kg (114 lbs).
- Tauira VESA: Check the four mounting holes on the back of your TV. The VESA pattern (horizontal x vertical) must be within the range of 75x75 mm to 400x400 mm. Compatible VESA patterns include: 75x75, 100x100, 200x100, 200x200, 200x300, 200x400, 300x200, 300x300, 400x200, 400x300, 400x400 mm.
- Momo pakitara: The mount is suitable for solid concrete walls, brick walls, or solid wood stud walls. Do NOT install on plasterboard, hollow walls, drywall, or soft walls.

Image: Diagram illustrating how to check TV VESA pattern, weight, size, and suitable wall types for installation.

Image: VESA compatibility diagram, illustrating the range of VESA patterns supported by the mount, from 75x75mm up to 400x400mm.
Ihirangi mokete
Verify that all components are present and undamaged before proceeding with installation. If any parts are missing or defective, contact PERLESMITH customer support.
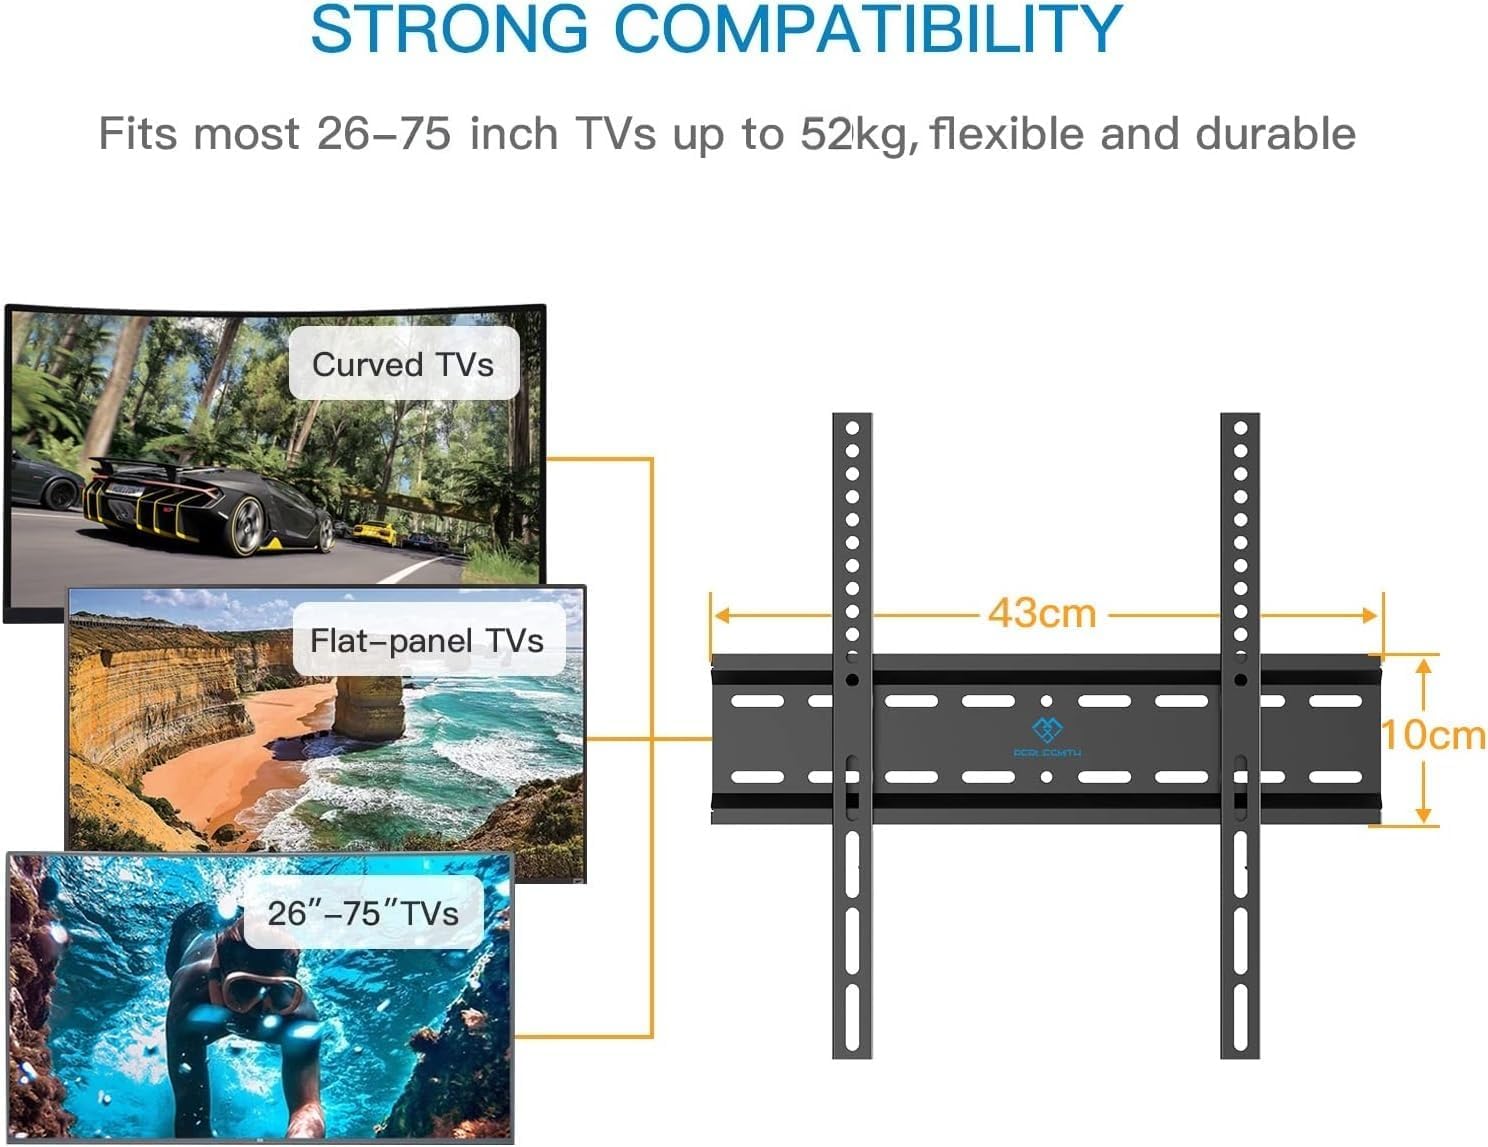
Image: Main components of the PERLESMITH TV Wall Mount, showing the wall plate and the two vertical TV brackets.
Kei roto i te kete:
- Pereti pakitara
- Ngā Whatunga Pouaka Whakaata (2 ngā wahi)
- Assorted TV Screws (M4, M6, M8)
- Ngā Wāhi Whakawehe me ngā Horoi
- Wall Mounting Hardware (Lag bolts, concrete anchors)
- Level (for some kits)
- Pukapuka Tohutohu
Tatūnga me te Tāuta
Follow these steps for a secure installation. A quick installation can be completed in approximately 15 minutes with proper tools and preparation.
Hipanga 1: Whakapirihia nga Taiapa TV ki te pouaka whakaata
- Āta whakatakotoria tō pouaka whakaata ki raro ki runga i tētahi mata ngohengohe, ma, kia kore ai e rakuraku.
- Identify the correct diameter and length of screws for your TV's VESA mounting holes. Use spacers if the TV back is uneven or if cables need clearance.
- Attach the two vertical TV brackets to the back of your TV using the selected screws and washers. Ensure the brackets are centered and securely tightened. The hooks on the brackets should face downwards.

Image: Step 1 of the installation process, showing the TV brackets being attached to the back of the television.
Hipanga 2: Whakamauhia te Pereti Pakitara ki te Pakitara
- Determine the desired height for your TV. Mark the location for the wall plate on the wall.
- For wood stud installation: Use a stud finder to locate the center of the wood studs. Mark the drilling points. Drill pilot holes (recommended size specified in manual, typically 5.5mm/7/32"). Secure the wall plate using lag bolts and washers.
- For concrete/brick wall installation: Use the wall plate as a template to mark drilling points. Drill holes (recommended size specified in manual, typically 10mm/3/8"). Insert concrete anchors into the drilled holes. Secure the wall plate using lag bolts and washers.
- Use a level to ensure the wall plate is perfectly horizontal before tightening all bolts.
Hipanga 3: Whakairihia te pouaka whakaata ki runga i te pereti pakitara
- Me te āwhina, hikitia mārire te pouaka whakaata me ngā whīra e mau ana.
- Align the hooks on the TV brackets with the top edge of the wall plate. Gently lower the TV, ensuring the brackets engage securely with the wall plate.
- Engage the safety locks (if present) on the bottom of the TV brackets to prevent accidental dislodgement.

Image: A person completing the final step of hanging the TV onto the wall mount, illustrating the quick installation process.

Image: Detail of the safety lock mechanism, which secures the TV brackets to the wall plate.

Whakaahua: Kati-ake view of the anti-drop design, ensuring the TV remains securely attached to the mount.
Nga Tohutohu Whakahaere
The PERLESMITH PSML1-E is a fixed TV wall mount. Once installed, the TV will remain in a static position, close to the wall (approximately 30 mm distance). This design provides a sleek, low-profile ahua.

Image: A television mounted on the wall, demonstrating the minimal 30mm distance from the wall for a low-profile titiro.
While the mount is fixed, some models may allow for a slight tilt adjustment up to 8 degrees. Refer to your specific product's features for tilt adjustment capabilities. To adjust, loosen the tilt bolts on the TV brackets, set the desired angle, and re-tighten the bolts securely.
Te tiaki
Ko te tiaki i nga wa katoa ka mau te roa me te haumaru o to whakairinga pakitara pouaka whakaata.
- Tirohanga Ia Wa: Annually check all screws and bolts to ensure they remain tight. Re-tighten if necessary.
- Te horoi: Horoia te papa ki te kakahu ngohengohe, maroke. Āta karohia ngā kai horoi me ngā whakarewa.
- Taki Tukino: Inspect the mount for any signs of wear, corrosion, or damage. If damage is found, do not use the mount and contact customer support.
Raparongoā
| Raruraru | Take pea | Rongoā |
|---|---|---|
| Ko te TV kaore i te taumata i muri i te whakaurunga. | Kāore te pereti pakitara i te ōrite i te wā e tāuta ana. | Carefully remove the TV. Loosen the wall plate bolts, adjust with a level, and re-tighten. Re-hang the TV. |
| Kāore te pouaka whakaata e tau ki te whakairinga. | Tauira VESA hē, rahi/taumaha rānei o te pouaka whakaata. | Verify TV specifications against the mount's compatibility (VESA, size, weight). Ensure correct screws and spacers are used. |
| Ka kore e tau te Maunga. | Improper wall installation or loose fasteners. | Immediately remove the TV. Re-check all wall mounting bolts and TV bracket screws for tightness. Ensure installation on a suitable wall type (solid concrete, brick, or wood stud). If unsure, consult a professional. |
| Cables are pinched or difficult to connect. | Insufficient space between TV and wall. | Ensure spacers are used if needed to provide adequate clearance for cables. Re-route cables carefully. |
Whakatakotoranga
- Tauira: PSML1-E
- Waitohu: HE WHAKAMAHI
- Rauemi: Korotahi Steel
- Tae: Pango
- Momo Tāuta: Maunga Taiepa
- Momo Nekehanga: Whakaritea
- Rahi TV Hototahi: 26 - 75 inihi
- Taumaha Morahi: 52 kg (114 lbs)
- Hototahitanga VESA: 75x75mm, 100x100mm, 200x100mm, 200x200mm, 200x300mm, 200x400mm, 300x200mm, 300x300mm, 400x200mm, 400x300mm, 400x400mm
- Tawhiti mai i te Taiepa: Tata ki te 30 mm
- Koki Honga Morahi: 8 Degrees (if applicable to specific unit)
- Taumaha Tūemi: 1.12 Kirokaramu
- Ahu mōkihi: 43.7 x 11.3 x 4.9 cm
- UPC: 713721601516
Pūtāhui me te Tautoko
PERLESMITH products are designed for durability and reliability. For warranty information or technical support, please refer to the contact details provided with your purchase or visit the official PERLESMITH webpae. Puritia to riirii hoko hei tohu mo te hoko mo nga kereme whakamana.


