1. Hua Neke Atuview
The TRiPEAK Bottom Bracket is engineered for efficient power transfer and high stiffness in bicycle drivetrains. It features high-precision steel bearings designed for durability and smooth operation. This bottom bracket is compatible with various frame types and cranksets, offering a reliable solution for both road and mountain bikes.
Āhuatanga matua:
- High-Precision Steel Bearings: Ensures efficient power transfer and ultra-high stiffness for a stable and durable ride.
- Wide Shell Compatibility: Fits 68mm English (BSA) bracket shells, and is interchangeable with various Shimano, Rotor, CeramicSpeed, and FSA bottom brackets.
- Crankset Compatibility: Designed for 24mm spindles, fully compatible with Shimano DURA-ACE, TIAGRA, ULTEGRA, GRX, 105 HOLLOWTECH II, FSA MegaExo, ROTOR ALDHU/3D/3D24, and RaceFace EXI crankset series.
- Engineered for Perfect-Fit: Patented cup structure provides a precise and solid fit to the frame, protecting against installation damage, wear, and deformation, especially on carbon frames.
- Whakanuia te Mauroa: TRiPEAK steel bearing balls are designed to be harder and stiffer than standard bearings, contributing to a longer lifespan and lighter weight.
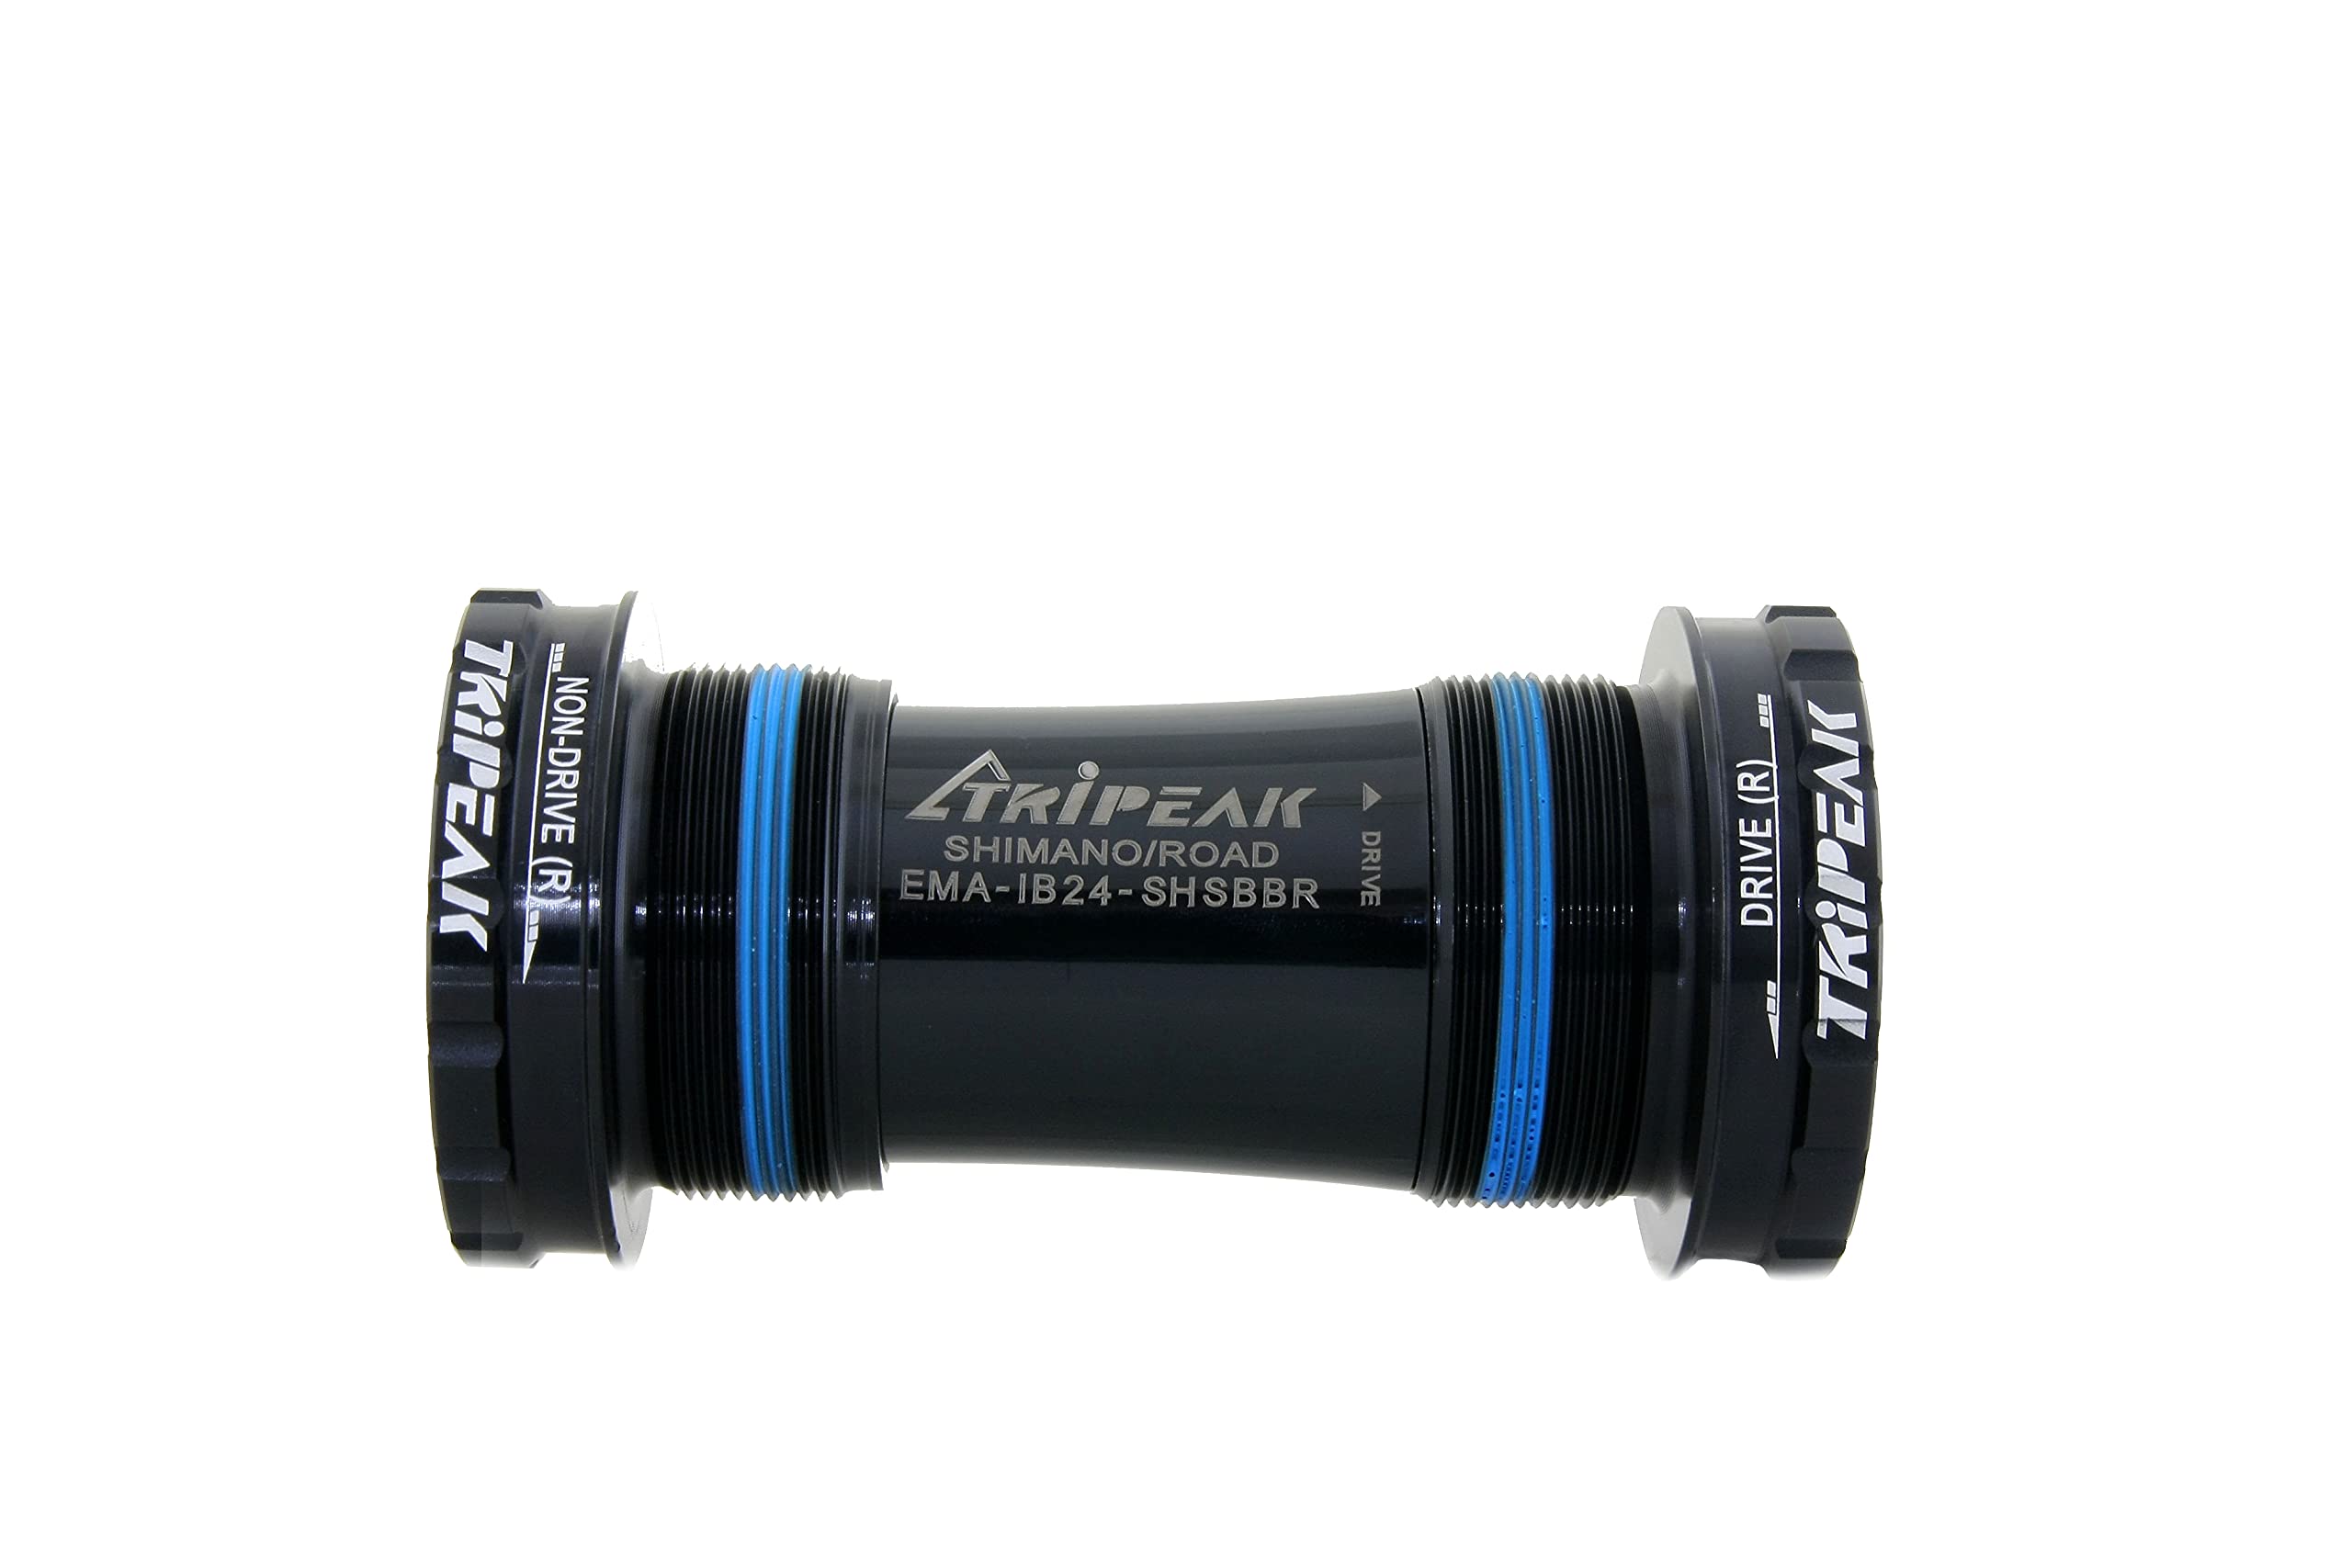
Image: The TRiPEAK Bottom Bracket, showcasing tona hoahoa me te hanga.

Pikitia: Kua wetewetehia view of the TRiPEAK Bottom Bracket, showing individual components including cups and internal sleeve.
2. Nga korero hototahi
This TRiPEAK Bottom Bracket is available in various configurations to match different bicycle frame bottom bracket shells and crankset spindle diameters. It is crucial to select the correct model for your specific bicycle to ensure proper fit and performance.
Supported Bottom Bracket Shells:
- BSA (English Threaded): 68mm (Road), 68/73mm (MTB)
- ITA (Italian Threaded): 70mm (Road)
- COLNAGO C60/CR1: 82.5mm (Road)
- T47: 68mm (Road/MTB), 86mm (Road/Trek)
Supported Spindle Diameters:
- 24mm (e.g., Shimano Hollowtech II, FSA MegaExo)
- 30mm (e.g., ROTOR 3D+, SRAM DUB)
- 28.99mm (SRAM DUB)
Always refer to the detailed specifications chart and your bicycle frame's manufacturer guidelines to confirm compatibility before installation.

Image: Detailed chart outlining TRiPEAK threaded bottom bracket specifications, including shell diameter, shell length, spindle diameter, crankset series compatibility, bearing material, and available colors.
3. Aratohu Tatūnga me te Tāutanga
Proper installation is critical for the performance and longevity of your bottom bracket. If you are unsure about any step, consult a professional bicycle mechanic.
Utauta e hiahiatia ana:
- Bottom bracket wrench compatible with 16-notch external bottom brackets (e.g., 41mm OD or 52-54mm OD depending on model).
- Bicycle grease.
- Clean rags.
Hipanga Tāuta:
- Prepare the Bottom Bracket Shell: Ensure the bicycle's bottom bracket shell threads are clean and free of debris. Use a clean rag to wipe away any old grease or dirt.
- Hoatu hinu: Apply a thin, even layer of bicycle grease to the threads of the bottom bracket shell and the threads of the bottom bracket cups. This prevents seizing and reduces creaking.
- Identify Cups: The bottom bracket cups are typically marked 'R' for the drive-side (right) and 'L' for the non-drive side (left). Ensure you have the correct cup for each side.
- Install Non-Drive Side Cup: Carefully thread the non-drive side (left) cup into the bottom bracket shell by hand. It should thread smoothly without resistance. If it binds, unthread it and re-attempt to avoid cross-threading.
- Install Drive Side Cup: Repeat the process for the drive side (right) cup, threading it in by hand until it is finger-tight.
- Tighten with Wrench: Use a compatible bottom bracket wrench to fully tighten both cups. Refer to the manufacturer's torque specifications (usually printed on the bottom bracket cup or in the product documentation) and use a torque wrench if available.
- Do Not Remove Internal Grease: Note that some bottom brackets come with extra grease inside the bearings. This is intentional and designed to aid in crank installation and bearing protection; do not remove it.

Image: Step-by-step diagram illustrating the installation process: (1) Apply grease to threads, (2) Insert non-drive side cup, (3) Insert drive side cup, (4) Tighten with a wrench to torque specification.
Bottom Bracket Tool Demonstrations:
Video: Demonstration of a 16-notch bottom bracket tool with a 41mm outer diameter. This video illustrates the type of tool used for installing and removing compatible bottom brackets.
Ataata: Ka mutuview of the Park Tool BBT-47-16, a 16-notch bottom bracket tool. This video highlights the features and proper use of a common tool for bottom bracket maintenance and installation.
4. Mahi
Once correctly installed, the TRiPEAK Bottom Bracket provides a stable and low-friction interface for your bicycle's crankset. Its primary function is to allow the crank arms to rotate smoothly, transferring power from the pedals to the chain and ultimately to the rear wheel.
- Te hurihanga Maeneene: The high-precision steel bearings minimize friction, ensuring a smooth and efficient pedaling experience.
- Pakari: The robust design and secure fit contribute to overall drivetrain stiffness, enhancing power transfer and responsiveness.
- Mauroa: Designed to withstand the forces of cycling, providing consistent performance over time.
5. Tiaki
Regular maintenance will extend the life of your TRiPEAK Bottom Bracket and ensure optimal performance.
Te horoi me te Tirotiro:
- Whakapai auau: Periodically clean the exterior of the bottom bracket and the surrounding frame area to prevent dirt and grime buildup.
- Tirohia mēnā kei te tākaro koe: Grasp both crank arms and attempt to move them side-to-side. Any noticeable play or looseness indicates potential bearing wear or improper installation.
- Whakarongo mo Haruru: Pay attention to any creaking, clicking, or grinding sounds during pedaling, which can signal issues with the bottom bracket.
Tiaki Whanau:
- The TRiPEAK bottom bracket features a double-sided contact seal for maximized bearing longevity, protecting the internal components from contaminants.
- Ko te precisely designed cage ensures anti-deformation of the bearing rings, contributing to smooth and quiet operation.
- Ko te TRiPEAK Steel Balls are engineered for ultra-quiet and smooth riding. While these bearings are durable, extreme conditions or prolonged use may eventually require replacement.

Image: Diagram highlighting the internal features of the TRiPEAK bottom bracket, including the double-sided contact seal, precisely designed cage, and TRiPEAK steel balls, all contributing to durability and smooth performance.
6. Raparongoā Nga take noa
If you encounter problems with your bottom bracket, the following guide may help identify and resolve common issues.
Creaking or Clicking Noises:
- Take: Insufficient torque on bottom bracket cups, dry threads, or contamination (dirt, water) in the bottom bracket shell or bearings.
- Rongoā: Remove the crankset and bottom bracket cups. Clean all threads thoroughly. Apply fresh bicycle grease to the shell and cup threads. Reinstall the bottom bracket, ensuring it is tightened to the manufacturer's specified torque. Check crank arm bolts for proper torque as well.
Roughness or Excessive Resistance:
- Take: Contaminated or worn-out bearings.
- Rongoā: If the bearings feel rough when rotating the crank arms by hand (after removing the chain), they may be contaminated or worn. While TRiPEAK bearings are sealed for protection, severe contamination or extensive use can lead to wear. In most cases, the entire bottom bracket unit will need to be replaced if the bearings are compromised.
Play or Looseness in Crankset:
- Take: Loose bottom bracket cups, worn bearings, or loose crank arm fixing bolts.
- Rongoā: First, check that the bottom bracket cups are tightened to the correct torque. If play persists, inspect the crank arm fixing bolts and tighten them to their specified torque. If the issue remains, the bearings may be worn and require bottom bracket replacement.
7. Whakatakotoranga Hua
| Whakatakotoranga | Taipitopito |
|---|---|
| Te Rahi o te Mokete Tuemi L x W x H | 4.06 x 1.85 x 1.77 inihi |
| Taumaha mōkihi | 0.11 Kirokaramu |
| Taumaha Tūemi | 0.11 Kirokaramu |
| Ingoa Waitohu | TRiPEAK |
| Tae | BSA-Black (for this variant) |
| Kaihanga | TRiPEAK |
| Nama Wahi | EMA-IB24-SHSBBR |
| Rahi | Road (68mm) (for this variant) |
| ASIN | B092ZTH5FS |
| Te Ra Tuatahi Wātea | Paenga-whāwhā 14, 2021 |
8. Pūtāhui me te Tautoko
For warranty information, product support, or technical assistance, please contact TRiPEAK directly through their official website or the retailer from whom the product was purchased. Keep your proof of purchase for any warranty claims.


