1. Kupu Whakataki
This manual provides detailed instructions for the Brinno BCC2000 Lite Construction Bundle, featuring the TLC2020 Time Lapse Camera, ATH1000 Waterproof Housing, and ACC1000P Mounting Clamp. Please read this manual thoroughly before using the product to ensure proper operation and longevity.
2. Ihirangi mokete
The Brinno BCC2000 Lite Construction Bundle includes the following items:
- Brinno TLC2020 Time Lapse Camera
- Brinno ATH1000 Waterproof Housing
- Brinno ACC1000P Mounting Clamp Kete
- 2 Nga here
- Kāri SD
- 2 AA Batteries (Note: 4 AA batteries are required for camera operation. Please ensure you have sufficient batteries.)
- USB Micro Cable
- Pukapuka Kaiwhakamahi

Figure 2.1: Items included in the Brinno BCC2000 Lite Construction Bundle.
3. Nga Hua o te Hua
3.1 TLC2020 Time Lapse Camera
- HDR FHD Video: Captures high-quality 1080p time-lapse videos.
- Automatic Processing: Images are automatically processed into ready-to-share time-lapse videos, eliminating the need for extensive post-editing.
- Roa te Ora o te Pūhiko: Powered by 4 AA batteries, the TLC2020 can record for up to 99 days non-stop (at a 5-minute interval).
- Flexible Schedule Setup: Allows setting specific days and times for recording to optimize battery life and capture only desired footage.
- Mata 2-inihi: For easy menu navigation and live view.

Figure 3.1: The TLC2020 camera offers extended battery life for prolonged recording.
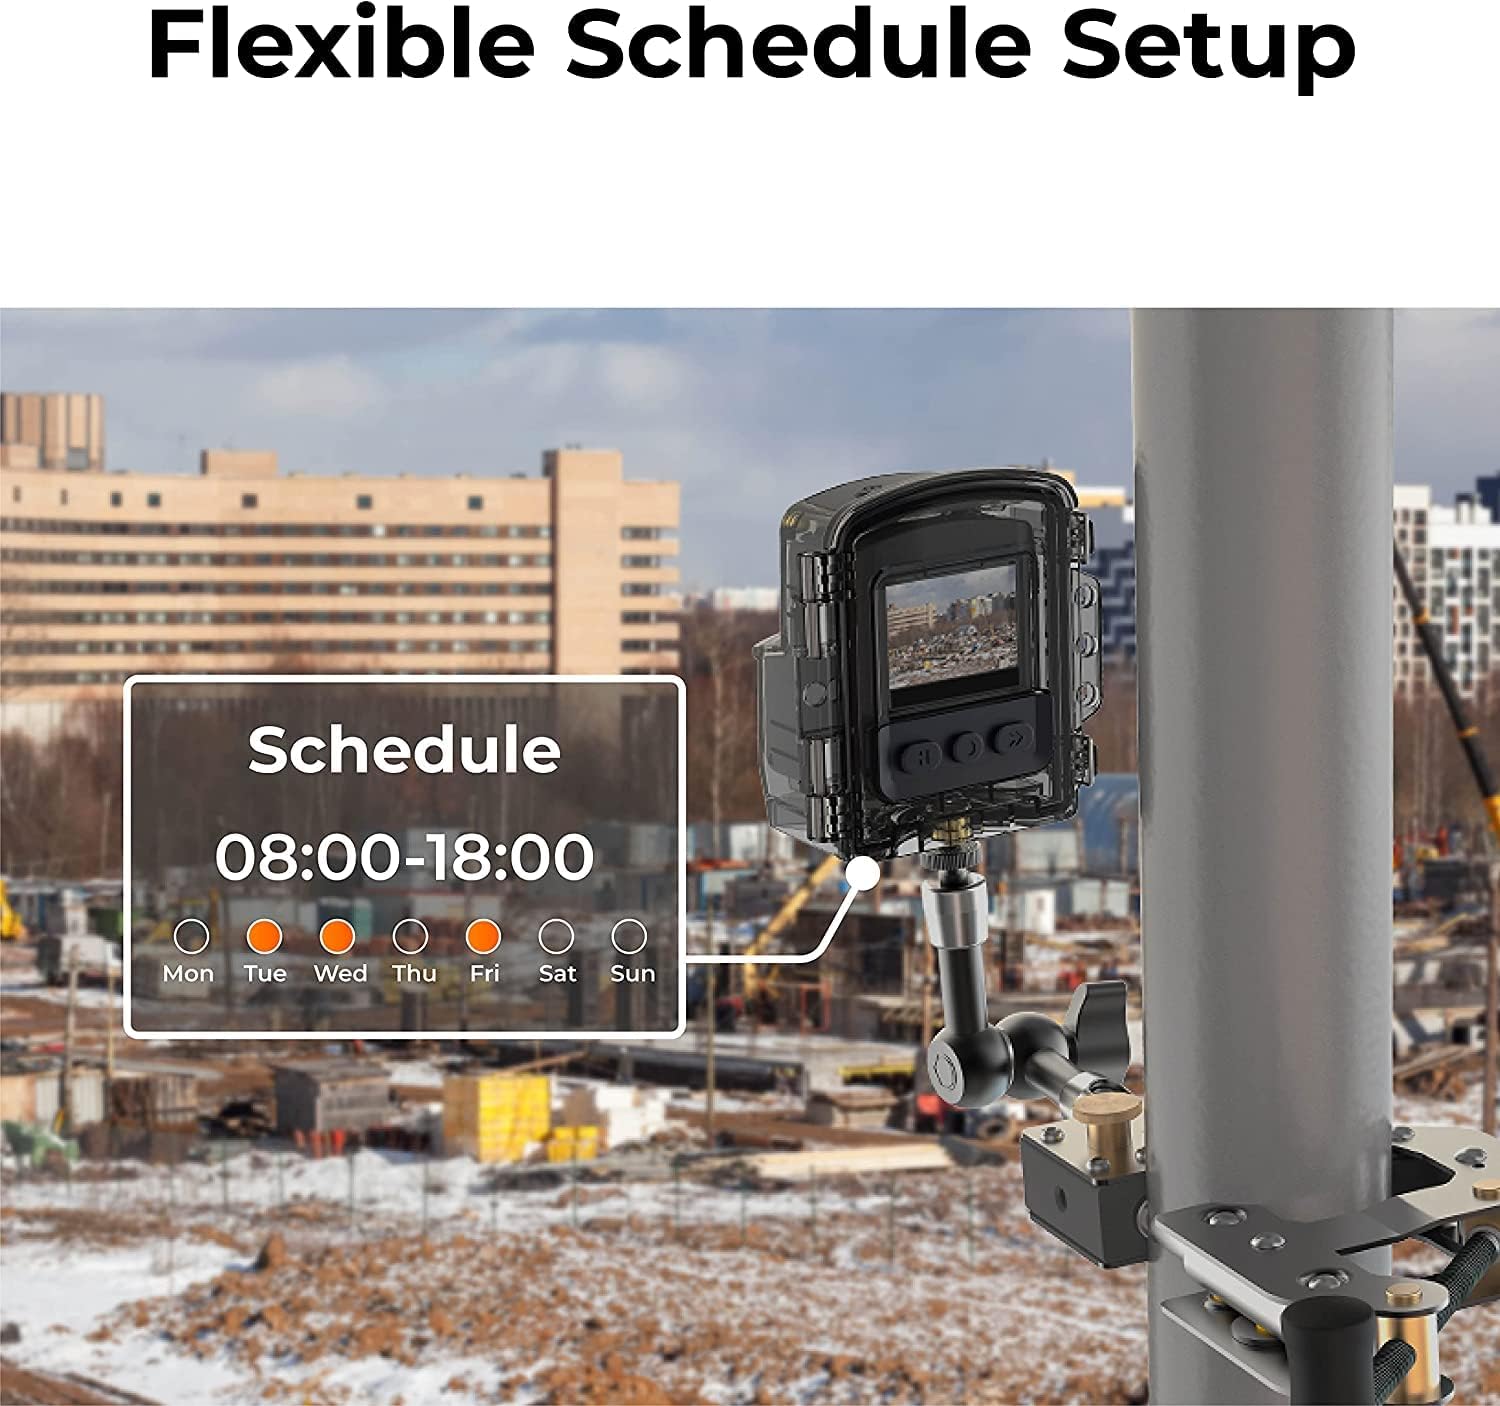
Figure 3.2: The camera's flexible schedule setup allows for customized recording periods.
3.2 ATH1000 Waterproof Housing
- IP67 Whakatauria: Provides robust protection against dust and water ingress, suitable for outdoor environments.
- Four-Season Protection: Designed to protect the camera in various weather conditions.
3.3 ACC1000P Mounting Clamp
- Hanga Roa: Made from stainless steel for secure and stable mounting.
- Whakanuia Nga Mahi: Equipped with two grip options for sturdy installation on both flat and cylindrical surfaces.
- Awhe Whakaritea: Clamping range between 0.04 inches to 10.6 inches with the extension pole.
- 360-Degree Rotating Joint: Ka taea te whakarite i te tūnga me te koki kia ngāwari.

Figure 3.3: The camera and housing are securely mounted with the ACC1000P clamp, offering protection in various conditions.

Figure 3.4: The ACC1000P clamp provides versatile mounting options for different surfaces and angles.
4. Tatūnga me te Tāuta
4.1 Inserting Batteries and SD Card
- Open the battery compartment cover on the TLC2020 camera.
- Whakauruhia nga pākahiko AA 4, kia tika te polarity.
- Insert the Micro SD card into the designated slot until it clicks into place.
- Katia kia mau te uhi o te wahanga pākahiko.
4.2 Whakauru i te Kamera
- Place the TLC2020 camera inside the ATH1000 Waterproof Housing. Ensure the housing is properly sealed.
- Attach the ATH1000 Waterproof Housing to the ACC1000P Mounting Clamp.
- Secure the ACC1000P Mounting Clamp to your desired surface (e.g., pole, beam, flat surface) using the appropriate grip and tightening mechanism. Adjust the 360-degree rotating joint to achieve the desired camera angle.

Figure 4.1: The Brinno TLC2020 camera securely mounted in its housing with the clamp.
5. Mahi
5.1 Te Whakakā me ngā Tautuhinga Tīmatanga
- Press and hold the power button on the camera for 3 seconds to turn it on.
- Use the menu buttons to navigate to the System Settings.
- Set the correct date and time for accurate time-lapse recording.
5.2 Configuring Recording Settings
- Wātanga: Select the desired time interval between captured frames (e.g., 5 seconds, 1 minute, 5 minutes). This determines the speed of your final time-lapse video.
- Hōtaka: Utilize the scheduling feature to set specific start and end times for recording, as well as specific days of the week. This helps conserve battery life and captures only relevant periods.
- Tautuhinga Atahanga: Adjust exposure, white balance, saturation, contrast, and sharpness as needed for your environment.
- Whakahoutanga Firmware: Ensure the camera firmware is updated to the latest version for optimal performance.
5.3 Starting and Stopping Recording
- After configuring all settings, press the 'OK' button or the designated record button to start the time-lapse recording.
- The camera will begin capturing images at your set interval.
- To stop recording, press the 'OK' button or the designated record button again.
5.4 Accessing Recorded Files
- Remove the Micro SD card from the camera.
- Insert the Micro SD card into a computer or card reader to access the recorded time-lapse video files (AVI format).
- Alternatively, connect the camera directly to a computer using the Micro USB cable to transfer files.
6. Tiaki me te Tiaki
- Regularly check the ATH1000 Waterproof Housing for any signs of damage or wear to ensure its integrity.
- Clean the camera lens and housing window with a soft, lint-free cloth. Avoid abrasive materials.
- Ensure the battery compartment is dry and free of debris before closing.
- Ki te kore e whakamahia mo te wa roa, tangohia nga pākahiko kia kore ai e pakaru.
7. Te Raru
7.1 Kārekau te Kāmera i te hiko
- Tirohia mehemea kua tika te whakaurunga o nga pākahiko me te whakakii katoa.
- Ensure 4 AA batteries are used, as specified.
- Try replacing with new batteries.
7.2 Nga take tuhi
- Verify that the Micro SD card is properly inserted and has sufficient free space.
- Check the recording schedule and interval settings.
- Me whakarite kei te hōu tonu te pūmanawa o te kāmera.
7.3 Kounga Ataahua Kino
- Clean the camera lens and the waterproof housing's front window.
- Adjust image settings such as exposure, contrast, and sharpness in the camera menu.
- Ensure adequate lighting conditions for optimal capture.
8. Whakatakotoranga
| Āhuahira | Whakatakotoranga |
|---|---|
| Waitohu | Brinno |
| Tau tauira | TLC2020C |
| Whakataunga Hopu Ataata | 1080p |
| Momo Mahara Kohiko | Micro SD (up to 128GB supported) |
| Rahi Mata | 2 Inihi |
| Hangarau Hononga | USB |
| Nga waahanga motuhake | IP67, Weather Resistant |
| Puna Mana | 4 Pahiko AA |
| Taumaha Tūemi | 3.18 pauna (Paehere) |
| Hunga Hua | 6.7 x 12.4 x 8.4 inihi (Paehere) |
9. Pūtāhui me te Tautoko
For warranty information and technical support, please refer to the official Brinno website or contact Brinno customer service. Keep your purchase receipt for warranty claims.


