Rfiver Mobile TV Cart User Manual
Tauira: MT2005
1. Kupu Whakataki
Thank you for choosing the Rfiver Mobile TV Cart. This portable TV stand is designed to provide a versatile and convenient viewing experience for screens ranging from 23 to 60 inches. Its robust construction ensures stability, while features like height adjustment, tilt functionality, and smooth-rolling wheels offer optimal flexibility for various environments, including home offices, classrooms, and outdoor spaces. This manual provides essential information for safe assembly, operation, maintenance, and troubleshooting of your new TV cart.

Image: The Rfiver Mobile TV Cart with a television mounted, showcasing its sleek design and mobile base.
2. Nga korero haumaru
Please read all instructions carefully before assembly and use. Failure to follow these instructions may result in property damage, serious injury, or death.
- Raukaha Taumaha: Do not exceed the maximum load capacity of 88 lbs (40 kg). This stand is designed for TVs between 23 and 60 inches.
- Hototahitanga VESA: Ensure your TV's VESA pattern (mounting hole distance) is compatible with the stand (100x100mm to 400x400mm).
- Pūmautanga: Always ensure the base is stable and the wheels are locked when the cart is stationary, especially when a TV is mounted.
- Nekehanga: When moving the cart, do so slowly and carefully, especially on uneven surfaces. Avoid sudden stops or turns.
- Tamariki: Keep children away from the TV cart during assembly and ensure they do not climb on or play with the stand once assembled.
- Huihuinga: Assemble the product on a soft, clean surface to prevent scratches. Two people are recommended for assembly and TV mounting.
- Whakaha Uepu: Route all cables securely to prevent tripping hazards and damage to the cables or TV.
3. Ihirangi mokete
Verify that all parts are present and undamaged before beginning assembly. If any parts are missing or damaged, contact customer support.
| Wahi | Whakaahuatanga | Te nui |
|---|---|---|
| Pou Matua | Vertical support pole | 1 |
| Waewae turanga | X-shaped base components | 4 |
| Nga wira | Lockable caster wheels | 4 |
| TV Whakauru | Brackets for attaching TV | 2 |
| Pae Tauhokohoko | Screws, washers, spacers, tools | 1 huinga |
| Apple TV Holder | Taonga taapiri | 1 |
| Pukapuka Tohutohu | Tenei tuhinga | 1 |
4. Tatūnga me te Runanga
Assembly is straightforward and typically takes about 30 minutes. Lay out all parts on a soft surface to prevent scratches. Follow the steps below carefully.
Hipanga 1: Huihuia te turanga
Attach the four base legs to the central hub of the main pole. Ensure the longer front legs are positioned correctly for optimal stability. Secure them using the provided bolts and tools.

Image: Illustration of the stable X-shaped base design, highlighting its structural integrity.
Hipanga 2: Tāpirihia ngā Wira
Screw the four lockable caster wheels into the ends of the base legs. Ensure they are tightened securely. The wheels allow for smooth movement and can be locked to keep the stand stationary.
Step 3: Install TV Mounting Brackets
Attach the TV mounting brackets to the back of your television. Select the appropriate screws, washers, and spacers from the hardware kit based on your TV's VESA pattern and depth. Ensure the brackets are securely fastened and level.

Image: Guide illustrating various VESA patterns (100x100mm to 400x400mm) and corresponding screw sizes for TV compatibility.
Hipanga 4: Whakamaua te pouaka whakaata ki te tūnga
With assistance, carefully lift the TV and hook the mounted brackets onto the top bar of the TV cart's main pole. Gently lower the TV until it rests securely. Fasten the safety screws or clips at the bottom of the brackets to prevent accidental dislodgement.
5. Nga Tohutohu Whakahaere
Te Whakarite Teitei
The TV cart offers 3 levels of height adjustment, ranging from 53 inches to 57 inches. To adjust the height, loosen the securing bolts on the main pole, carefully raise or lower the TV to the desired position, and then re-tighten the bolts firmly. Always ensure the TV is level after adjustment.
Te Whakaritea Koki Honga
The TV can be tilted from -2° to +5° to optimize your viewing angle and reduce glare. To adjust the tilt, loosen the tilt knobs on the side of the TV mounting brackets, adjust the screen to the desired angle, and then tighten the knobs securely.

Image: Visual representation of the TV cart's tilt range (-2° to +5°) and three levels of height adjustment, enhancing group viewing.
Moving the TV Cart
The cart is equipped with silent, 360° rotating wheels for smooth movement on various floor types, including wood and carpet. To move the cart, unlock all four wheels by flipping their levers. Once in the desired position, lock the wheels to prevent accidental movement.

Whakaahua: Taipitopito view of the silent, 360° rotating wheels, indicating the lock and unlock mechanisms for secure positioning.
Whakahaere Taura
Utilize the provided cable clips or straps to route and secure all power and HDMI cables along the main pole. This helps maintain a tidy appearance, prevents tangles, and reduces tripping hazards.
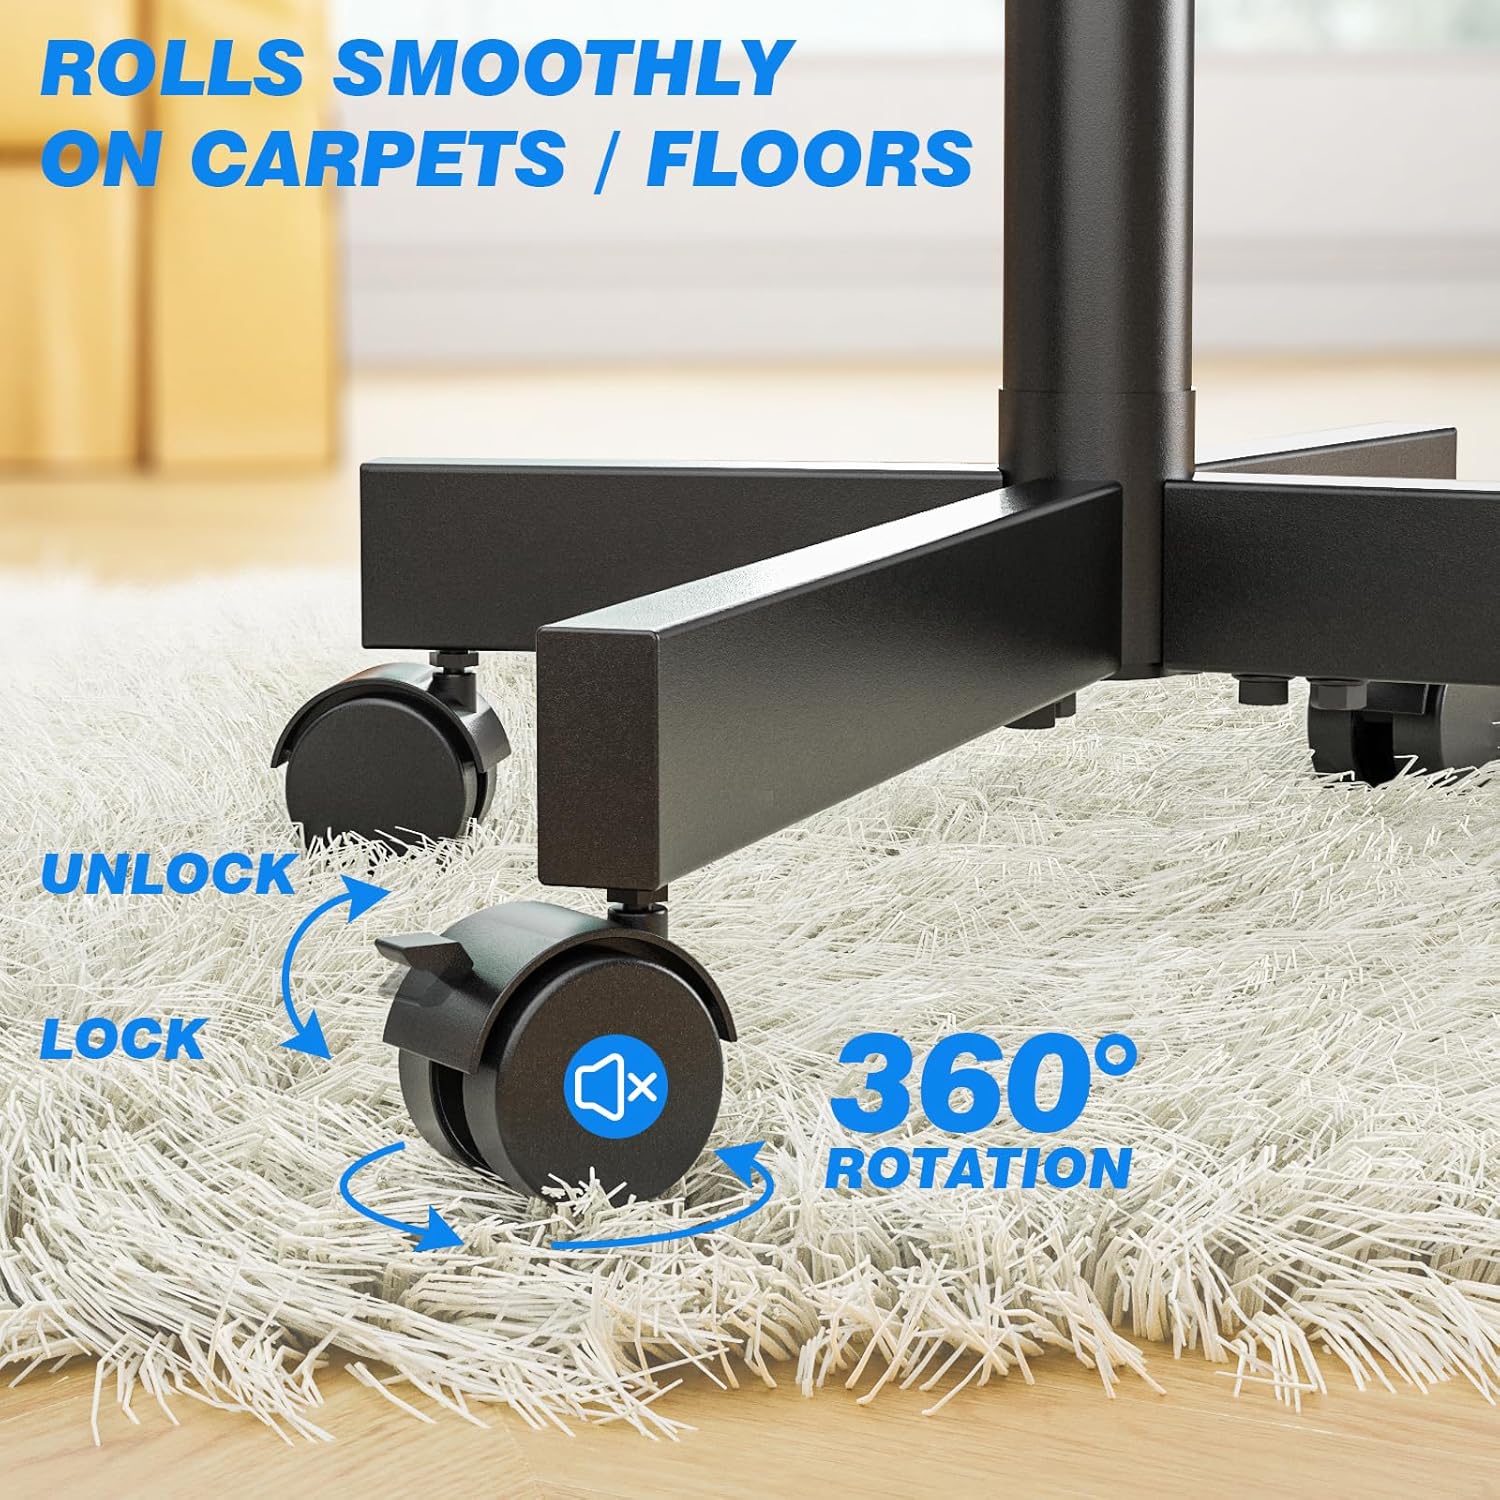
Image: A visual comparison demonstrating effective cable organization using cable clips along the stand's pole, contrasting with unmanaged cables.
6. Tiaki
Regular maintenance ensures the longevity and safe operation of your Rfiver Mobile TV Cart.
- Te horoi: Wipe down the stand with a soft, dry cloth. For stubborn marks, use a slightly damp cloth with mild soap, then dry thoroughly. Avoid abrasive cleaners or solvents.
- Ngā toromoka: Takitaki ia ia nga wa katoa nga raka me nga wiri kia mau tonu. Whakapaia ano mehemea e tika ana kia mau tonu.
- Wira: Keep the wheels free of debris (hair, dust, etc.) to ensure smooth rolling. Lubricate the wheel axles if they become stiff.
- Rokiroki: If storing the TV cart for an extended period, ensure it is clean, dry, and stored in a stable position, preferably with the wheels locked.
7. Te Raru
| Raruraru | Take pea | Rongoā |
|---|---|---|
| TV cart is wobbly or unstable. | Loose fasteners; uneven floor; TV weight exceeds capacity. | Check and tighten all bolts. Move to a level surface. Ensure TV weight is within 88 lbs limit. |
| Kāore ngā wira e hurihuri maeneene, e raka rānei. | Debris in wheels; lock mechanism engaged; wheels not tightened. | Clean wheels of any debris. Ensure lock levers are disengaged. Check if wheels are securely screwed into the base. |
| Cannot adjust TV height or tilt. | Adjustment knobs/bolts are too tight. | Loosen the relevant knobs or bolts before attempting to adjust. Re-tighten firmly after adjustment. |
| TV does not fit the mounting brackets. | Tauira VESA hē, te rahi TV ranei. | Verify your TV's VESA pattern is between 100x100mm and 400x400mm. Ensure TV size is between 23-60 inches. |
8. Whakatakotoranga
| Āhuahira | Taipitopito |
|---|---|
| Tau tauira | MT2005 |
| Rahi TV Hototahi | 23 - 60 inihi |
| Te Kaha Uta Morahi | 88 lbs (40 kg) |
| VESA Hototahi | 100x100mm ki te 400x400mm |
| Awhe Whakatikatika Teitei | 53 - 57 inches (3 levels) |
| Koki Honga | -2° ki te +5° |
| Rauemi | Korotahi Steel |
| Hunga Hua | 21.2 x 16.1 x 56 inches (approximate, assembled) |
| Taumaha Tūemi | 14 pauna |
| Tae | Pango |
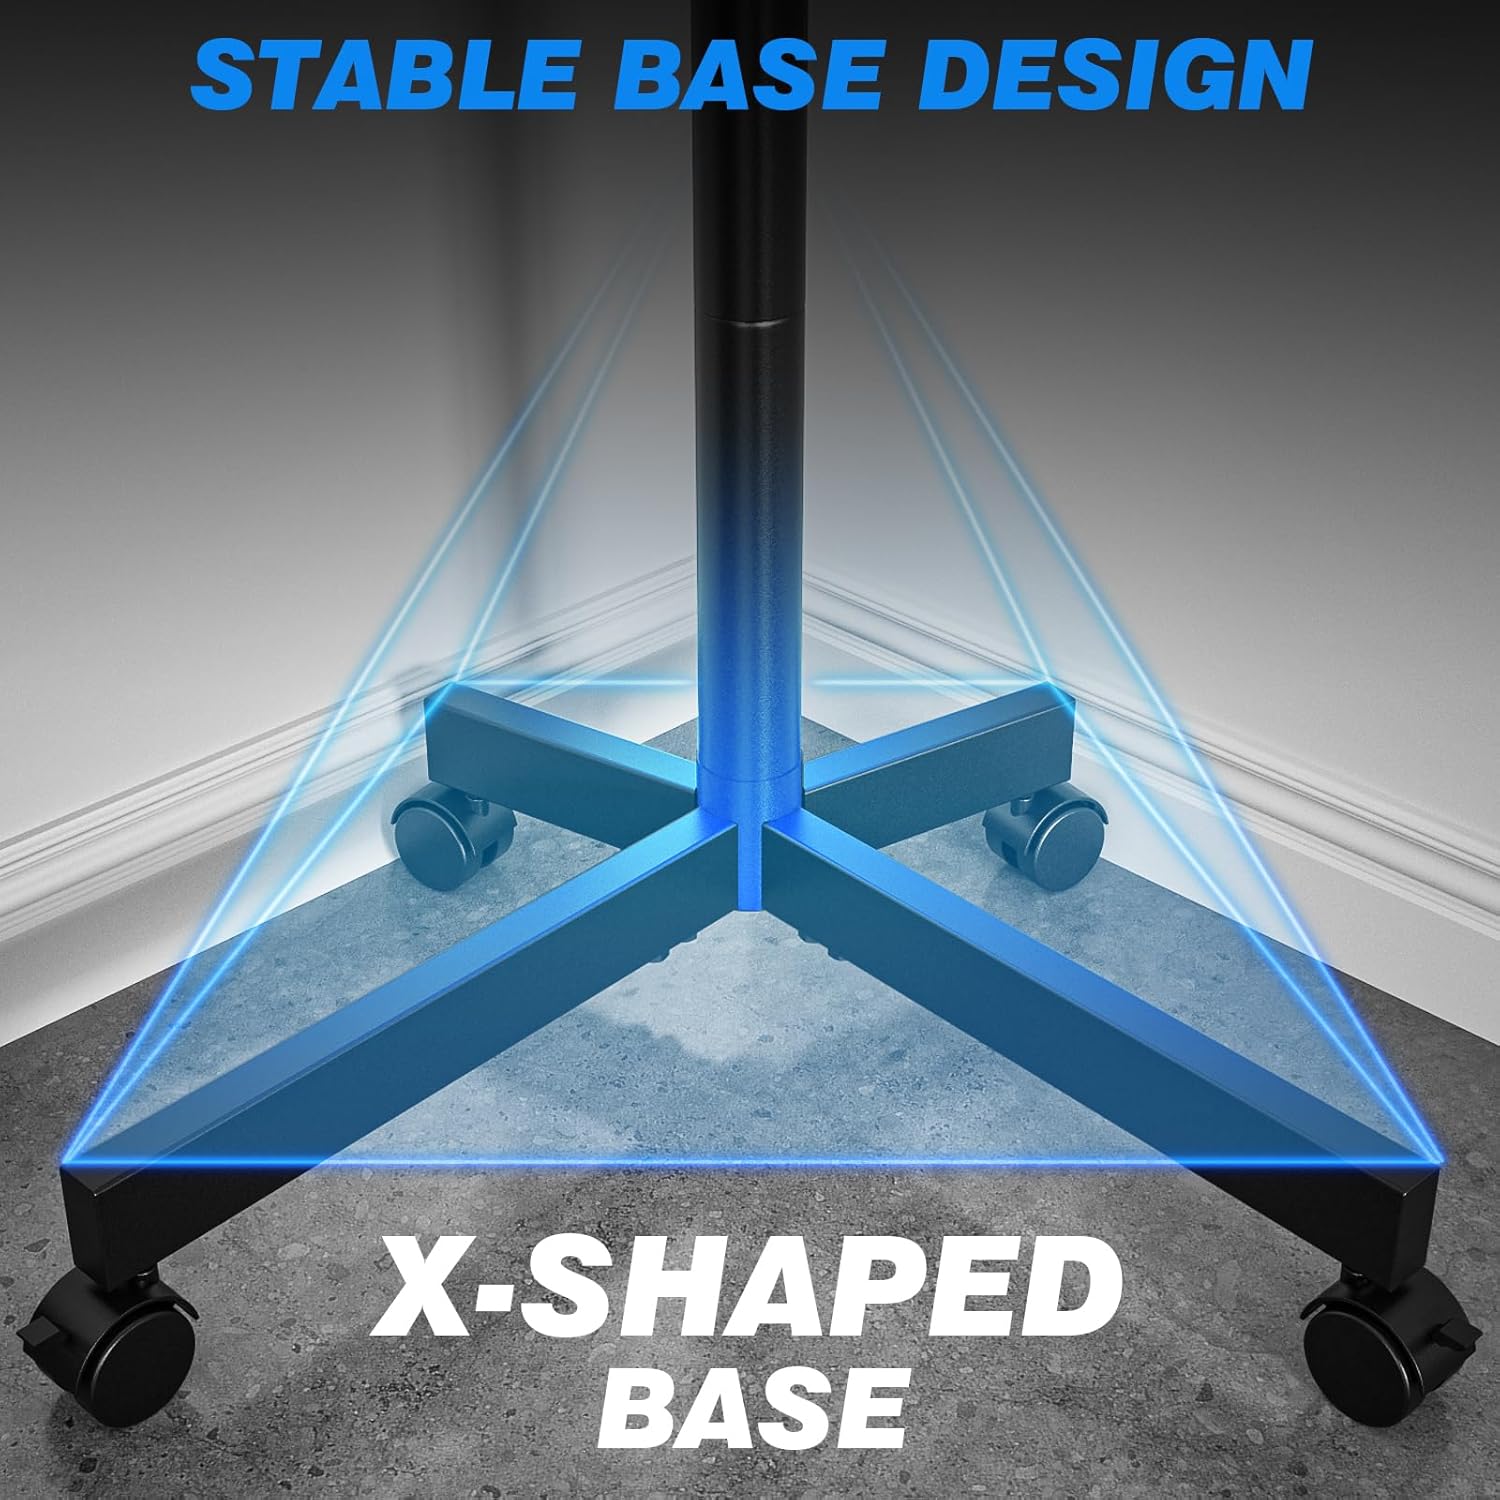
Image: Comprehensive product measurements including height, base dimensions, and mount capacity of 88 lbs.

Image: A comparison graphic illustrating the Rfiver stand's superior load capacity (88 lbs) and height adjustment range (53"-57") compared to other models.
9. Pūtāhui me te Tautoko
The Rfiver Mobile TV Cart comes with a 5-Year Manufacturer Warranty. For any questions, concerns, or assistance with assembly or operation, please contact our 24-hour online service team. Please have your model number (MT2005) and purchase information ready when contacting support.
Mōhiohio Whakapā: Refer to the product packaging or the official Rfiver webpae mo nga taipitopito whakapā tautoko kiritaki o naianei.


