Nga Korero Haumaru Nui
Please read these instructions carefully before installation. If you do not understand these instructions or have doubts about the safety of the installation, please contact a qualified installer. Check carefully to ensure there are no missing or defective parts. Improper installation may cause damage or serious injury. Do not use this product for any purpose not explicitly specified by the manufacturer.
- Raukaha Taumaha: Do not exceed the maximum weight capacity specified for your TV stand model. Exceeding this limit may result in instability and potential injury.
- Rahi pouaka whakaata: Ensure your TV's size and VESA pattern are compatible with the stand.
- Pūmautanga: Always ensure the stand is placed on a stable, level surface. Avoid placing the stand near edges where it could be easily knocked over.
- Tamariki: Keep children away from the TV stand during assembly. Small parts can be a choking hazard.
- Utauta: Whakamahia ngā taputapu e tika ana kia rite ki ngā tohutohu mō te huihui.
Ihirangi mokete
Verify that all components are present and undamaged before beginning assembly. If any parts are missing or damaged, please contact PERLESMITH customer support.
Wae Angamaheni Kei roto:
- Base Plate (Tempered Glass or Metal)
- Tautoko Tiwae
- TV Whakauru
- VESA Adapters (if applicable)
- Hardware Kit (various screws, washers, spacers)
- Assembly Tools (e.g., Hex Key)
Tatūnga me te Tāuta
Follow these steps for proper assembly and installation of your PERLESMITH Universal Swivel TV Stand Base.
Step 1: Assemble the Base and Support Column
- Carefully unbox all components and lay them out on a soft, clean surface to prevent scratches.
- Attach the support column to the base plate using the provided screws and tools. Ensure all connections are secure.

Image: The stand features a strong tempered glass base and a thicker support column for enhanced stability.
Step 2: Attach TV Mounting Brackets to Your Television
- Identify the VESA mounting holes on the back of your television.
- Select the appropriate screws, washers, and spacers from the hardware kit that fit your TV's VESA pattern.
- Attach the vertical TV mounting brackets to the back of your television. Ensure they are level and securely fastened. Do not overtighten.
Step 3: Mount the Television onto the Support Column
- With assistance, carefully lift your television and hook the attached mounting brackets onto the support column's mounting plate.
- Secure the TV to the stand using the safety screws or locking mechanisms provided.
- For model PSTVS13, assembly is designed for ease with fewer bolts required for installation.
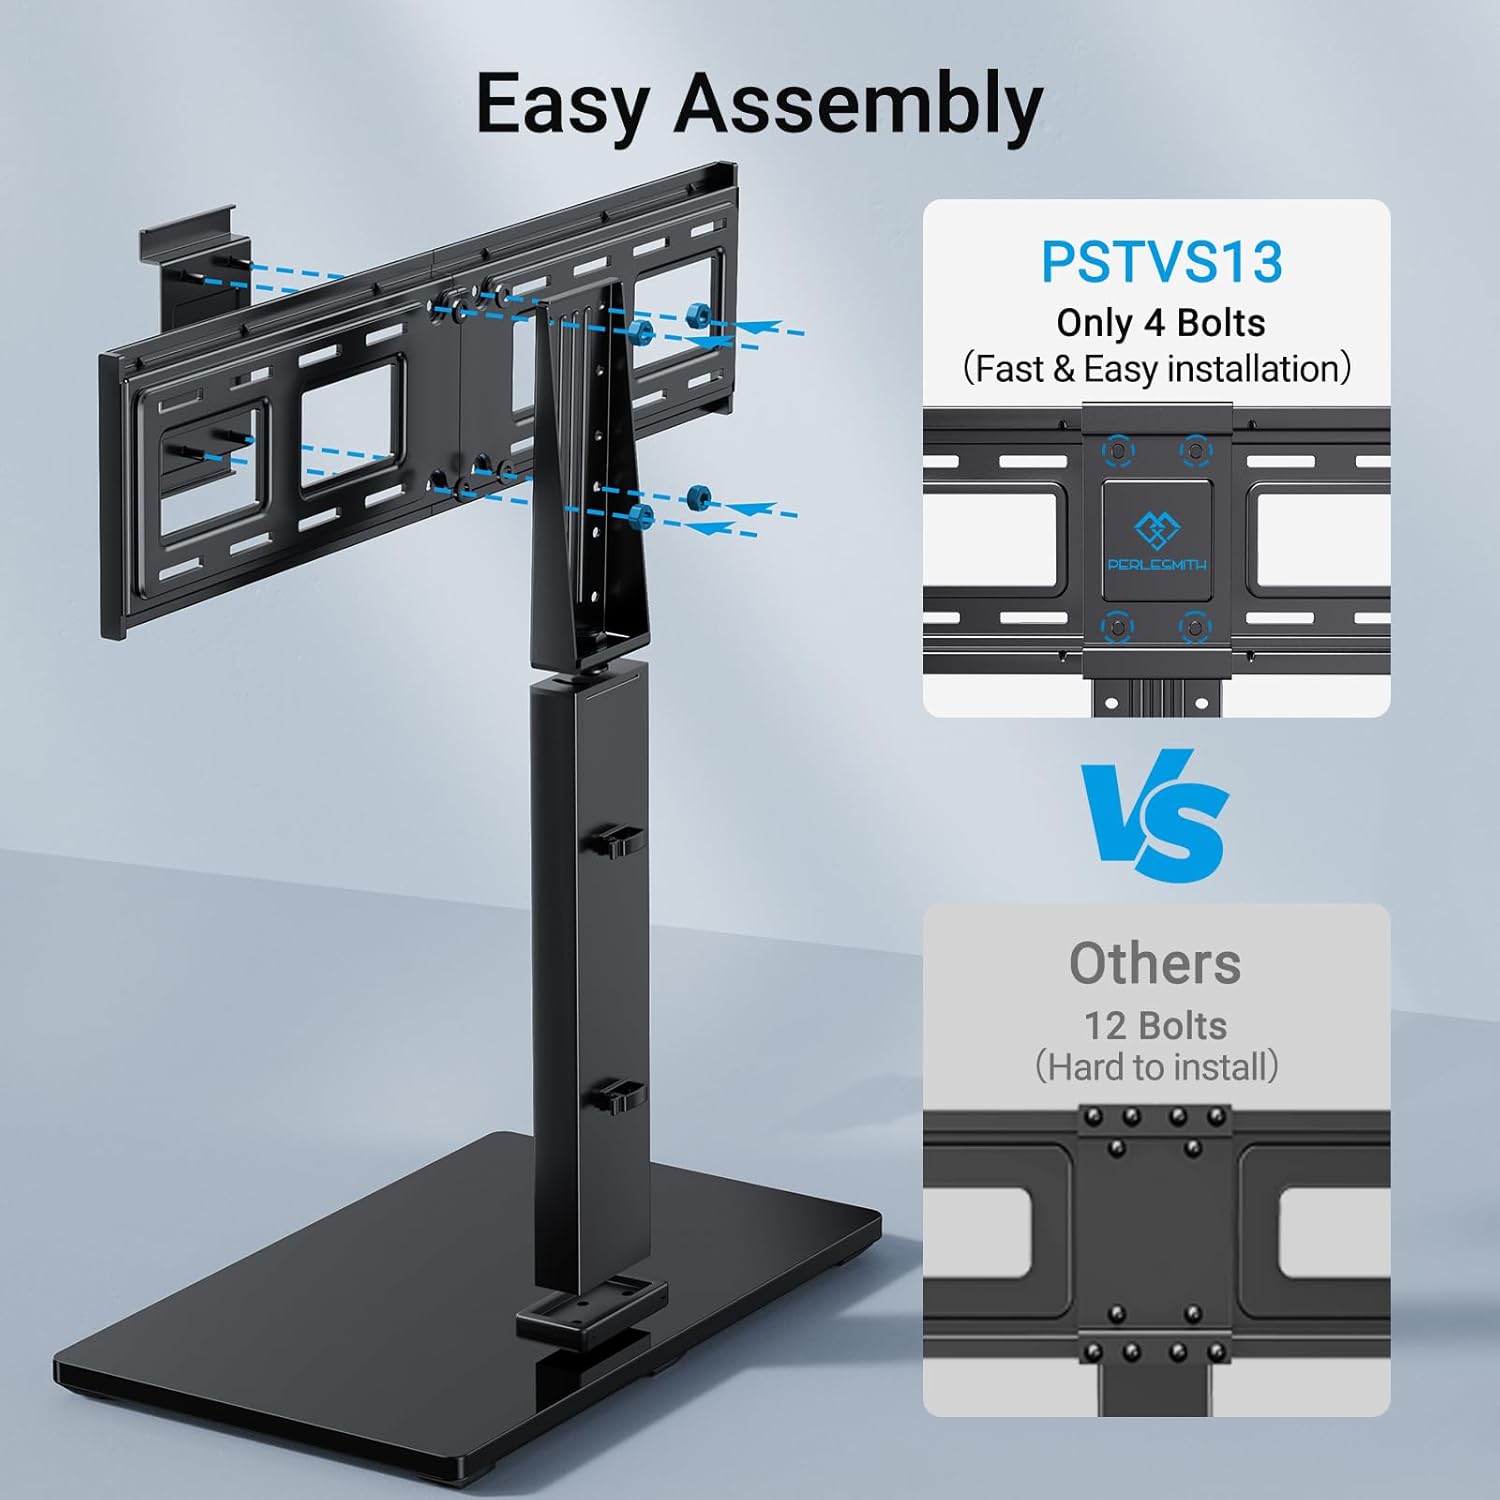
Image: PSTVS13 features an easy assembly design, requiring only 4 bolts for fast installation compared to other models.
Nga Tohutohu Whakahaere
Mahi Hurihuri
Kei ngā tauira PSTVS13 me PSTVS09 he mahi hurihuri hei arotau i tō viewte wheako.
- Gently grasp the sides of your television and rotate it to the desired angle.
- The stand allows for a swivel range of up to 30 degrees left or right (total 60 degrees).
- Avoid forcing the TV beyond its natural swivel limits.

Image: The TV stand allows for a swivel of up to 30 degrees left or right, providing flexible viewnga koki.
Height Adjustment (PSTVS13 Only)
The PSTVS13 model offers multiple height adjustment positions for an elevated view.
- The PSTVS13 provides 9 different height adjustment positions, allowing for a total of 8 inches of vertical movement.
- To adjust the height, you may need to temporarily remove the TV from the stand or loosen specific bolts on the support column (refer to the detailed assembly diagram for your specific model).
- Always ensure the TV is securely re-fastened at the new height.

Image: The PSTVS13 model features a taller pillar design, offering a 15% higher elevated view compared to other stands.
Te tiaki
Regular maintenance helps ensure the longevity and safe operation of your TV stand.
- Te horoi: Use a soft, dry cloth to clean the stand. For stubborn marks on the glass base, a mild glass cleaner can be used, applied to the cloth first, not directly to the stand. Avoid abrasive cleaners or solvents.
- Taki Hononga: Periodically check all screws and bolts to ensure they remain tight. Loose connections can compromise stability.
- Tirotiro: Inspect the stand for any signs of wear, damage, or corrosion. If any issues are found, discontinue use and contact customer support.
Raparongoā
If you encounter issues with your TV stand, refer to the following common problems and solutions.
Problem: TV is not stable or wobbles.
- Rongoā: Ensure all assembly screws are tightened securely. Verify the stand is on a flat, level surface. Check that the TV's weight and VESA pattern are within the stand's specifications.
Problem: TV does not fit the mounting brackets.
- Rongoā: Confirm your TV's VESA pattern (distance between mounting holes) matches the stand's compatibility. Ensure you are using the correct screws and spacers for your TV model.
Problem: Difficulty with swivel function.
- Rongoā: Ensure no cables are obstructing the swivel mechanism. Do not force the TV; the swivel is designed for smooth, controlled movement.
Whakatakotoranga
Detailed specifications for PERLESMITH Universal Swivel TV Stand Bases.
| Āhuahira | PSTVS13 | PSTVS09 |
|---|---|---|
| Rahi TV Hototahi | 37" - 75" | 32" - 60" |
| Te Kaha Uta Morahi | 99 lbs (45 kg) | 88 lbs (40 kg) |
| Hototahi VESA (mm) | 200x100, 200x200, 300x200, 300x300, 400x300, 400x400, 600x200, 600x400 | 100x100, 200x100, 200x200, 200x300, 300x200, 300x300, 300x400, 400x200, 400x300, 400x400 |
| Awhe Hurihuri | ±30° (60° katoa) | ±30° (60° katoa) |
| Whakatikatika Teitei | 9 positions, 8" total movement | Not applicable (fixed height) |
| Rauemi | Alloy Steel, Tempered Glass Base | |
| Tae | Pango | |
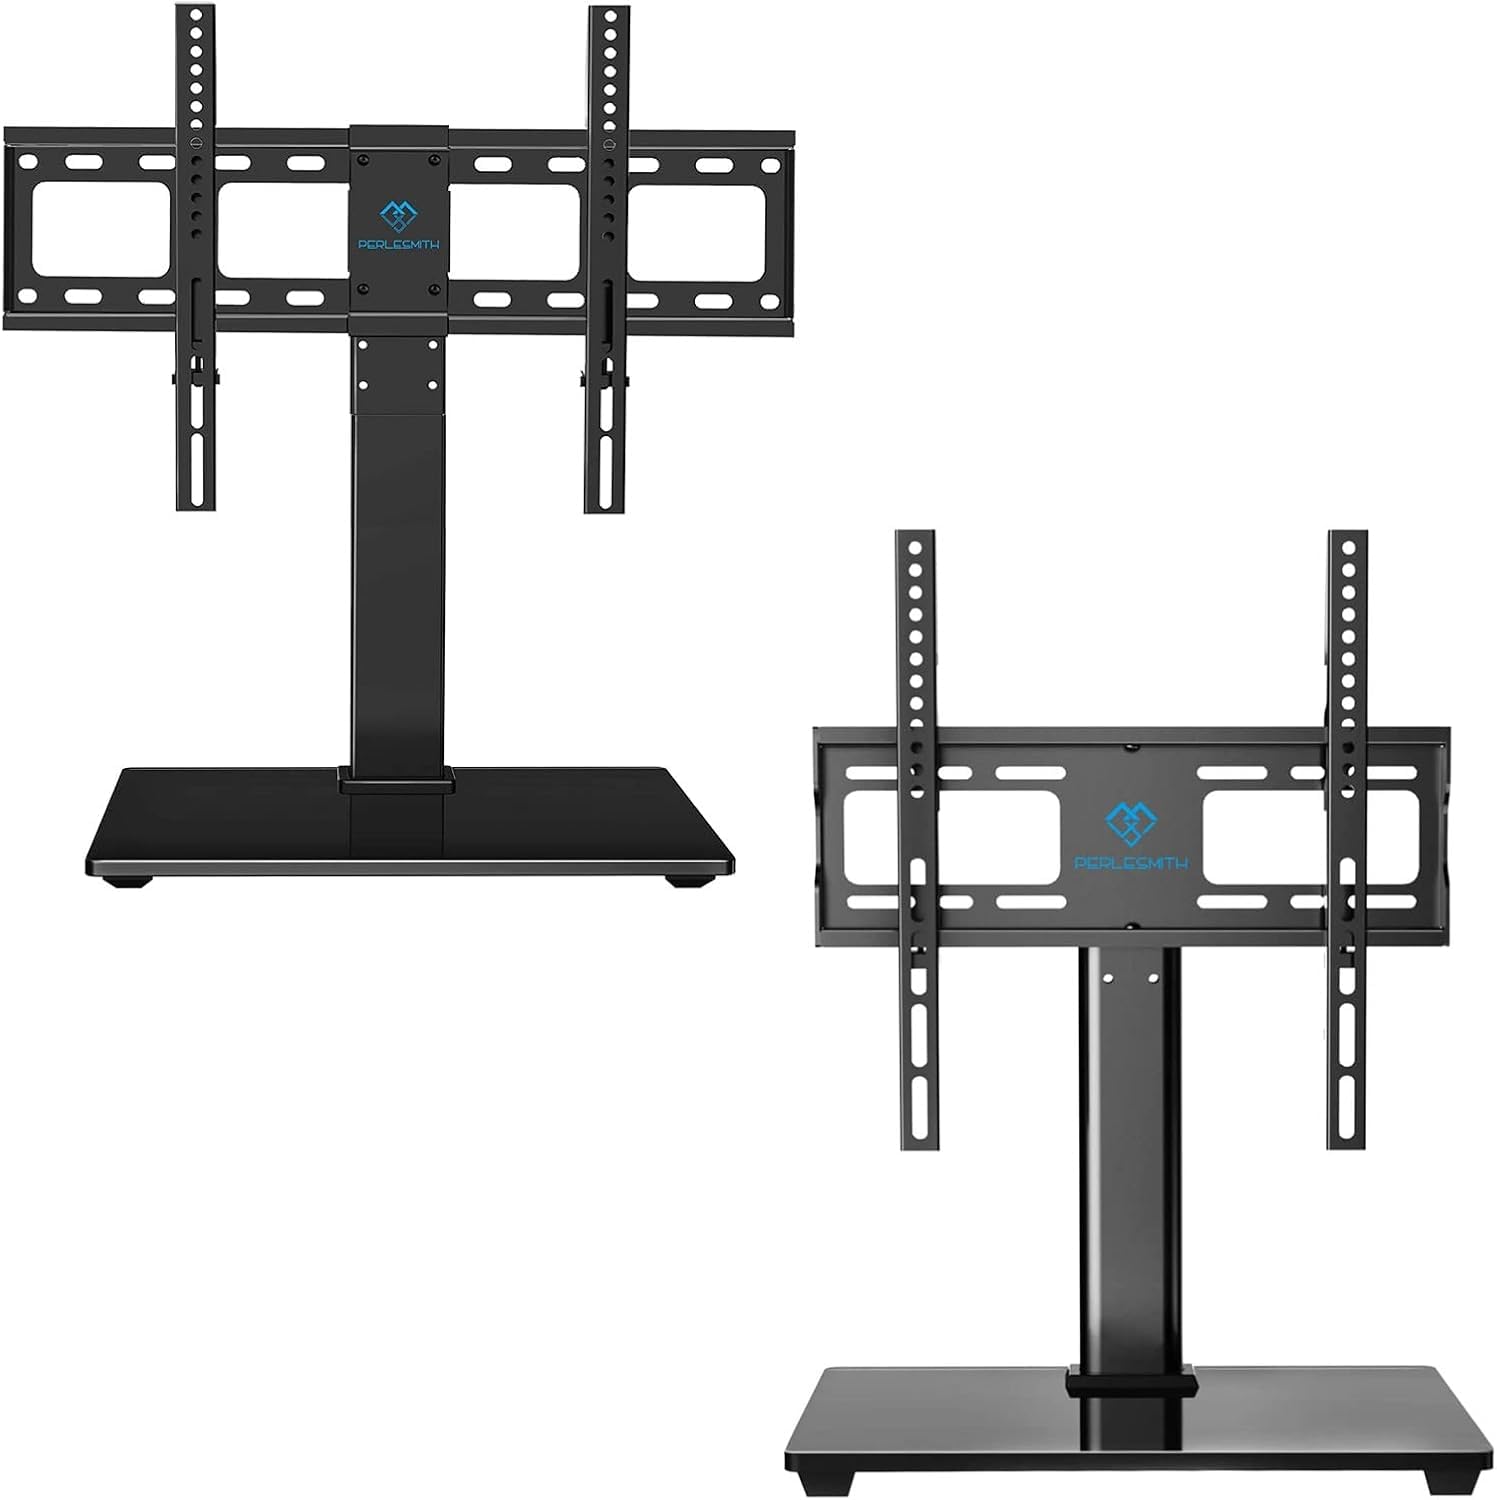
Image: PSTVS13 compatibility for 37"-75" TVs, max 99 lbs, and various VESA patterns.

Image: PSTVS09 compatibility for 32"-60" TVs, max 88 lbs, and various VESA patterns.

Image: The stand has passed a 4X load capacity test, demonstrating sturdy TV support.
Nga korero Whakaputanga
PERLESMITH products are manufactured with quality and care. This product is covered by a manufacturer's warranty against defects in materials and workmanship. Please refer to the warranty card included with your purchase or visit the official PERLESMITH webpae mo nga tikanga me nga tikanga whakamana.
Tautoko Kiritaki
If you have any questions, require assistance with assembly, or need to report missing/damaged parts, please contact PERLESMITH customer support. Our team is available to help you.
- Webpae: Visit the official PERLESMITH webpae tukutuku mō ngā FAQs, ngā mōhiohio hua, me ngā kōwhiringa whakapā.
- Īmēra: Tirohia te takai o tō hua, te PERLESMITH rānei webpaetukutuku mō ngā wāhitau īmēra ratonga kiritaki.
- Waea: Contact numbers may be available on the PERLESMITH webpae, tuhinga hua ranei.


