1. Kupu Whakataki
This manual provides essential information for the safe and correct operation of your Vonyx VMM100 4-Channel DJ Mixer. Please read this manual thoroughly before using the device to ensure optimal performance and to prevent damage. Keep this manual for future reference.
2. Nga Tohutohu Haumaru
- Whakaritehia te voltage matches the requirements specified for the device.
- Do not expose the device to rain or moisture to avoid electric shock.
- A ape i te whakanoho i te taputapu ki te taha o nga puna wera, ki te ra tika ranei.
- Kaua e whakatuwheratia te casing; kaore he waahanga e taea ana e te kaiwhakamahi ki roto. Tukuna atu nga ratonga katoa ki nga kaimahi whai tohu.
- Disconnect the power adapter during thunderstorms or when not in use for extended periods.
- Tiakina te taputapu mai i nga tamariki.
3. Nga Hua o te Hua
- Compact 4-channel analog mixer.
- Hononga Nihokikorangi mo te rere ororongo ahokore.
- Integrated USB MP3 player with digital display.
- Adjustable delay effect with dedicated volume control.
- Effect send/return on channels 1 and 2.
- High and low tone controls for each channel.
- USB power supply (5V) for mobile use, compatible with power banks.
- Channels 1 and 2 feature +48V phantom power for condenser microphones.
- LED VU meter and peak indicators for signal monitoring.
- Includes USB power adapter and USB cable.
4. Ihirangi mokete
Tena koa tirohia kei te noho nga taonga katoa i te wa e wetewete ana:
- Vonyx VMM100 4-Channel DJ Mixer
- USB Pūrere Taputapu
- Tauira USB
- Pukapuka Kaiwhakamahi (tenei tuhinga)
5. Mana me nga Mahi
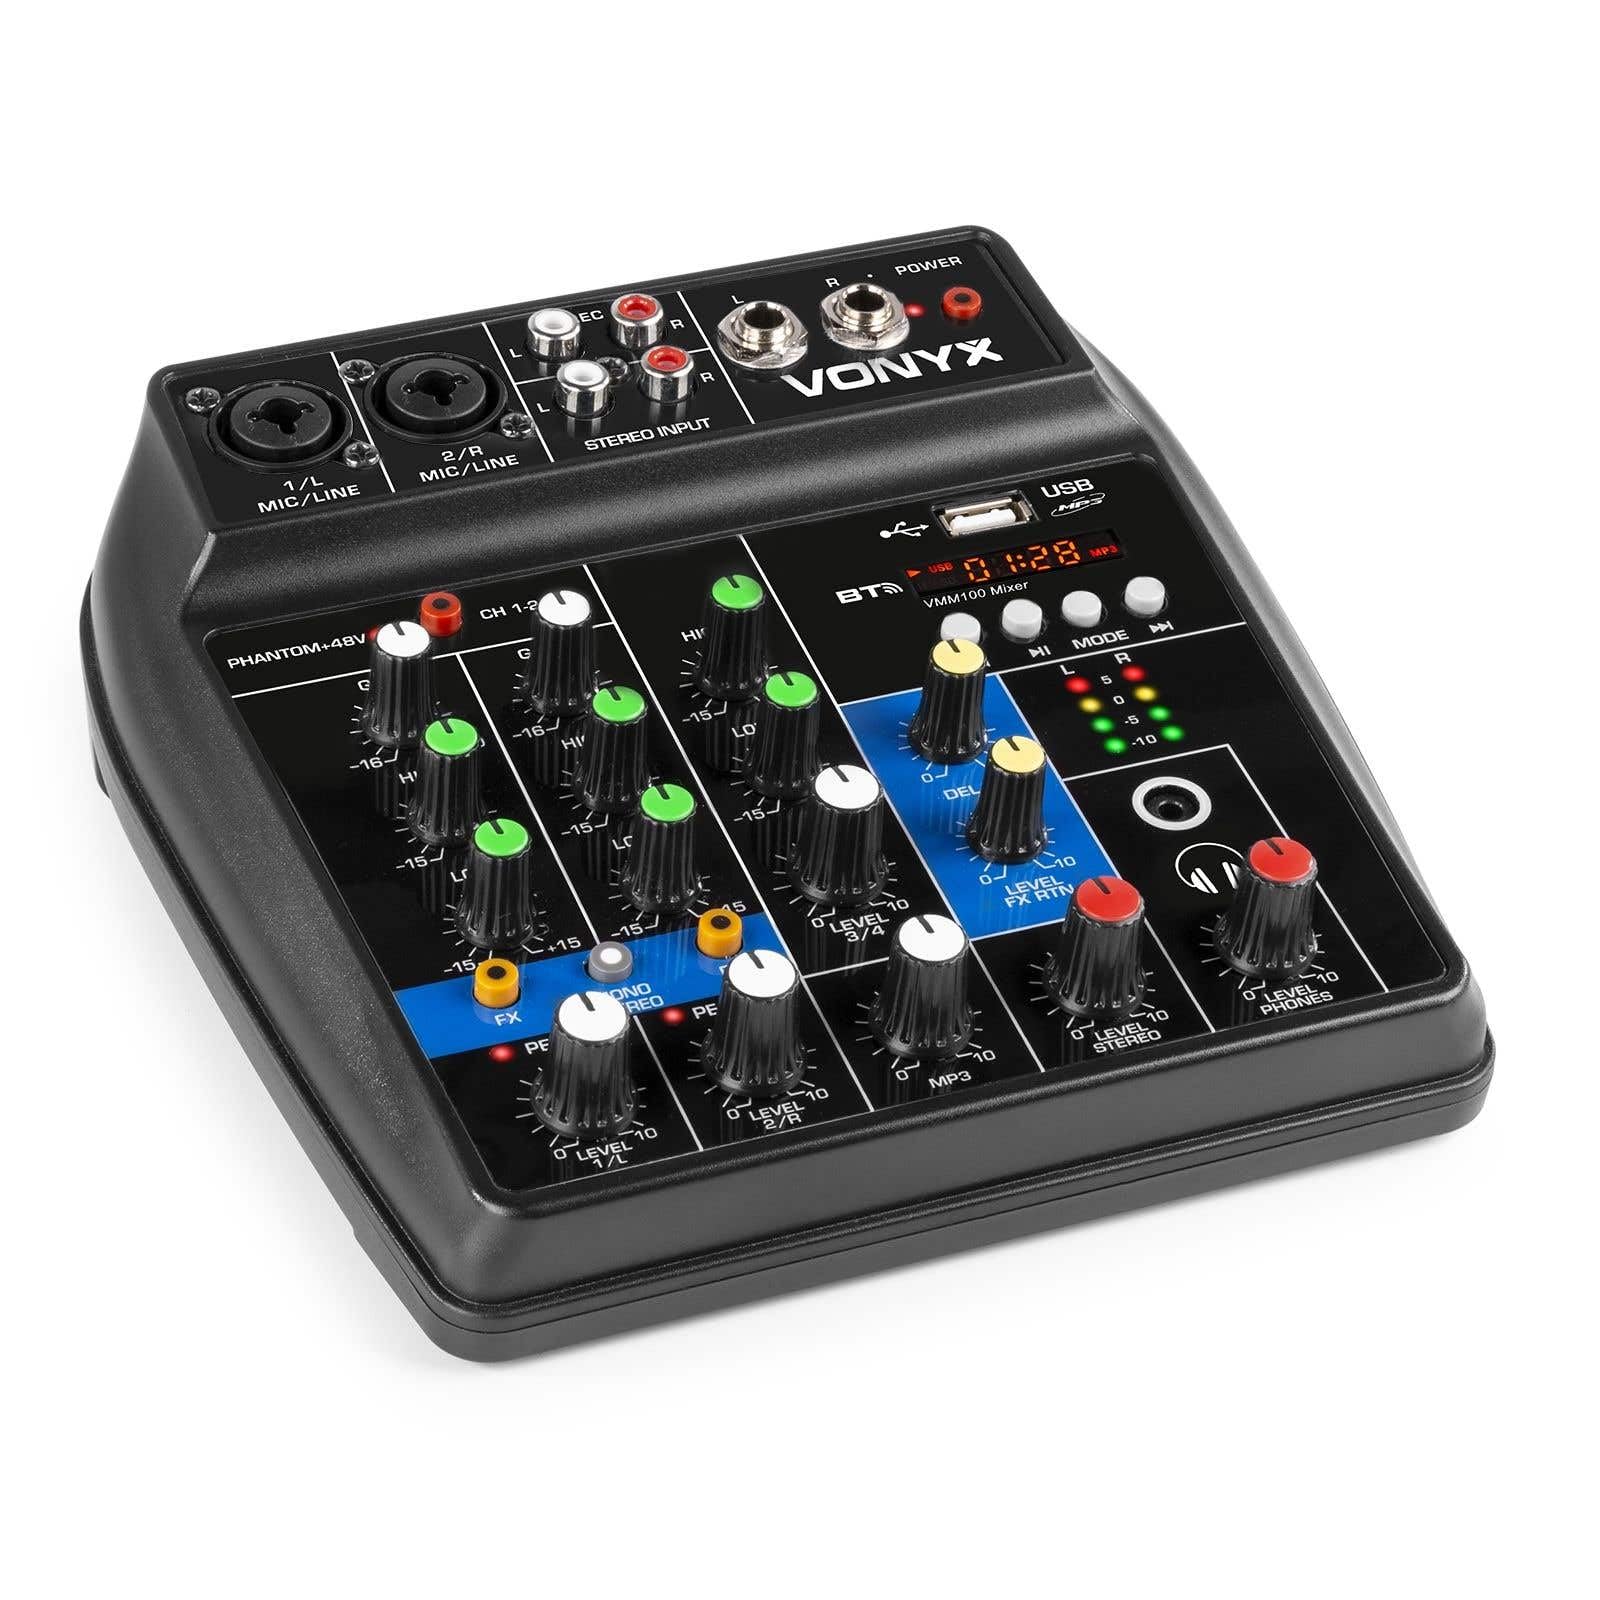
Whakaahua 1: Te nuinga view of the Vonyx VMM100 mixer, highlighting the layout of all controls, inputs, and outputs.

Whakaahua 2: Close-up of the mixer's control panel, showing individual channel controls, EQ, gain, and effect knobs.
5.1 Ngā Hongere Whakauru (1 me te 2)
- Combi XLR / 6.3mm Jack: Connect microphones (XLR) or line-level instruments (6.3mm jack).
- Pātene Phantom +48V: Activates phantom power for condenser microphones on channels 1 and 2.
- Knob GAIN: Adjusts the input sensitivity for the connected device.
- Poro Teitei: Adjusts the high-frequency (treble) level for the channel.
- Poro Iti: Adjusts the low-frequency (bass) level for the channel.
- FX Knob: Controls the amount of delay effect applied to the channel.
- Arahina tihi: Illuminates when the input signal is too high, indicating potential clipping. Adjust GAIN to prevent this.
- Taumata Knob: Adjusts the overall output level of the channel.
5.2 Stereo Input (Channel 3)
- Ngā Tāurunga RCA (L/R): Connect external stereo audio sources such as CD players or other line-level devices.
- Taumata Knob: Ka whakarerekē i te taumata putanga o te tāuru oro stereo.
5.3 MP3/Bluetooth Channel (Channel 4)

Whakaahua 3: USB port with a USB drive, demonstrating media playback capability.

Whakaahua 4: Bluetooth and USB player section, showing the display and control buttons.
- Tauranga USB: Whakauruhia he puku kohiko USB hei purei i te MP3.
- Whakaatu: Shows track information, playback time, and mode.
- Control Buttons (Play/Pause, Skip, Mode): Navigate tracks and switch between USB and Bluetooth modes.
- Bluetooth (BT) Indicator: Lights up when Bluetooth is active and paired.
- Taumata Knob: Adjusts the output level of the MP3/Bluetooth channel.
5.4 Wāhanga Matua
- Poro Whakaroa: Adjusts the overall intensity of the delay effect.
- LEVEL FX RTN Knob: Controls the return level of the delay effect.
- LEVEL STEREO Knob: Master volume control for the main stereo output.
- LEVEL PHONES Knob: Ka whakarerekē i te oro mō te putanga o te paneoro.
- VU Meter (LED): Displays the main output level.
- Main Output (6.3mm Jack L/R): Ka hono ki amphe kaiwhakaora, he kaikorero hiko ranei.
- Putanga Rekoata (RCA L/R): Connects to recording devices.
- Putanga Paneoro (Hononga 6.3mm): Connects stereo headphones.
- Arahina mana: Indicates when the mixer is powered on.
5.5 Whakauru Mana

Whakaahua 5: Te taha view of the mixer, illustrating the 5V DC USB power input port.
- 5V DC USB Input: Connect the provided USB power adapter or a compatible USB power source (e.g., power bank) to power the mixer.
6. Tatūnga
6.1 Hononga Hiko
- Connect the supplied USB cable to the 5V DC USB input on the mixer.
- Connect the other end of the USB cable to the provided USB power adapter.
- Plug the USB power adapter into a suitable wall outlet. The POWER LED on the mixer will illuminate.
6.2 Te Hono i nga Puna Ororongo
- Microphones/Line Instruments: Connect microphones via XLR or line-level instruments via 6.3mm jack to channels 1 and 2. If using condenser microphones, activate the +48V phantom power switch.
- Stereo Line Devices: Connect devices like CD players to the RCA inputs of channel 3.
- Puku USB: Whakauruhia he puku kohiko USB kei roto MP3 files into the USB port on channel 4.
6.3 Ngā Putanga Hononga
- Putanga Matua: Connect the 6.3mm jack main outputs (L/R) to your amppūokooro hiko, pūoro hiko, pūnaha PA rānei.
- Pūoro: Connect your headphones to the 6.3mm headphone jack.
- Pūrere Hopu: Connect the RCA record outputs (L/R) to an external recording device if desired.
7. Nga Tohutohu Whakahaere
7.1 Te Whakaranu Taketake
- Ensure all LEVEL and GAIN knobs are set to their minimum positions before powering on.
- Power on the mixer and any connected audio equipment.
- Gradually increase the GAIN knob for each active input channel until the PEAK LED flashes only occasionally during the loudest parts of the signal.
- Adjust the HIGH and LOW EQ knobs for each channel to shape the tone as desired.
- Use the individual LEVEL knobs to balance the volume of each channel.
- Adjust the main STEREO LEVEL knob to control the overall output volume. Monitor the VU meter to avoid clipping.
- Adjust the PHONES LEVEL knob for comfortable headphone monitoring.
7.2 Mahi Nihokikorangi
- Press the MODE button on the MP3/Bluetooth channel until the display shows "BT" or the Bluetooth indicator flashes.
- On your smartphone, tablet, or PC, search for Bluetooth devices and select "Vonyx VMM100".
- Once paired, the Bluetooth indicator will glow steadily. You can now stream audio wirelessly to the mixer.
- Use the playback controls on the mixer or your device to manage audio.
7.3 Pureitanga MP3 USB
- Whakauruhia he puku kohiko USB kei roto MP3 files ki te tauranga USB.
- Press the MODE button on the MP3/Bluetooth channel until the display shows track information.
- Use the playback controls (Play/Pause, Skip) to navigate and play tracks.
7.4 Te Whakamahi i ngā Pānga
- Turn the FX knob on channels 1 and 2 to send a portion of that channel's signal to the internal delay effect.
- Adjust the main DELAY knob to control the overall intensity and characteristics of the delay.
- Use the LEVEL FX RTN knob to control how much of the processed effect signal is mixed back into the main output.
8. Hopu
The VMM100 mixer allows for easy recording of your mix. Connect the RCA record outputs (L/R) to the input of a suitable recording device (e.g., computer audio interface, dedicated recorder). Ensure your recording software or device is configured to receive audio from the connected inputs. The signal sent to the record output is a stereo mix of all active channels, post-fader.
9. Tiaki
- Te horoi: Whakamahia he kakahu ngohengohe, maroke hei horoi i te taha waho o te mīhini whakaranu. Kaua e whakamahi i ngā kaihoroi whakakoi, i ngā whakarewa rānei.
- Rokiroki: Penapenahia te mīhini whakaranu ki te wāhi hauhautanga, maroke, kia matara atu i te rā tika me ngā pāmahana tino kino.
- Te whakahaere: Kaua e maturuturu, e tukua rānei te mīhini whakaranu ki ngā pānga kaha.
10. Te Raru
| Raruraru | Take pea | Rongoā |
|---|---|---|
| Karekau he kaha | Ko te urutau hiko kaore i te hono, i te he ranei. | Check power connections. Try a different USB port or adapter. |
| Kaore he putanga oro | Incorrect cable connections; volume knobs too low; incorrect input selection. | Verify all audio cables are securely connected. Increase channel LEVEL and STEREO LEVEL knobs. Ensure correct input mode (e.g., USB/BT). |
| Oro kerekere | Input GAIN too high; output level too high. | Reduce GAIN for the affected channel until the PEAK LED stops flashing excessively. Lower STEREO LEVEL. |
| Ko te Nihokikorangi kaore i te takirua | Mixer not in Bluetooth mode; device too far; previously paired device connected. | Ensure mixer is in BT mode. Move device closer. Disconnect from other Bluetooth devices. |
| Ko te purei USB kaore e mahi | Kāore i te tika te hōputu o te puku USB; kāore i te tautokona file momo; kāore te mīhini whakaranu i te aratau USB. | Ensure USB drive is FAT32 formatted and contains MP3 files. Press MODE to select USB. |
11. Whakatakotoranga
- Ngā Tāuru:
- Channels 1 & 2: Combi XLR / 6.3mm Jack (Line or Microphone)
- Channel 3: RCA (Stereo)
- Channel 4: Bluetooth or USB MP3 Player
- Putanga:
- Main: 6.3mm Jack (Stereo)
- Record: RCA (Stereo)
- Headphone: 6.3mm Jack
- Awhe Auautanga: 20 Hz - 20,000 Hz
- Kai-rite: 2-band (High, Low) per channel
- Mana Phantom: +48V (Channels 1 & 2)
- Hononga Voltage: 5V DC (mā te USB)
- Ahu (L x W x H): 18 x 19.5 x 5.8 cm (7.09 x 7.68 x 2.28 inihi)
- Taumaha: 0.5 kg (1.1 lbs)
- Rauemi: Nylon
12. Pūtāhui me te Tautoko
Vonyx products are designed and manufactured to the highest quality standards. In the unlikely event of a problem with your product, please contact your retailer for warranty service. Please retain your proof of purchase. For technical support or further inquiries, refer to the official Vonyx webpaetukutuku, whakapā atu ranei ki ta raatau tari ratonga kaihoko.


