1. Kupu Whakataki
This manual provides essential instructions for the installation, operation, and maintenance of the DEYE SUN-12K-SG04LP3-EU Three-Phase Hybrid Inverter. Please read this manual thoroughly before installation and operation to ensure proper use and to prevent damage to the device or injury to personnel. Keep this manual for future reference.

Whakaahua 1: DEYE SUN-12K-SG04LP3-EU Hybrid Inverter and included accessories. This image displays the main inverter unit along with various cables, connectors, and current transformers that are part of the product package.
2. Nga Tohutohu Haumaru
Me whai tonu i ngā mahi ārai haumaru e whai ake nei hei whakaiti i te tūponotanga o te ru hiko, te ahi, te whara rānei:
- Ko te whakaurunga me te tiaki me mahi e nga kaimahi whai mana anake.
- Ensure the inverter is disconnected from all power sources (PV array, battery, grid) before performing any service or maintenance.
- Kaua e whakahaeretia te kaihurihuri mena kua pakaru, kei te ahua kino ranei.
- Do not attempt to repair the inverter yourself. Contact authorized service personnel.
- Tiakina nga tamariki mai i te hurihanga.
- The inverter can reach high temperatures during operation. Avoid touching it directly.
- Me whakarite kia tika te hau huri noa i te kaihurihuri kia kore ai e wera rawa.
3. Hua Neke Atuview
The DEYE SUN-12K-SG04LP3-EU is a three-phase hybrid inverter designed for solar energy systems. It features two Maximum Power Point Trackers (MPPTs), a WLAN module for monitoring, and an IP65 rating for outdoor installation. It supports low-voltage 48V batteries and offers flexible DC/AC coupling options.
3.1 Nga waahanga matua
- 12 kW Three-Phase Hybrid Inverter
- 48 V Puawai Ititage Battery Compatibility (Lead-Acid or Lithium-Ion)
- Two MPPTs for optimized solar energy harvesting
- Integrated WLAN module for remote monitoring
- IP65 protection rating for outdoor use
- Supports three-phase unbalanced output
- Equipped with CAN (x2) and RS485 (x1) ports for BMS and parallel communication
- Smart Load application and Grid-Peak-Shave function
3.2 Te Awhi o te Tukunga

Whakaahua 2: Components included in the DEYE SUN-12K-SG04LP3-EU package. This image shows the various accessories such as communication cables, DC connectors, current transformers, and the user manual that come with the inverter.
Manatokohia kei roto i te kete ngā wāhanga katoa kua whakarārangihia i raro nei:
- DEYE SUN-12K-SG04LP3-EU Hybrid Inverter Unit
- WLAN Kōwae
- Pukapuka Kaiwhakamahi
- Maunga Paetahi
- Communication Cables (e.g., Ethernet, RS485)
- DC Tūhono
- Nga Kaihuri O Naianei (CTs)
- Pūoko pāmahana
4. Tatūnga me te Tāuta
Proper installation is crucial for the safe and efficient operation of the inverter. Follow these steps carefully.
4.1 Kōwhiringa Pae
- Install the inverter in a well-ventilated area, away from direct sunlight, rain, and dust.
- Ensure the ambient temperature is within the operating range (-40 °C to 60 °C).
- Maintain adequate clearance around the inverter for heat dissipation.
- The inverter is IP65 rated, allowing for outdoor installation, but protection from extreme weather is recommended.
4.2 Whakapiki i te Inverter
The inverter is designed for wall mounting.
- Whakamahia te whāriki whakairi kua whakaratohia hei tauira hei tohu i ngā pūwāhi keri ki te pakitara.
- Ka werohia nga rua me te whakauru i nga taputapu pakitara e tika ana.
- Kia mau ki te awhi whakapuru ki te pakitara.
- Carefully lift the inverter and hang it onto the mounting bracket.
- Secure the inverter to the bracket using the provided screws.

Whakaahua 3: Runga view of the inverter showing mounting points for wall installation. This image highlights the design features that facilitate easy and flexible installation of the unit on a wall.
4.3 Hononga Hiko
All electrical connections must comply with local electrical codes and standards.

Whakaahua 4: Raro view of the DEYE inverter, illustrating all connection ports. This includes battery connections, communication ports (CAN, RS485), PV input, grid connection, load connection, and generator/smart load ports.
- Hononga Whakauru PV: Connect the DC cables from the solar array to the PV input terminals (DC1, DC2). Ensure correct polarity. The inverter has 2 MPPTs.
- Hononga Pūhiko: Connect the battery cables to the BATTERY terminals. The inverter supports 48V low-voltage batteries (Lead-Acid or Lithium-Ion). Ensure correct polarity.
- Hononga Mātiti AC: Connect the AC grid cables to the GRID terminals. This is a three-phase inverter.
- Uta Hononga: Connect the load cables to the LOAD terminals.
- Generator/Smart Load Connection: If applicable, connect the generator or smart load to the GEN terminals.
- Tauranga Whakawhitiwhiti: Connect BMS (Battery Management System) via CAN (COM1, COM2) or RS485 (COM3) ports. An RS232 port is also available for remote control.
- Kōwae WLAN: Insert the WLAN module into its designated port for remote monitoring capabilities.
- Pūoko pāmahana: Connect the external temperature sensor.
Tuhipoka: The inverter supports parallel connection of up to 10 units for increased capacity.
5. Nga Tohutohu Whakahaere
This section details the startup procedure and basic operation of the DEYE Hybrid Inverter.
5.1 Whakaohoatanga Tuatahi
- After all electrical connections are securely made, switch on the DC switch located on the side of the inverter.
- Switch on the AC breaker from the grid side.
- The inverter will perform a self-test and then begin operation.
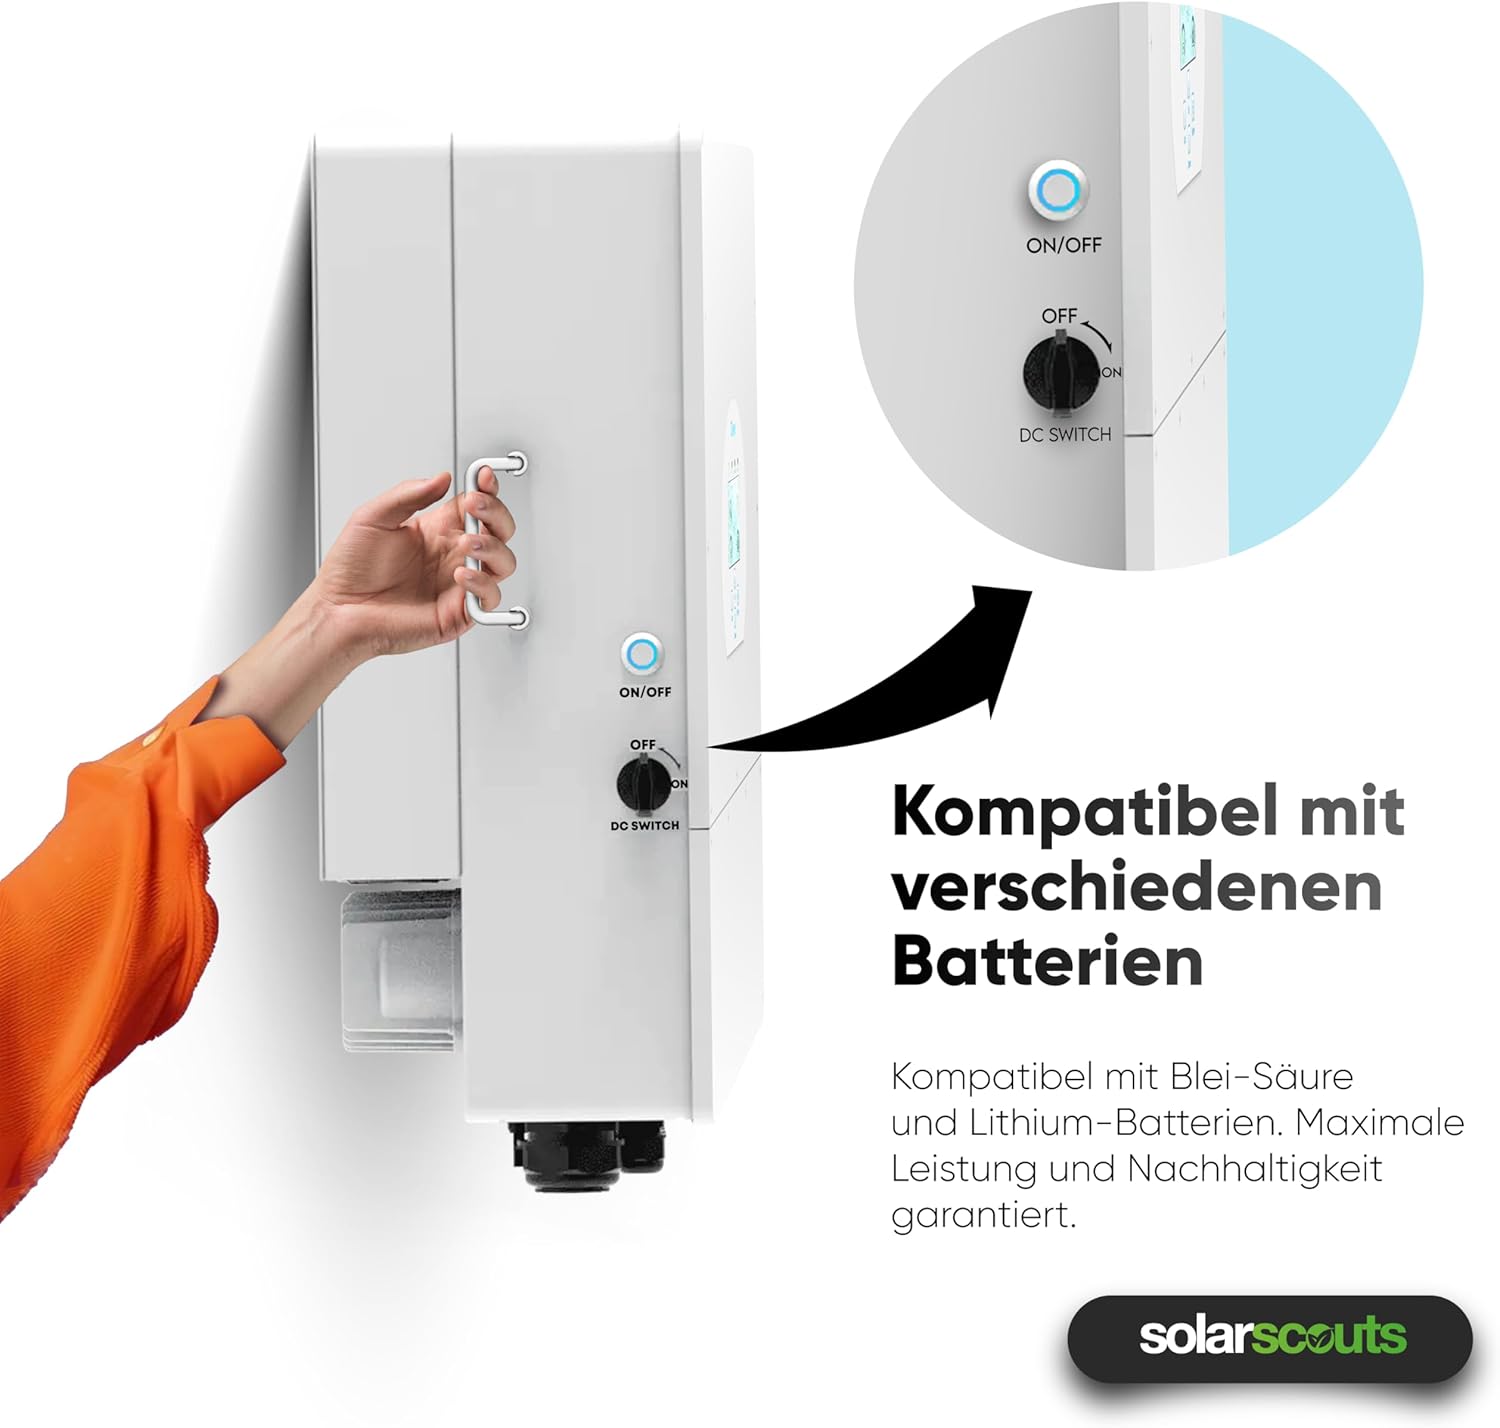
Whakaahua 5: A hand operating the ON/OFF and DC switch on the side of the inverter. This switch controls the power flow and is essential for safe startup and shutdown procedures.
5.2 Whakaatu me te Atanga
The inverter features an intuitive touchscreen interface for monitoring and configuration.

Whakaahua 6: Kati-ake view of the inverter's touchscreen display. This interface provides real-time operational data, status indicators (AC, DC, Normal, Alarm), and navigation buttons (Up, Down, Esc, Enter) for system control and monitoring.
- Tohu Mana: AC, DC, Normal, Alarm LEDs indicate the current operational status.
- Patene Whakaterenga: Use "Up", "Down", "Esc", and "Enter" buttons to navigate through menus and adjust settings.
- Raraunga Wā-tūturu: The display shows real-time power flow, battery status, and grid interaction.
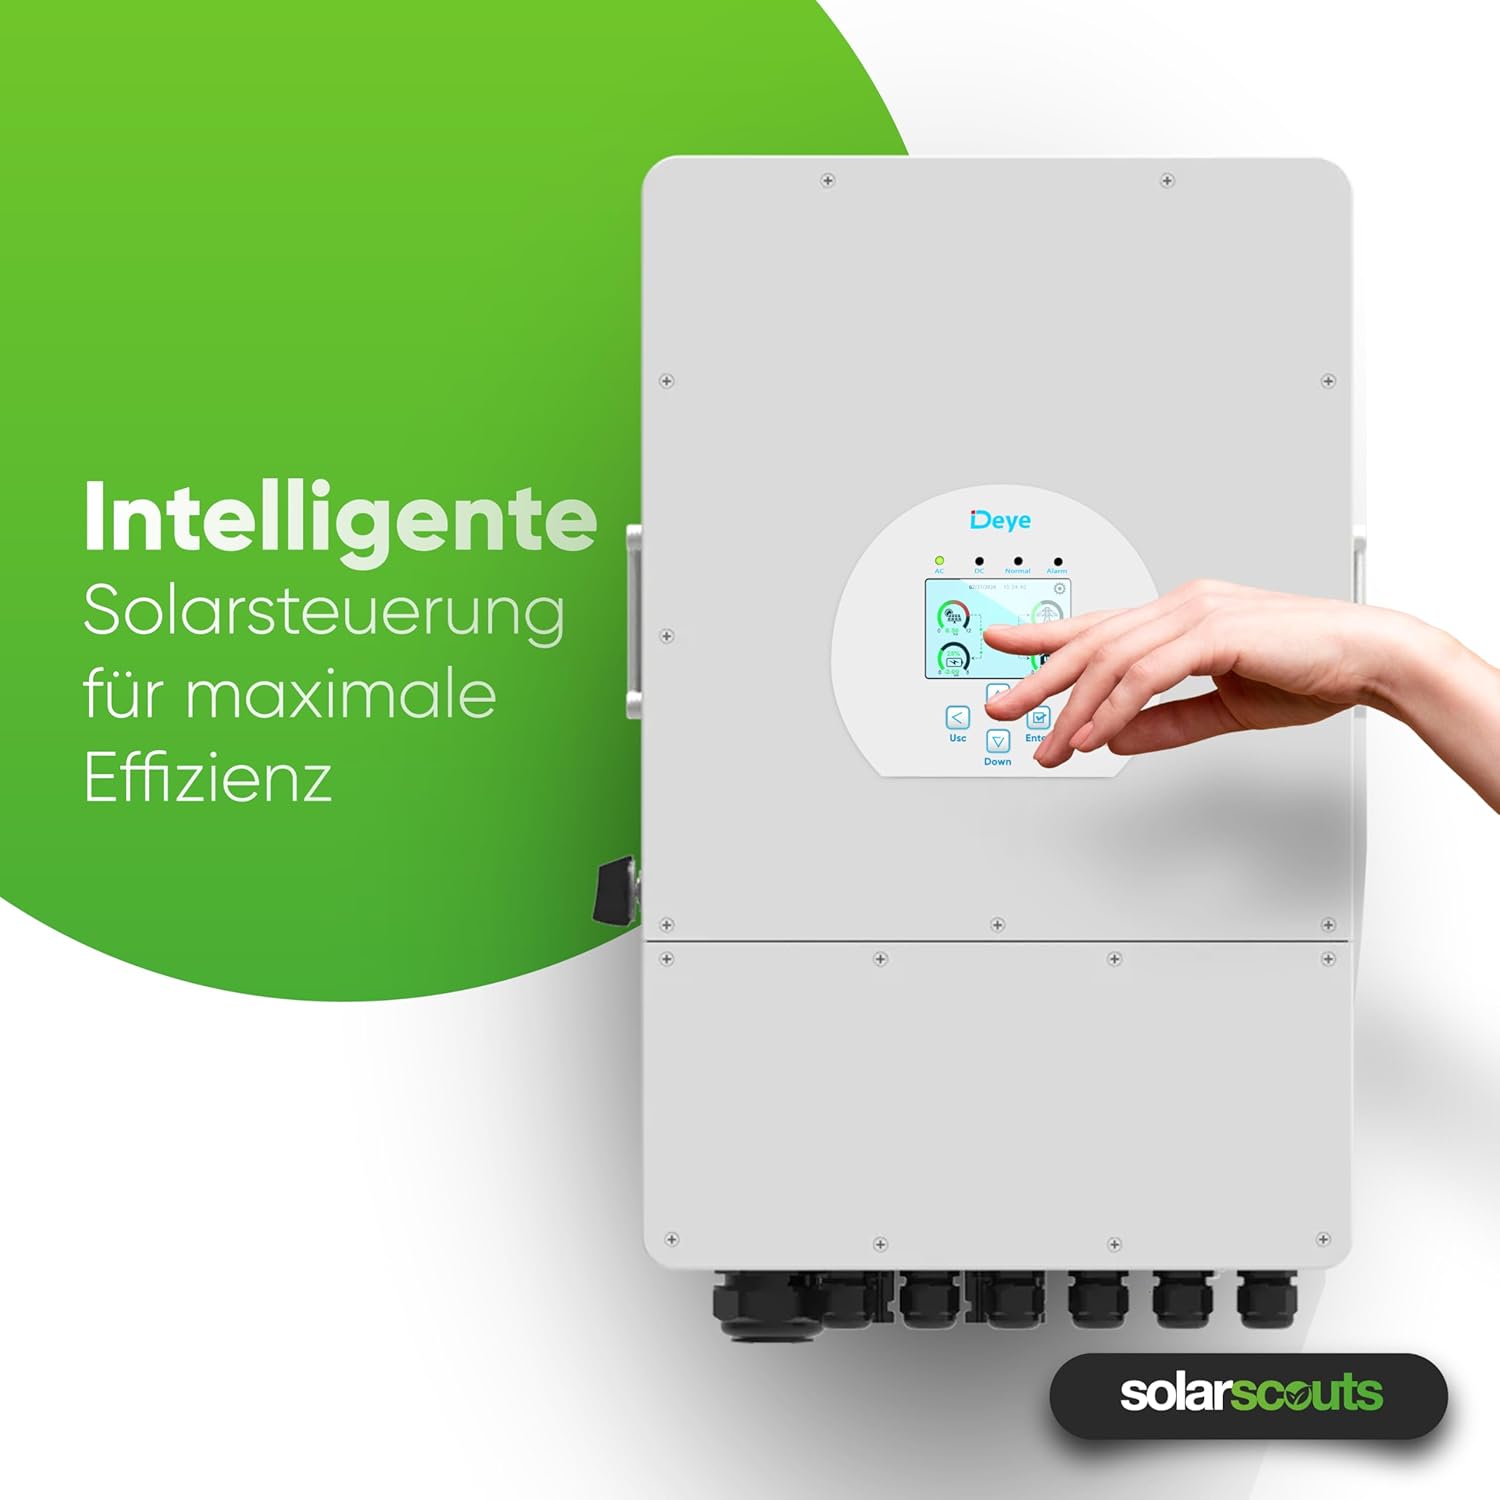
Whakaahua 7: A hand interacting with the inverter's intelligent solar control display. This demonstrates the user-friendly interface for managing solar power and maximizing system efficiency.
5.3 Operating Modes and Settings
The inverter offers various operating modes and configurable settings, including:
- Battery Charge/Discharge: Configure up to 6 periods for charging and discharging the battery.
- Grid-Tie Mode: Injects excess solar power into the grid.
- Aratau Matiti-atu: Provides power to loads from PV and battery during grid outages.
- Smart Load Function: Manages connected loads intelligently.
- Grid-Peak-Shave Function: Optimizes energy usage to reduce peak demand from the grid.
Refer to the detailed sections in the full user manual for specific parameter settings and advanced configurations.
5.4 Smart Monitoring Platform
The integrated WLAN module allows connection to the Deye intelligent monitoring platform. This platform enables:
- Remote shutdown in case of emergencies.
- Remote parameter adjustment.
- Remote firmware updates.
- Real-time performance monitoring of the PV system.
6. Tiaki
Ko te tiaki i nga wa katoa ka mau te roa me te mahi tino pai o to kaihurihuri.
- Te horoi: Periodically clean the inverter's exterior to remove dust and debris. Ensure ventilation openings are clear. Use a soft, dry cloth. Do not use liquid cleaners.
- Tirotiro: Regularly check all electrical connections for tightness and signs of corrosion or damage. Inspect cables for wear and tear.
- Whakahau: Ensure that the area around the inverter remains clear to allow for proper airflow and cooling.
- Whakahōu Firmware: Keep the inverter's firmware updated through the smart monitoring platform to benefit from performance improvements and new features.
Whakatupato: Disconnect all power sources before performing any maintenance or cleaning.
7. Te Raru
This section provides solutions for common issues you might encounter. For more complex problems, contact technical support.
| Raruraru | Take pea | Rongoā |
|---|---|---|
| Karekau te kaihurihuri e kaha ana | DC switch off, AC breaker off, no PV input, battery disconnected/low voltage | Check DC switch, AC breaker, PV connections, and battery voltage. |
| Kaore he putanga mana | Grid disconnected, overload, inverter fault | Check grid connection, reduce load, check display for error codes. |
| WLAN connection issues | Incorrect network settings, weak signal, module not inserted correctly | Verify WLAN settings, ensure strong signal, reinsert WLAN module. |
| Kāore te pākahiko e utu/whakakore | Incorrect battery settings, BMS communication error, battery fault | Check battery type and settings, verify BMS connection, inspect battery. |
8. Whakatakotoranga Hangarau
The following table provides detailed technical specifications for the DEYE SUN-12K-SG04LP3-EU Hybrid Inverter.

Whakaahua 8: A detailed table outlining the technical specifications of the DEYE Hybrid Inverter. This includes data on battery input, PV input, AC output, efficiency, protection, and general characteristics.
| Tawhā | Uara |
|---|---|
| Tauira | SUN-12K-SG04LP3-EU |
| Wāhanga | E toru-waahanga |
| External AC Output Power | 12000 W |
| Hiko Tāuru DC (Mōrahi) | 15600 W |
| Nga MPPT | 2 |
| Pūhiko Voltage | 40 V - 60 V (48 V nominal) |
| Momo Pūhiko | Lead-Acid or Lithium-Ion |
| Max. Utu / Tukunga o naianei | 240 A |
| Karaehe Tiaki | IP65 |
| Te Waahi Mahi | -40 °C ki te 60 °C |
| Ahu (L x W x H) | 42.2 cm x 69.9 cm x 27.9 cm |
| Taumaha | 33.6 kg |
| Hononga Whakarara | Max. 10 wae |
9. Pūtāhui me te Tautoko
DEYE provides a comprehensive warranty for its products.

Whakaahua 9: The DEYE Hybrid Inverter displayed with a badge indicating a 10-year warranty, signifying product quality and reliability.
- Wā Pūtāhui: The DEYE SUN-12K-SG04LP3-EU Hybrid Inverter comes with a 10-year warranty. Please refer to the official warranty document for detailed terms and conditions.
- Tautoko Hangarau: For technical assistance, troubleshooting beyond this manual, or warranty claims, please contact your local DEYE distributor or visit the official DEYE webpae mo nga korero whakapiri tautoko.
- Whakahōu Pūmanawa: Guaranteed software updates are available for the product.