
1. Kupu Whakataki
The Weiser Elements 5-Button Keypad Electronic Deadbolt Door Lock provides convenient keyless entry, enhancing security and simplifying access to your home. This manual provides detailed instructions for installation, operation, and maintenance of your new lock.
Āhuatanga matua:
- Convenient Keyless Entry: Secure and simple access without physical keys.
- Easy Code Management: Customize up to 12 user codes, 2 one-time user codes, and 1 programming code.
- Auto Lock: Customizable automatic locking after 30 sec, 1 min, 3 min, 5 min, or 10 min.
- Intrusion Alert: Alarm sounds and keypad disables for 1 minute after 3 consecutive incorrect code entries.
- Easy Low Light Code Entry: Bright LED lights illuminate the keypad for night use.
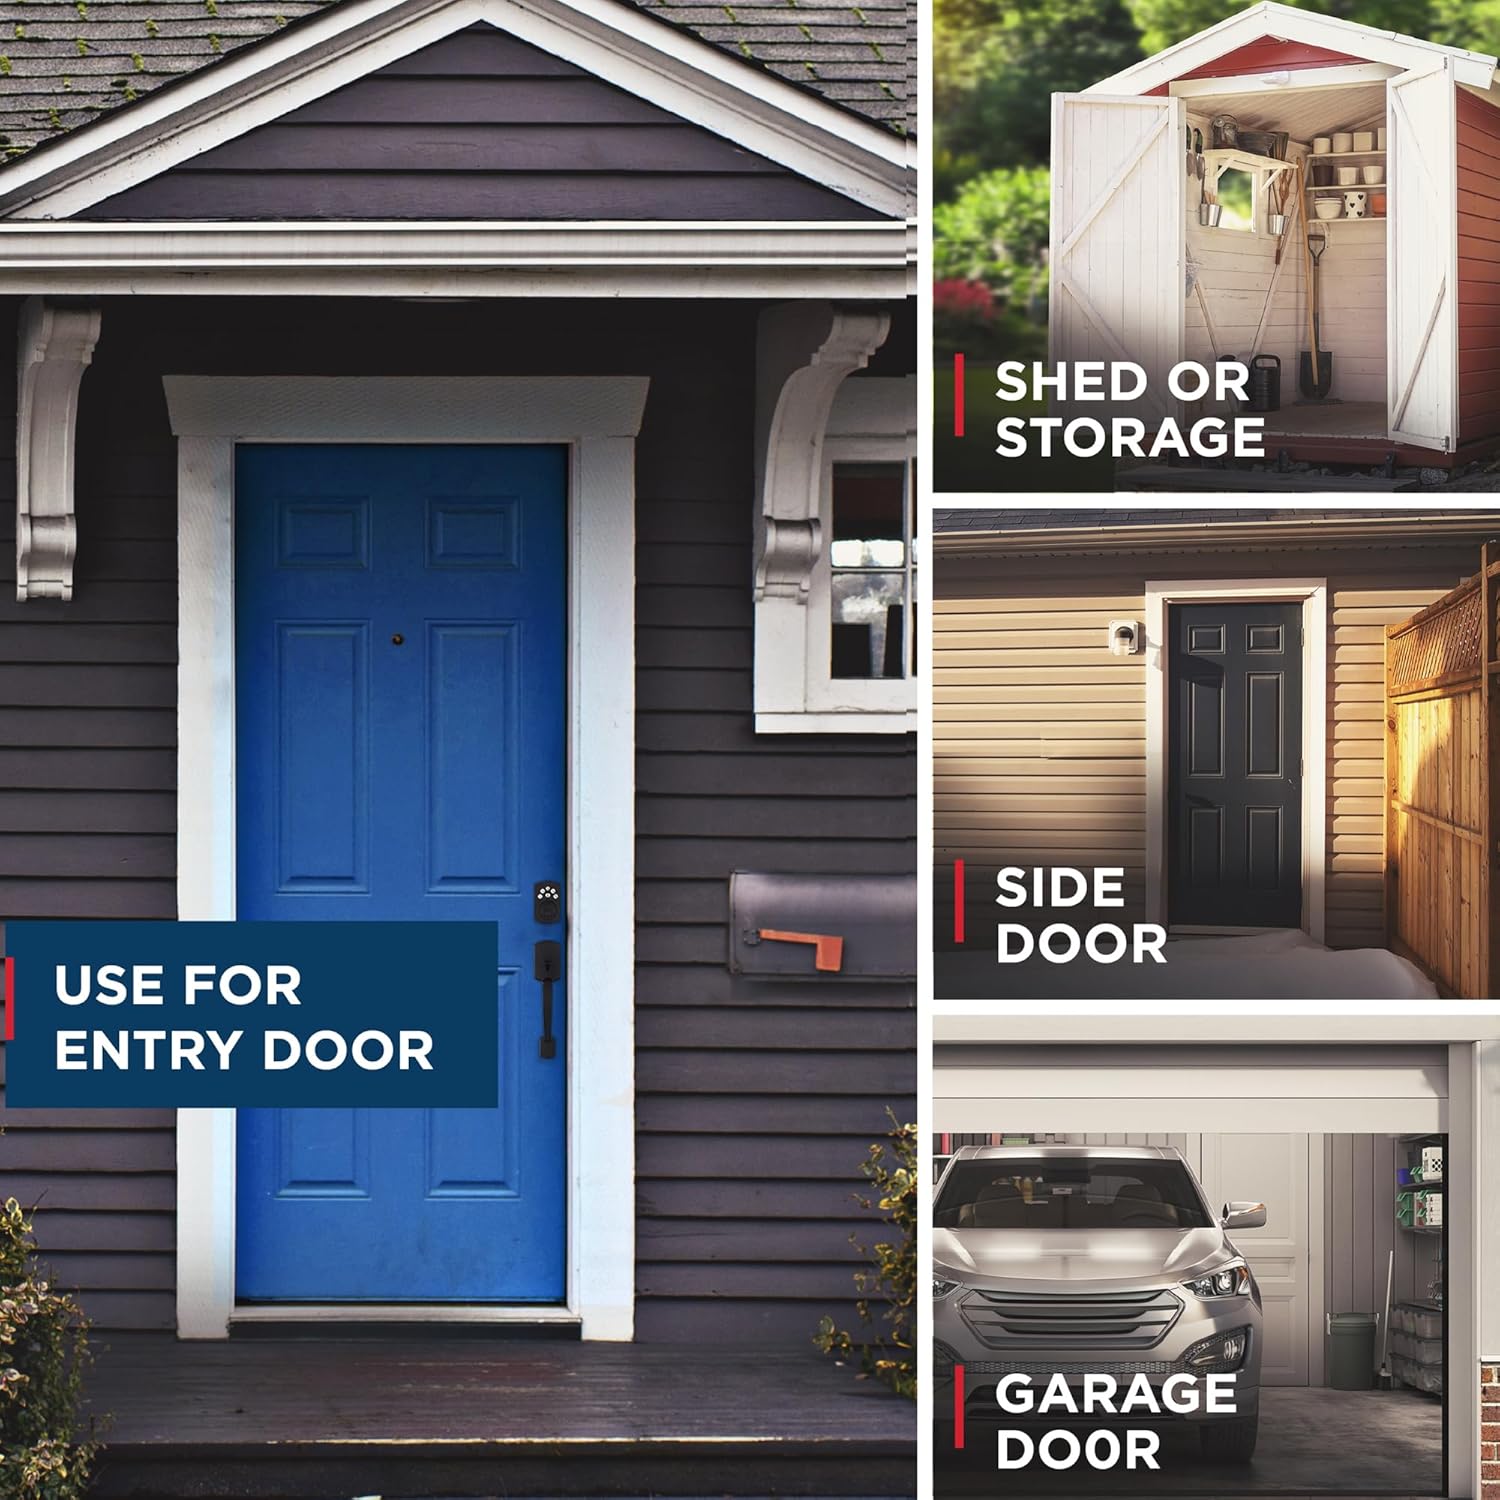
Whakaahua: Examples of where the Weiser Elements lock can be used, including entry doors, sheds, side doors, and garage doors.
2. He aha kei roto i te Pouaka
Manatokona kei te noho nga waahanga katoa i mua i te tiimata o te whakaurunga:
- Exterior Assembly Piece
- Interior Assembly Piece
- Pereti Maunga
- Uwhi o roto
- Nga tīwiri (nga momo rahi)
- Puku-i Kara
- hiri
- Pahi Wharahi
- Manual Tāuta
- 2 Kī

Image: All components included in the Weiser Elements Keyless Entry Door Lock package, laid out for inspection.
3. Tatūnga me te Tāuta
Installation of the Weiser Elements lock is designed to be straightforward, requiring only a screwdriver. For detailed, step-by-step instructions, refer to the included Installation Manual. It is recommended to follow the manual precisely to ensure proper function and security.
Hipanga Tāuta Whānui:
- Prepare the door: Ensure the door bore hole and backset are compatible with the lock's dimensions.
- Install the latch: Insert the latch into the door edge and secure it.
- Install the exterior assembly: Place the exterior keypad unit through the door.
- Install the mounting plate: Secure the mounting plate to the door.
- Install the interior assembly: Connect the interior unit to the mounting plate.
- Install batteries: Insert the required batteries (4x AA alkaline batteries, not included) into the interior assembly.
- Perform door handing process: This calibrates the lock to your door's orientation.
- Test the lock: Verify both key and keypad functions.
For visual and interactive guidance, consider using the BILT 3D interactive instructions if available, which provide voice, text, and animation for an easy installation process.
4. Nga Tohutohu Whakahaere
4.1. Keyless Entry
To unlock the door using the keypad, enter your valid user code. The lock will retract the deadbolt, allowing entry.

Image: A person using the keypad for keyless entry, demonstrating the convenience of the system.
4.2. Code Management
The lock supports up to 12 unique user codes and 2 one-time user codes. A single programming code allows you to add, edit, or delete these user codes. Refer to your Installation Manual for specific steps on programming codes.

Image: Visual representation of the lock's capacity for 12 user codes and 2 one-time user codes.
4.3. Auto Lock Feature
For enhanced security, the Auto Lock feature can be enabled to automatically re-lock the door after a set period. You can customize the auto-lock delay to 30 seconds, 1 minute, 3 minutes, 5 minutes, or 10 minutes.

Image: A person and dog leaving a house, illustrating the convenience of the Auto Lock feature with customizable time settings.
4.4. Easy Low Light Code Entry
The keypad features bright LED lights that illuminate the buttons, making it easy to enter your user code even in low light conditions or at night. Simply tap the keypad to activate the lights.

Image: The illuminated keypad of the Weiser Elements lock at night, showing its visibility in low light conditions.
4.5. Aratau Hararei
Activate Vacation Mode to temporarily disable the keypad. This feature provides added security when you are away for an extended period, ensuring no one can operate your door lock via the keypad.

Image: A couple with luggage, illustrating the use of Vacation Mode for security while away from home.
4.6. Maukati Kotahi-Pa
The motorized deadbolt allows for convenient one-touch locking. Simply press the lock button on the keypad to secure your door without needing to carry keys or manually engage the deadbolt.

Image: A finger pressing the lock button on the keypad, demonstrating the one-touch locking feature.
5. Tiaki
5.1. Pūhiko Ora
The Weiser Elements lock is designed for long-lasting performance. A set of 4x AA alkaline batteries (not included) provides approximately 12 months of battery life, depending on usage. Replace batteries when the low battery indicator appears or when the lock's operation becomes sluggish.
To replace batteries, remove the interior cover and insert new batteries according to the polarity markings. Always use fresh, high-quality alkaline batteries.
6. Te Raru
6.1. Intrusion Alert
If 3 consecutive incorrect user codes are entered on the keypad, the lock will activate an intrusion alert. The keypad will flash red 15 times, and an alarm will sound 15 times. During this period, the keypad will be disabled for 1 minute to prevent further tamppaenga.
After the 1-minute lockout period, the keypad will reset, and you can attempt to enter a valid code again. If you frequently encounter this, ensure you are entering the correct user codes and that the programming code has not been compromised.

Image: Diagram illustrating the intrusion alert system, showing the keypad flashing red and sounding an alarm after multiple incorrect code entries.
6.2. Lock Not Responding
- Check batteries: Ensure batteries are fresh and installed correctly.
- Verify code: Double-check that the correct user code is being entered.
- Reset: If issues persist, refer to the Installation Manual for instructions on performing a factory reset.
7. Whakatakotoranga
| Āhuahira | Taipitopito |
|---|---|
| Waitohu | Weiser |
| Tau tauira | 9GED92400-004 |
| Hunga Hua | 2.46 x 7.14 x 11.66 cm (0.97 x 2.81 x 4.59 inihi) |
| Taumaha Tūemi | 710 g (1.56 lbs) |
| Tae | Maama Pango |
| Kāhua | tuku iho |
| Whakaoti | Kua peita |
| Rauemi | Te whakarewa, te Kirihou |
| Te maha o nga wahi | 2 (Exterior and Interior Assembly) |
| Nga waahanga motuhake | Auto-Lock, BHMA/ANSI Grade 3, Light Up Keypad, Motorized Locking, Vacation Mode (Disable Keypad) |
| Whakamahinga | Amateur, Professional (Recommended for Front, Back, Side, Garage, Shed, AirBnb Doors) |
| Nga Pikohiko e hiahiatia ana | No (4x AA alkaline batteries are required for operation, but not included) |
| Momo Maukati | Keypad, Pin Tumbler |
| Whenua Taketake | Haina |

Image: Detailed dimensions of the Weiser Elements Keyless Entry Door Lock, including exterior and interior units and adjustable latch backset.
8. Pūtāhui me te Tautoko
8.1. Nga Korero Whakaputanga
The Weiser Elements Keyless Entry Door Lock comes with a 1-Year Limited Electronics Warranty and a Lifetime Limited Mechanical & Finish Warranty. Please retain your proof of purchase for warranty claims.
8.2. Tautoko Kiritaki
For further assistance, technical support, or warranty inquiries, please visit the official Weiser website or contact their customer service department. Contact information can typically be found in the included Installation Manual or on the Weiser brand webpae.


