1. Kupu Whakataki
This manual provides detailed instructions for the installation, operation, and maintenance of your COMMAX CDV-77M 7-inch Fine View Monitor. Please read this manual thoroughly before using the product to ensure proper function and safety. Keep this manual for future reference.
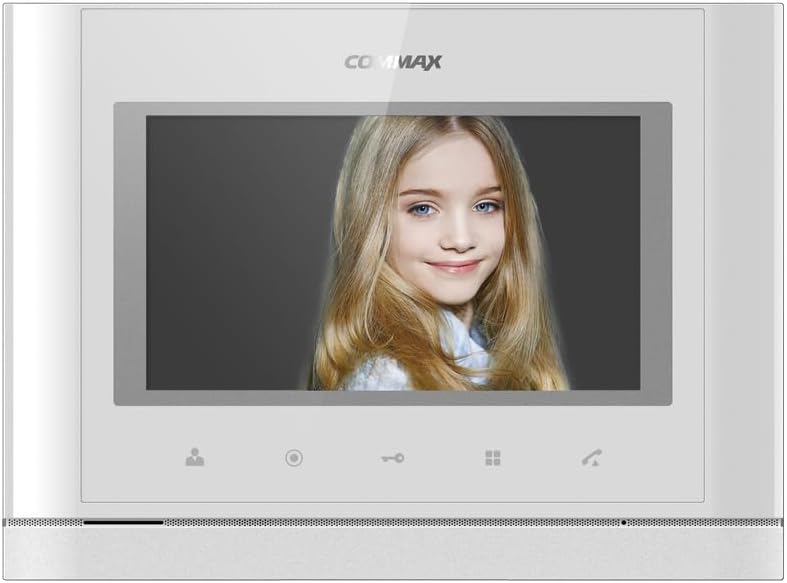
Mua view of the COMMAX CDV-77M monitor, showcasing its 7-inch TFT LCD screen and sleek design. The screen is active, displaying an image.
2. Nga Hua o te Hua
- 7-inch TFT LCD screen for clear video display.
- Supports video communication and door lock release functions.
- Expandable system: Connects with up to 2 door cameras, 2 additional monitors, and 2 interphones.
- PAL/NTSC video format conversion capability.
- Hand-free operation for convenience.
- Wall-mounted design for easy installation.
3. Nga korero haumaru
Kia mau ki nga whakaritenga haumaru e whai ake nei hei aukati i te kino o te hua me te whakarite i te haumaru o te kaiwhakamahi:
- Kaua e tukuna te waeine ki te wai, ki te makuku nui ranei.
- A ape i te whakatakoto i te waeine ki te ra tika, ki te tata ranei ki nga puna wera.
- Kaua e ngana ki te whakatuwhera, ki te whakatika ranei i te waahanga. Tukuna atu nga ratonga katoa ki nga kaimahi whai tohu.
- Me whakarite kia ōrite te pūtake hiko ki te rōrahi kua tohuatage (AC 100-240V, 50/60Hz).
- Tiakina te waeine mai i nga papa autō kaha.
- Operate within the specified temperature range of 0℃ to 40℃.
4. Tāutanga
4.1 Ihirangi mokete
Manatokona kei te noho nga waahanga katoa:
- COMMAX CDV-77M Monitor Unit
- Taiapa Maunga Whakairi
- Whakaeke Tiu me Punga
- Pukapuka Kaiwhakamahi (tenei tuhinga)
- Waea Hiko
4.2 Te Whakamau i te Aroturuki
The CDV-77M monitor is designed for wall-mounted installation. Choose a suitable location indoors, away from direct sunlight and moisture.
- Secure the wall mounting bracket to the desired location using the provided screws and anchors.
- Ensure the bracket is level and securely fastened.
- Refer to the dimensions diagram for proper spacing and fit:

Technical drawing showing the dimensions of the COMMAX CDV-77M monitor: 244 mm width and 180 mm height.
4.3 Hononga Waea
Before making any connections, ensure the power supply is disconnected.
- Door Camera Connection: Connect the door camera using a 4-wire cable. The maximum recommended distance is 28 meters (using 0.5Ø wire).
- Interphone Connection: Connect the interphone unit using a 4-wire cable.
- Additional Monitor Connection: If connecting additional monitors, refer to the specific wiring diagram provided with your system.
- Hononga Hiko: Connect the AC 100-240V, 50/60Hz power cable to the monitor and a suitable power outlet.
After all connections are made, carefully attach the monitor unit to the wall mounting bracket.
5. Nga Tohutohu Whakahaere
Familiarize yourself with the monitor's controls:

Detailed diagram illustrating the front panel of the COMMAX CDV-77M monitor, with labels for the TFT LCD, Speaker, Microphone, Power Switch, and control buttons: Monitoring, Interphone, Door Release, Menu, and Talk.
- Hiko Whakaka/Weto: Use the Power Switch located on the side/bottom of the unit.
- Whiwhi Waea: When a visitor calls from the door camera, the monitor will display their image and ring. Press the Patene Korero to communicate.
- Aroturuki: Pehia te Pātene Arotaki ki view the feed from the connected door camera at any time.
- Tukunga o te Kūaha: I a koe e waea ana, e aroturuki ana rānei, pēhia te pātene Patene Tuku Kuha to unlock the connected door.
- Interphone Communication: Pehia te Interphone Button to initiate communication with another connected interphone or monitor.
- Tahua Whakaterenga: Whakamahia te Patene Tahua to access settings and adjustments for the monitor.
6. Tiaki
- Te horoi: Whakamahia he kakahu ngohengohe, maroke hei horoi i te mata o te mata, ā, whakamahia he kakahuasing. Kaua e whakamahi i nga kai horoi me nga whakarewa.
- Tango Puehu: Regularly dust the unit to prevent accumulation, especially around ventilation areas.
- A ape i te Wai: Do not spray liquids directly onto the monitor.
7. Te Raru
| Raruraru | Take pea | Rongoā |
|---|---|---|
| No power to the monitor. | Power cable disconnected; power outlet faulty; power switch off. | Check power cable connection; test outlet with another device; ensure power switch is on. |
| No video from door camera. | Camera cable loose or damaged; camera faulty. | Check camera wiring connections; ensure camera is powered and functioning. |
| Kāore he oro i te wā e kōrero ana. | Microphone/speaker faulty; wiring issue. | Check audio wiring; ensure volume settings are appropriate. |
| Door lock not releasing. | Door lock wiring issue; lock mechanism faulty. | Verify door lock wiring; test door lock mechanism independently. |
Mena kei te haere tonu te raru i muri i te whakamatau i enei otinga, tena koa whakapā atu ki te tautoko a te kaihoko.
8. Whakatakotoranga
| Āhuahira | Taipitopito |
|---|---|
| Tauira | CDV-77M |
| Rahi Mata | 7 inihi TFT LCD |
| Puna Mana | AC 100-240V, 50/60Hz |
| Momo Maunga | Momo whakairi-taiepa |
| Te Waahi Mahi | 0℃ ~ 40℃ |
| Wiring (Door Camera) | 4 wires (Distance: 28m with 0.5Ø wire) |
| Wiring (Interphone) | 4 waea |
| Max. Hononga | 2 Cameras, 2 Monitors, 2 Interphones |
| Te kai | Max. 15W / Standby 3W |
| Ahu (W×H×D) | 244mm × 180mm × 18mm |
| Hōputu Ataata | PAL/NTSC convertible |
9. Pūtāhui me te Tautoko
For warranty information, please refer to the warranty card included with your product or contact your local COMMAX distributor. For technical support or service inquiries, please visit the official COMMAX webpaetukutuku, whakapā atu ranei ki ta raatau tari ratonga kaihoko.
Kaihanga: COMMAX
Te Ra Tuatahi Wātea: 7 Akuhata 2023