1. Kupu Whakataki
This manual provides detailed instructions for the setup, operation, and maintenance of your Phomemo WiFi Thermal Label Printer Model 249. This printer is designed for efficient and versatile label printing, compatible with various operating systems and e-commerce platforms. Please read this manual thoroughly to ensure proper use and to maximize the printer's performance.
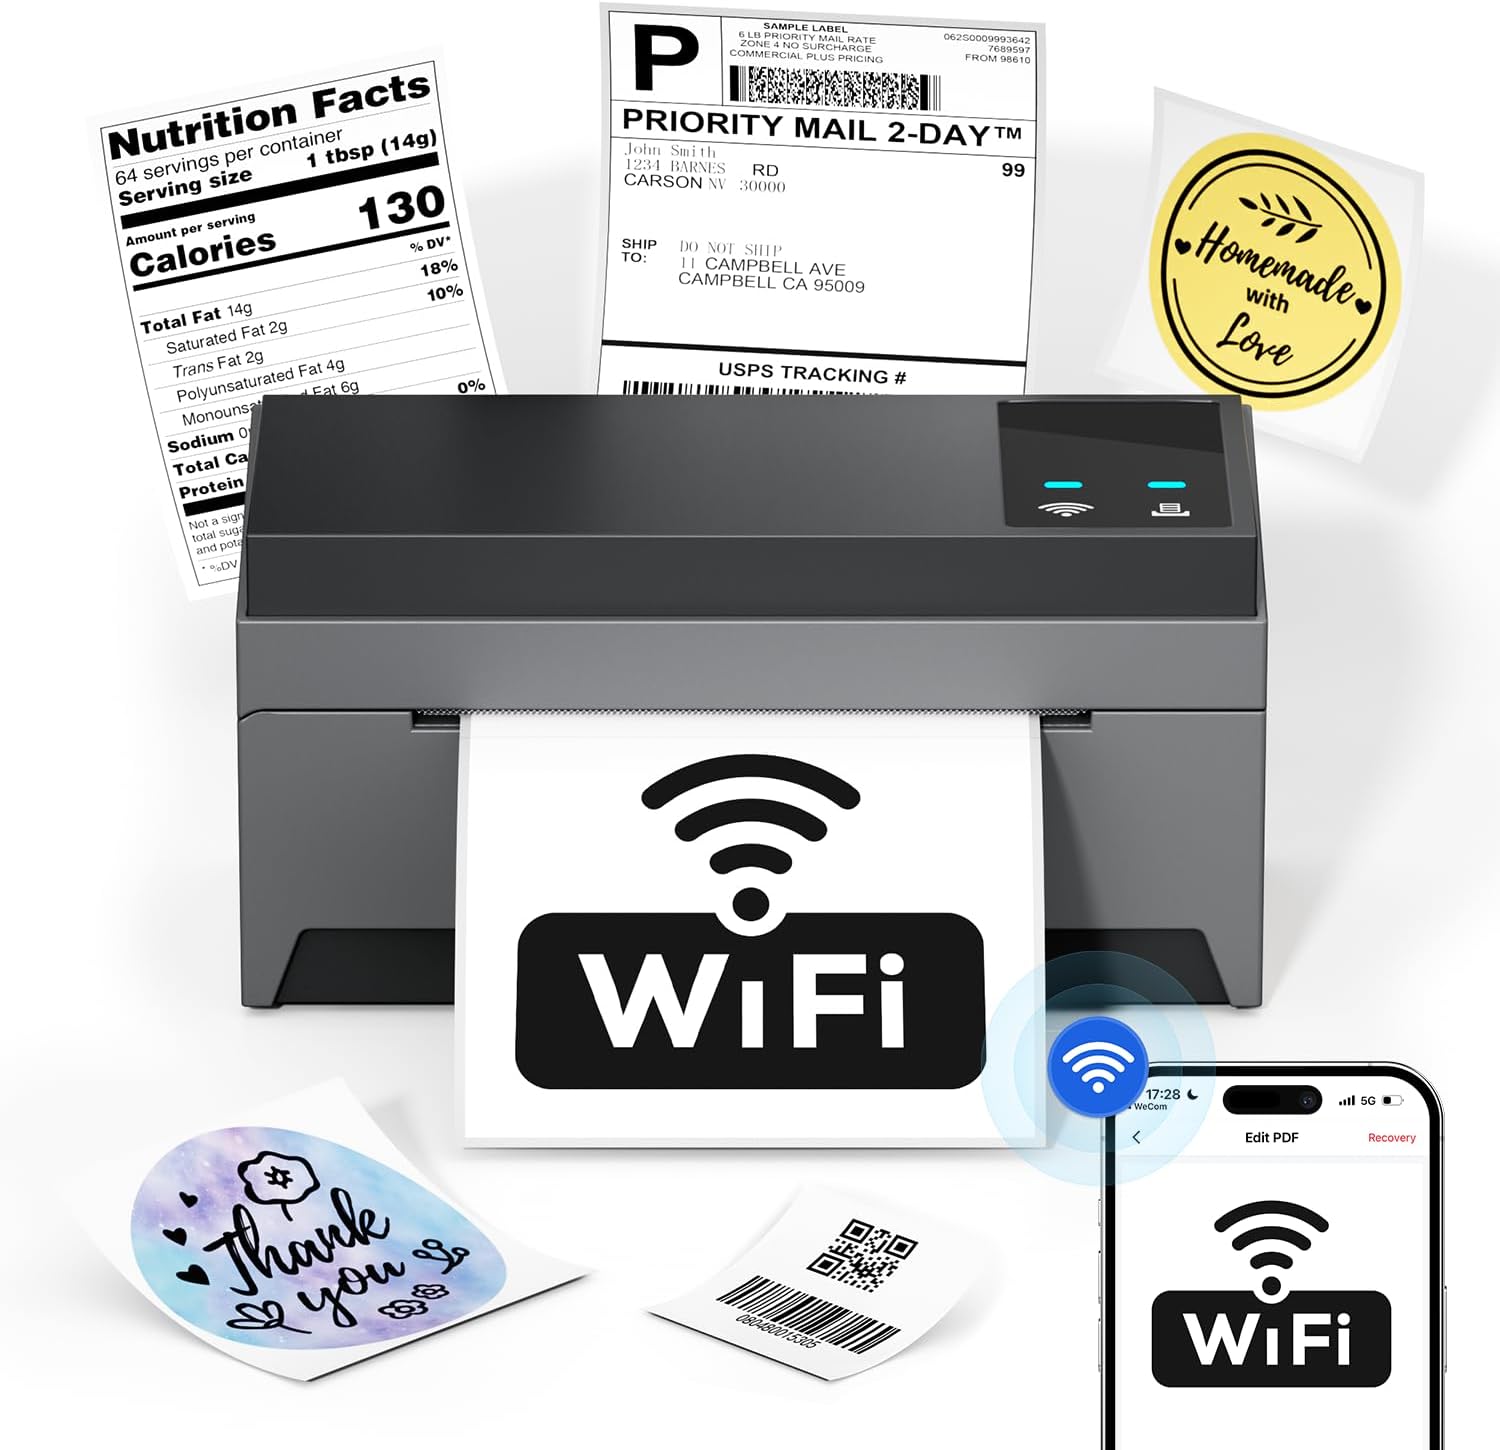
Image: The Phomemo Model 249 printer in operation, demonstrating its capability to print diverse label types such as shipping labels, product information, and custom designs.
2. Ihirangi mokete
Manatokohia ko nga mea katoa kei raro nei kei roto i to kete:
- 1 Phomemo 249 WiFi label printer
- 1 USB-C Data cable
- 1 Power cord (US/UK/EU) with Adapters
- 10 pcs 4x6 shipping labels
- 1 Aratohu tere
- 1 USB-C urutau

Image: All components included in the Phomemo 249 printer package, neatly arranged on a wooden desk.
3. Aratohu Tatūnga
3.1 Tatūnga Tinana
- Hono Hono: Plug the power cord into the printer and then into a power outlet.
- Uta Tapanga: Open the printer cover. Insert the thermal labels with the printable side facing up. Adjust the label guides to fit the width of your labels. Close the cover.
3.2 Tāuta Pūmanawa
The Phomemo 249 printer can be operated via the Labelife mobile app or a Printer Setting Tool for computers.
For Mobile Devices (iOS & Android) - Labelife App
- Tikiake App: Scan the QR code or search for "Labelife" in the App Store (iOS) or Google Play Store (Android).
Download Labelife App - Whakahohehia te Hononga: Turn on Bluetooth and WiFi on your mobile device.
- Tūhono Pūreretā: Open the Labelife app. Select the "Internet Connection" option and choose your printer from the list (e.g., PM-249-WF).
- Whirihora WiFi: Enter your WiFi password to connect the printer to your network.

Image: Visual guide demonstrating the steps to connect the printer using the Labelife mobile application.
For Computers (MacOS & Windows) - Printer Setting Tool
- Utauta Tikiake: Tirohia te paetukutuku mana o Phomemo website or the link provided in your quick guide to download the Printer Setting Tool for your operating system (Windows or MacOS).
- USB Connection (Initial Setup): Connect your computer to the printer using the provided USB-C cable. This is often required for the initial WiFi configuration from a computer.
- Whirihora WiFi: Use the Printer Setting Tool to select your WiFi network and enter the password. Once configured, the printer will automatically connect to WiFi for future use, eliminating the need for repeated USB connections unless the WiFi settings change.

Image: Instructions for setting up the printer's WiFi connection using the Printer Setting Tool on a computer.
3.3 Kōwhiringa Hononga
- WiFi (5GHz): Supports fast and reliable wireless printing from Android, iOS, Mac, Windows, and Linux devices. Up to 10 devices can connect simultaneously.
- USB: Provides a direct wired connection for all computer systems, including Chrome OS.
- Nihokikorangi: Note that Bluetooth is for auxiliary WiFi connection setup only and does not support direct printing.

Image: Visual representation of the printer's versatile connectivity via WiFi and USB, compatible with various operating systems.
4. Aratohu Mahi
4.1 Tukanga Ta
Once your printer is connected and labels are loaded, you can initiate printing from your chosen device:
- Whakaritehia to Tuhinga: Whakatuwheratia te tapanga file (e.g., PDF, image) on your computer or mobile device.
- Tīpako Pūreretā: In your application's print dialog, select the Phomemo 249 printer.
- Whakatika Tautuhinga: Ensure the label size and orientation are correctly set to match your physical labels.
- Tā: Confirm settings and send the print job to the printer.
4.2 Labelife App Features
The Labelife app provides tools for creating and customizing labels:
- Access a library of free label styles.
- Design custom shipping labels, product tags, and other personalized labels.
- Kawemai PDF files mo te ta.
- Edit labels with various fonts, shapes, and barcodes.
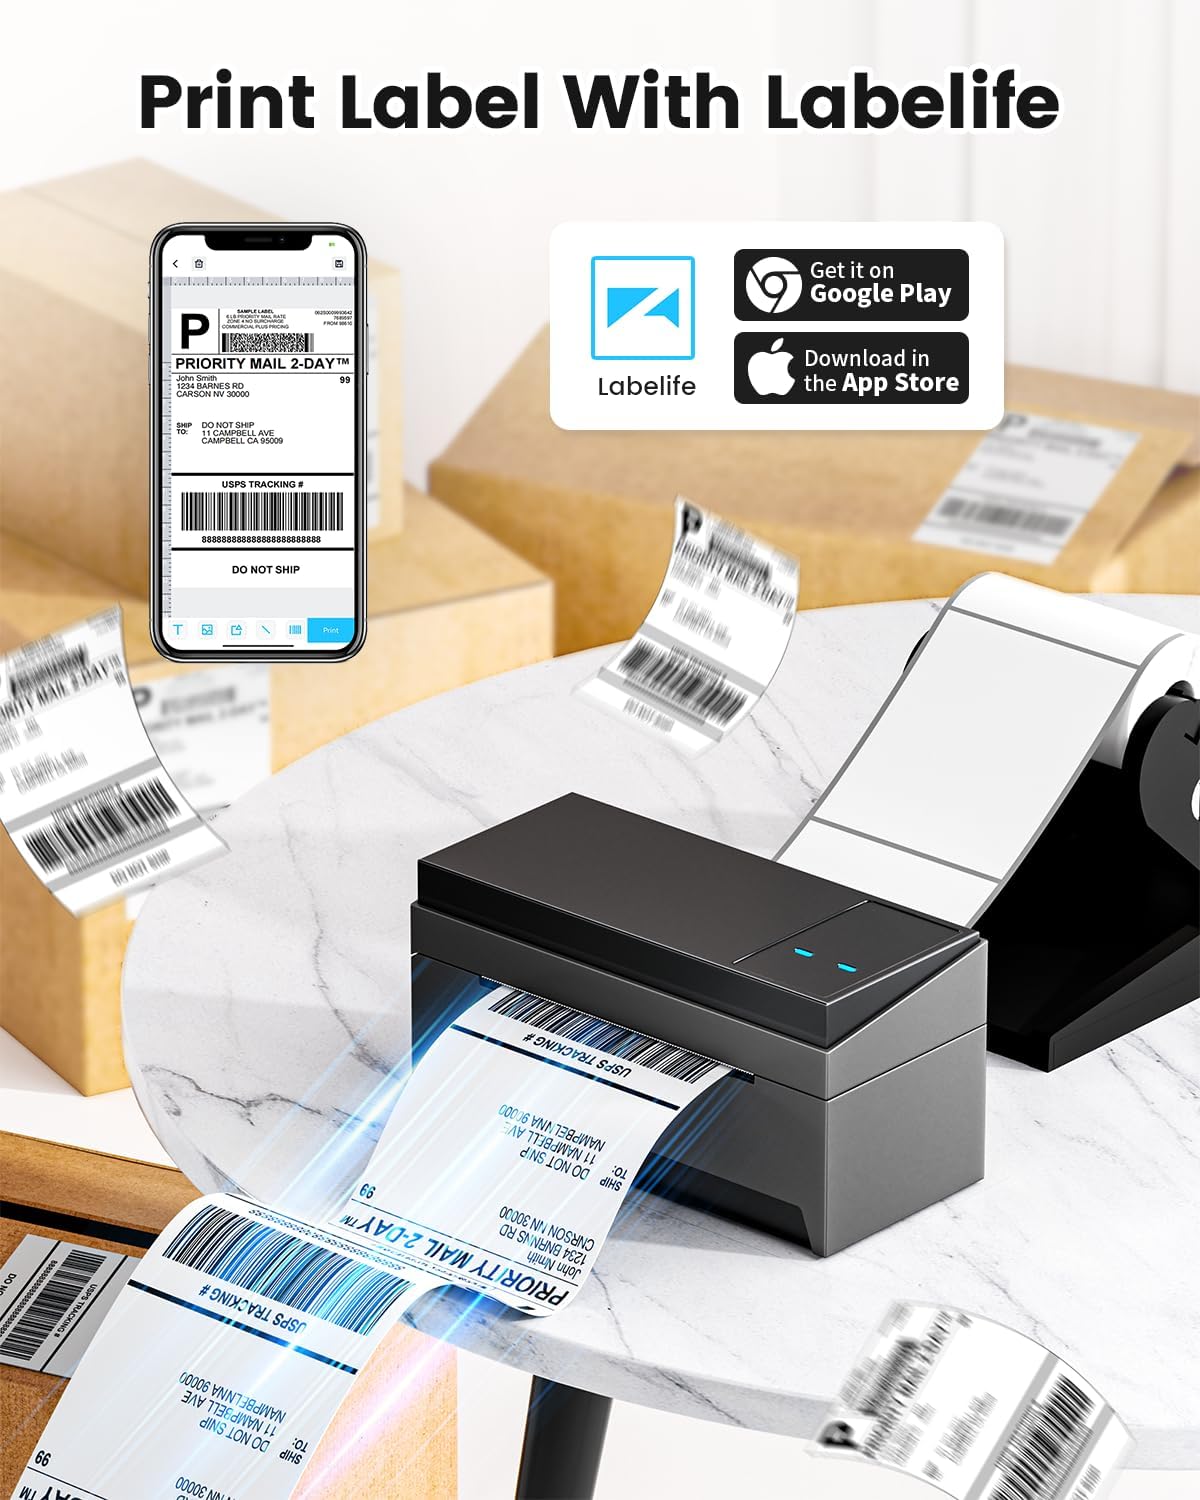
Image: A smartphone displaying the Labelife app, ready to print a shipping label, with the Phomemo printer in the background.
4.3 Paerewa Tautoko
The Phomemo 249 printer is compatible with a wide range of e-commerce and logistics platforms, ensuring accurate label generation for your needs:
- eBay
- Amazon
- Walmart
- Shopify
- USPS
- Etsy
- PayPal
- FedEx
- DHL
- UPS
- Me te maha atu.
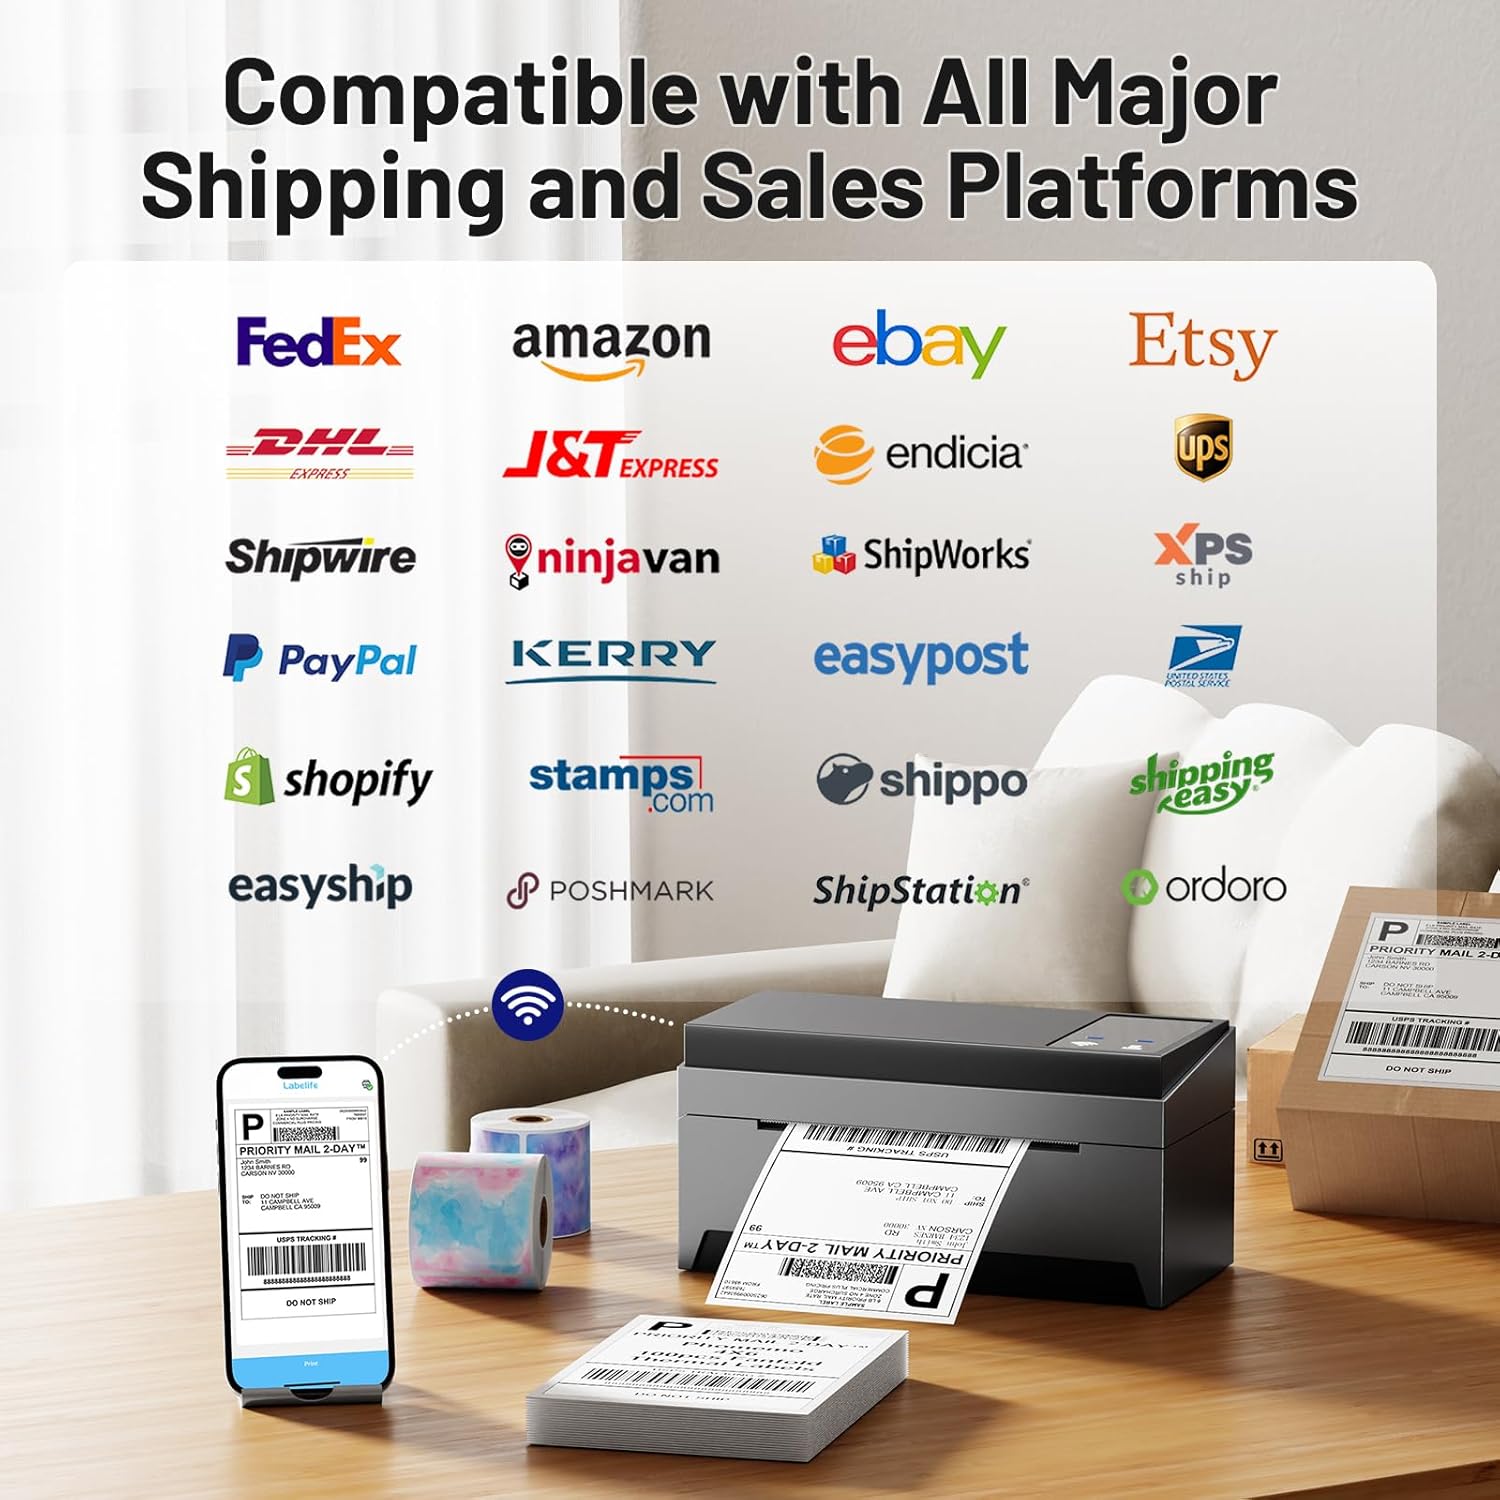
Image: A collage of logos from major e-commerce and logistics platforms, highlighting the printer's broad compatibility.
4.4 Label Types and Sizes
The printer supports various label sizes and types, with a printing range from 1 inch to 4.6 inches in width. This includes standard 4x6 inch shipping labels, smaller product labels, and custom shapes.
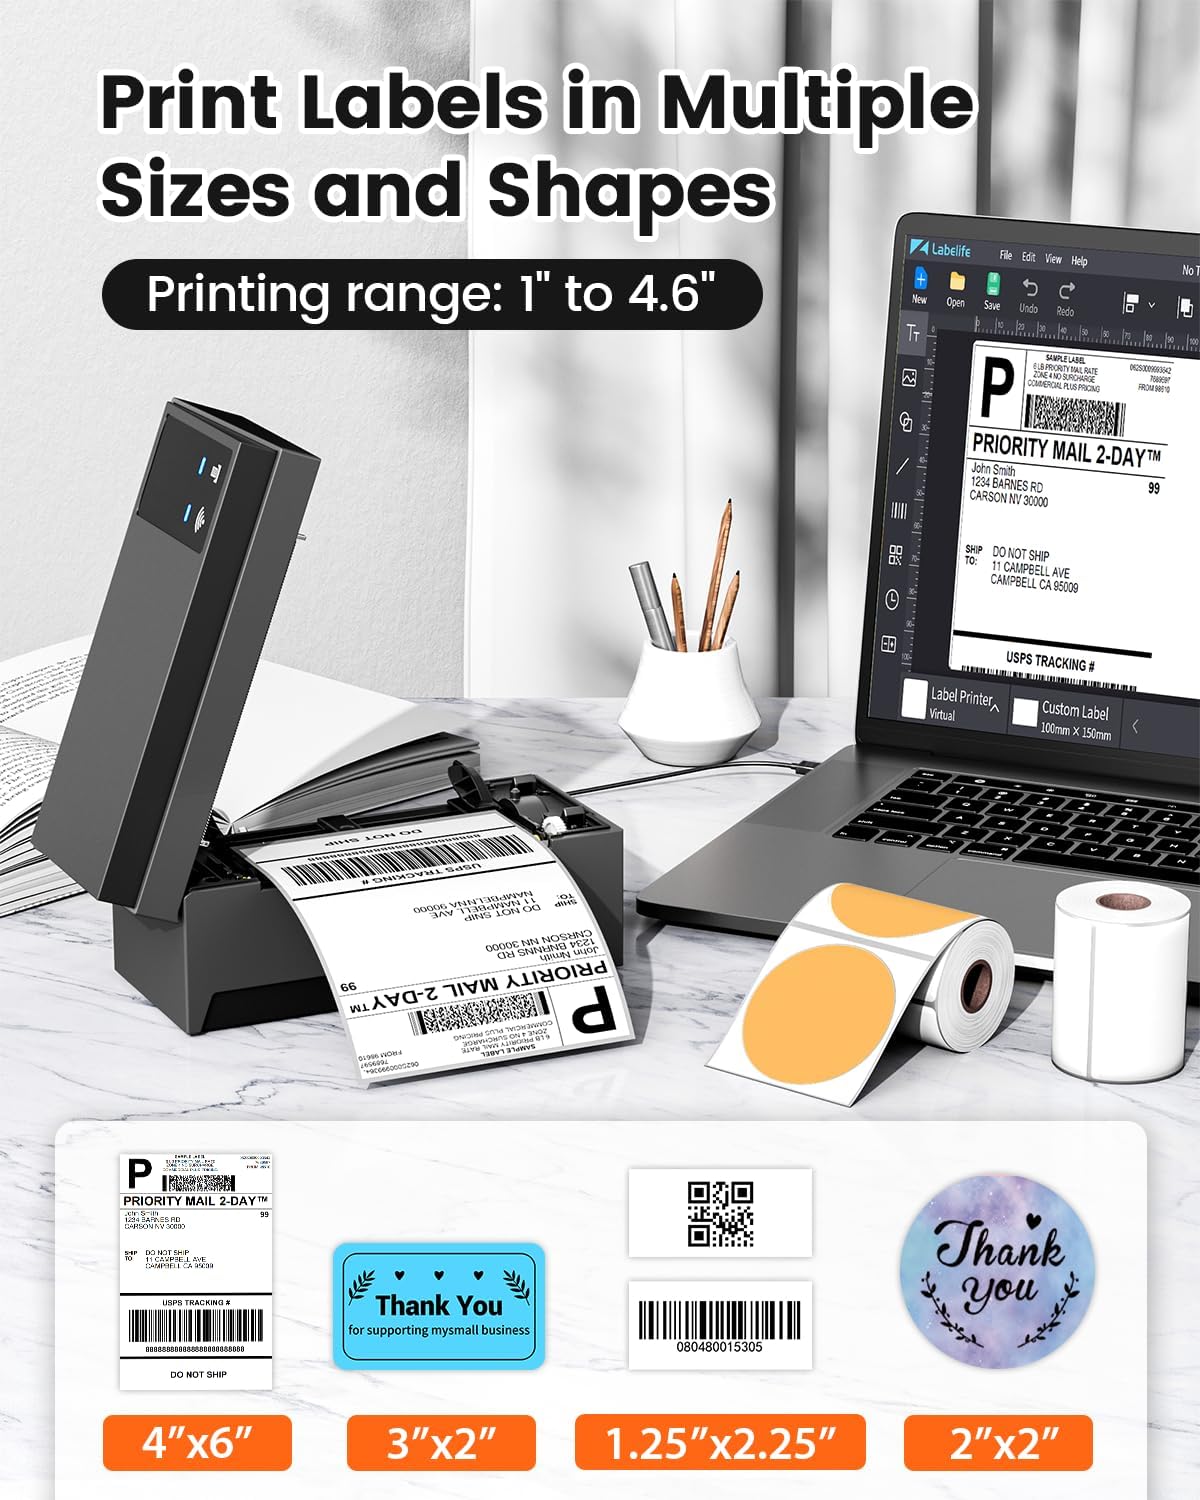
Image: A display of various label sizes and shapes, such as 4x6 inch, 3x2 inch, and round labels, demonstrating the printer's versatility.
5. Tiaki
5.1 Te horoi i te Upoko Ta
To maintain print quality, regularly clean the print head:
- Whakawetohia te pūreretā ka unu mai i te puna hiko.
- Whakatūwherahia te uhi pūreretā.
- Mā te ata horoia te pane tā ki te miro miroampened ki te komukumuku waipiro.
- Tukua kia maroke rawa te pane tā i mua i te katinga o te taupoki me te tahuri anō i te pūreretā.
5.2 Tiakitanga Whanui
- Puritia te kaituhi i roto i te taiao ma, kore-puehu.
- Avoid exposing the printer to direct sunlight or extreme temperatures.
- Use only high-quality thermal labels to prevent damage to the print head.
6. Te Raru
If you encounter issues with your Phomemo 249 printer, refer to the following common problems and solutions:
| Raruraru | Take pea | Rongoā |
|---|---|---|
| Printer not connecting via WiFi | Incorrect WiFi password, printer not on the same network, Bluetooth not enabled (for app setup). | Ensure correct WiFi password. Verify printer and device are on the same 5GHz network. For app setup, enable Bluetooth. Re-run WiFi configuration via Labelife app or Printer Setting Tool. |
| Printer prints blank labels | Incorrect label loading, print head dirty, software settings. | Ensure labels are loaded with the printable side up. Clean the print head (refer to Section 5.1). Check print settings in your software (e.g., ensure image is not set to print in color if it's a monochrome thermal printer). Restart printer and device. |
| Labels are faded or unclear | Low quality labels, dirty print head, incorrect print density settings. | Use high-quality thermal labels. Clean the print head. Adjust print density settings in your printer driver or app. |
| Printer not detected by computer via USB | Faulty USB cable, driver not installed correctly, incorrect USB port. | Try a different USB cable or port. Reinstall the printer driver. Ensure the USB-C adapter is correctly used if needed. |
For further assistance, please contact customer support (refer to Section 8).
7. Whakatakotoranga
Key technical specifications for the Phomemo WiFi Thermal Label Printer Model 249:
| Āhuahira | Whakatakotoranga |
|---|---|
| Ingoa Tauira | 249 |
| Waitohu | Phomemo |
| Hangarau Hononga | USB, Wi-Fi (5GHz) |
| Hangarau Tā | Ngawha |
| Putanga Pūreretā | Monochrome |
| Whakataunga Tā mōrahi | 203 dpi |
| Tere Tā Max (Monochrome) | 72 ppm (whārangi ia meneti) |
| Morahi Rahi Media | 4x6 inihi |
| Rahi Rau | 4x6 Inihi |
| Te Raukaha Rau Tauru Max | 100 |
| Pūrere Hototahi | Pona, Rorohiko, Waea Atamai, Papa |
| Atanga Pūmārō | Momo USB C |
| Hunga Hua | 9 x 14 x 19 inihi |
| Taumaha Tūemi | 3.03 pauna |
| Momo Waituhi Pūreretā | No Ink (Thermal) |
| Āhuahira Motuhake | Decal-Printing |
8. Nga Korero Whakaputanga
The Phomemo WiFi Thermal Label Printer Model 249 comes with a iti pūtāhui. Please refer to the warranty card included in your package or contact customer support for specific terms and conditions.
9. Tautoko Kiritaki
For any questions, technical assistance, or support, please contact the Phomemo professional support team:
- Tautoko Waea: Available 9:00 AM - 5:00 PM EST, Monday - Friday.
- Tautoko Īmēra: Available for inquiries.
- Kōrerorero Ora: Available 7:30 PM - 4:30 AM EST, Monday - Friday.
- Remote Desktop Assistance: Offered for complex issues.
Detailed video tutorials and additional manuals are also available to assist with setup and operation.


