1. Hua Neke Atuview
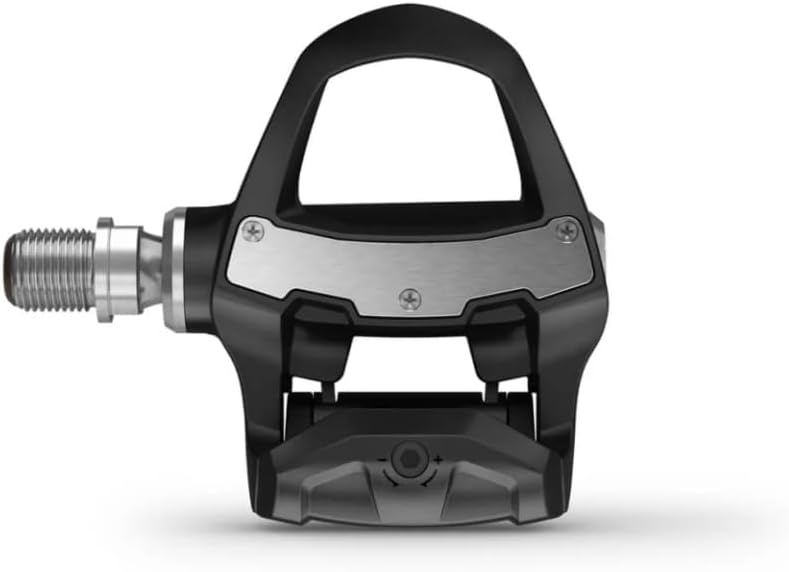
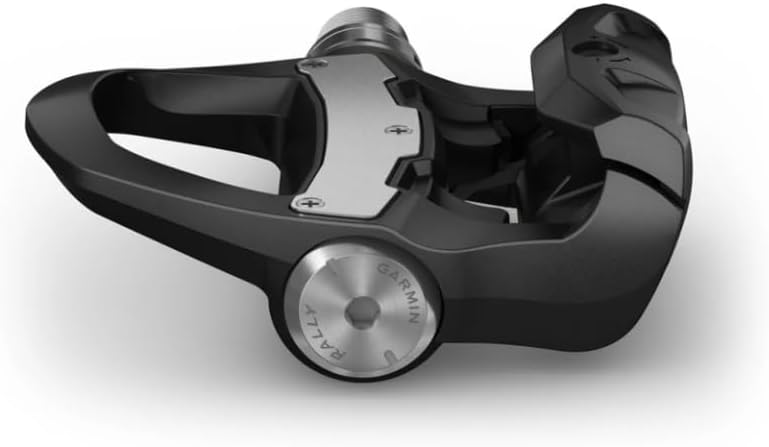
The Garmin Rally RK200 is a dual-sensing power meter pedal system designed for cyclists to gain precise performance insights. These pedals are engineered for reliability and provide advanced cycling dynamics, including left/right balance, total power, cadence, and pedal stroke efficiency. They are designed for easy installation and transferability between bikes, compatible with LOOK KEO cleats.

2. He aha kei roto i te Pouaka
The Garmin Rally RK200 package includes the following components:
- Garmin Rally RK200 Pedals (1 pair)
- Cleat hardware
- 55 mm Q-factor washers
- Wearable4U PowerBank (included in this bundle)

3. Tatūnga me te Tāuta
3.1. Utauta e hiahiatia ana
For installation, you will need:
- 8mm Allen key or bit
- Te kuihi taipana
- Grease (for crank arm threads)
- Clean cloth or brush
3.2. Tāutanga Pedal
- Prepare Crank Arm Threads: Before installation, clean the crank arm threads thoroughly and apply a small amount of grease. Ensure any old grease is removed.
- Thread Pedals: Install the left pedal counterclockwise and the right pedal clockwise. Improper installation may damage your pedal or the crank threads.
- Use Pedal Spacers: When installing the pedal, it is mandatory to use one or two pedal spacers to ensure at least 1mm of clearance between the power meter module and the crank arm. If the power meter module is pressed against the crank arm during tightening, it may damage the power meter module.
- Tighten with Torque Wrench: It is recommended to use a torque wrench with an 8mm Allen bit for installation to ensure the accuracy of the power measurement. The recommended tightening torque is 30-40 N·m. If the crank manufacturer specifies a different torque, please follow their recommendation.
- Avoid Overtightening by Hand: You may hand-thread the power meter module lightly, but do not fully tighten it by hand as this may damage the power meter module.

4. Mahi
4.1. Whakahohenga Tuatahi
The power meter must be charged and woken up before first use. Connect the charging cable to activate the pedals. Once activated, the pedals are ready for pairing.
4.2. Pairing with Cycling Computer/App
Pair the Rally RK200 with compatible Garmin Edge cycling computers or the Garmin Connect app for seamless data uploads, software updates, and real-time analysis. The pedals also support third-party apps such as Strava, TrainingPeaks, and TrainerRoad.
4.3. Zero-Offset Calibration and Crank Length Setting
To ensure zero-offset calibration accuracy, perform several forceful pedal strokes after each installation before proceeding with the zero-offset calibration. Connect the pedals to the Garmin Connect app or a compatible cycling computer. Select the correct crank length (mm) according to your actual crank arm length. Perform regular zero-point calibration to ensure accurate power meter readings.
4.4. Advanced Cycling Dynamics
The Rally RK200 measures total power and cadence, along with advanced cycling dynamics to help tailor your training:
- Left/Right Balance: Measures power from your left leg versus power from your right leg for symmetrical power analysis.
- Seated vs. Standing: Tracks the amount of time spent in each position and gauges position effectiveness.
- Wāhanga Hiko: Provides insight into where power is produced in the pedal stroke.
- Platform Center Offset: Helps ensure proper cleat position by tracking where power is applied on the pedal.
5. Tiaki
- Te horoi: Horoia ngā pētera i ia wā ki te pānuitangaamp cloth. Avoid using harsh chemicals or abrasive materials that could damage the sensors or finish.
- Ora Pūhiko: The Rally RK200 offers a runtime of up to 120 hours. Monitor battery levels via your cycling computer or the Garmin Connect app and recharge as needed using the provided dual-head magnetic charging cable.
- Whakahōu Firmware: Keep your pedals updated with the latest firmware through the Garmin Connect app or a compatible Garmin Edge device to ensure optimal performance and access to new features.
- Tirotiro: Periodically inspect the pedals for any signs of wear or damage, especially after intense rides or crashes. Ensure all components are securely fastened.
6. Te Raru
- No Power Reading:
- Ensure pedals are activated and charged.
- Verify proper installation and tightening torque.
- Perform a zero-offset calibration.
- Check for proper pairing with your cycling computer or app.
- Nga Panui Heke:
- Ensure the correct crank length is set in the app/device.
- Perform a zero-offset calibration before each ride or if you notice inconsistencies.
- Check for any physical obstructions or damage to the power meter module.
- Nga take hono:
- Me whakarite kua whakahohea te Nihokikorangi/ANT+ i runga i tō pūrere.
- Move closer to the pedals during pairing.
- Restart both the pedals (by connecting/disconnecting charger) and your cycling computer/app.
- Te korenga o te whakahohenga: If activation fails, return to the device search list in the utility app and reconnect to activate. Ensure your email address is correctly entered for verification.
7. Whakatakotoranga
| Āhuahira | Taipitopito |
|---|---|
| Tau tauira | RK200 |
| Hinga Mana | Takirua-Tono |
| Hototahitanga o te Cleat | LOOK KEO |
| Rauemi | Carbon Composite or Plastic |
| Tae | Pango |
| Taumaha Tūemi | 330 Karamu |
| Hunga Hua | 13.1"L x 14.6"W |
| Ora Pūhiko | Tae atu ki te 120 haora |
| Hononga | ANT+, Nihokikorangi |
| Momo Paihikara | Mountain Bike, Road Bike |
| UPC | 810132456312 |
8. Raihana me te Tautoko
8.1. Nga Korero Whakaputanga
For detailed warranty information, please refer to the official Garmin consumer limited warranty policy available at: https://www.garmin.com/en-US/legal/consumer-limited-warranty/
8.2. Tautoko Kiritaki
Mō ētahi atu āwhina, tautoko hangarau, pātai ratonga rānei, tirohia te ratonga tautoko mana a Garmin. website or contact their customer service. You can also refer to the Wearable4U store for product-specific inquiries related to the bundle.


