1. Kupu Whakataki
This manual provides comprehensive instructions for the setup, operation, and maintenance of your Xech Prism Pro Digital Alarm Clock with Speaker. This device features a multi-coloured display, dual alarms, a built-in Bluetooth speaker, and USB-C recharging capabilities. Please read this manual thoroughly before using the product to ensure optimal performance and longevity.

Whakaahua: Mua view of the Xech Prism Pro Digital Alarm Clock, showcasing its vibrant multi-coloured time display.
2. Ihirangi mokete
I te wetewete, tirohia koa kei roto katoa nga mea e whai ake nei:
- Xech Prism Pro Digital Alarm Clock (Model X-607)
- USB-C Uira Whakatau
- Pukapuka Kaiwhakamahi (tenei tuhinga)
3. Hua Neke Atuview
Familiarize yourself with the various components and controls of your Xech Prism Pro alarm clock.

Image: Detailed diagram illustrating the control buttons, display indicators, USB-C charging port, and integrated speaker of the Xech Prism Pro.
Wae matua:
- Whakaatu Mata: Shows time, alarm status, and other information with multi-coloured digits.
- Patene Mana: Located on the top panel for setting time, alarms, and controlling speaker functions.
- Tauranga USB-C: Mo te utu i te taputapu.
- Kaikōrero whakauru: For audio playback and alarm sounds.
- Pen Stand: A convenient slot for holding pens or small stationery items.
4. Tatūnga
4.1 Whakataki Tuatahi
Before first use, fully charge the Xech Prism Pro using the provided USB-C cable. Connect the cable to the USB-C port on the device and plug the other end into a compatible USB power adapter (not included).

Image: The Xech Prism Pro alarm clock being charged via its USB-C port, demonstrating its rechargeable capability.
4.2 Kei te Hiko / Weto
Pēhia, ka pupuri i te pātene Mana (tirohia te Hua i Muri ihoview diagram) to turn the device on or off.
4.3 Automatic Time Synchronization
The Prism Pro supports automatic time synchronization when paired with a smartphone via Bluetooth. This eliminates the need for manual time setting.
- Me mohio kei te whakahohea te Nihokikorangi i runga i to waea atamai.
- On the Xech Prism Pro, activate Bluetooth pairing mode (refer to the Operating Instructions for detailed steps).
- Select "Xech Prism Pro" from your phone's Bluetooth device list to pair.
- Once paired, the clock will automatically synchronize its time with your phone.

Image: A smartphone displaying its time next to the Xech Prism Pro, indicating the device's ability to auto-sync time via Bluetooth pairing.
5. Nga Tohutohu Whakahaere
5.1 Tautuhinga Whakaoho
The Xech Prism Pro features dual alarms (Alarm 1 and Alarm 2) to accommodate different schedules.
- Press the "Alarm" button (usually marked with an alarm icon) to select Alarm 1 or Alarm 2.
- Use the "+" and "-" buttons to adjust the hour and minute settings.
- Press the "Alarm" button again to confirm the setting and move to the next parameter (e.g., AM/PM, alarm tone, volume).
- To activate or deactivate an alarm, press the "Alarm" button until the corresponding alarm indicator (e.g., "AL1" or "AL2") appears or disappears on the display.
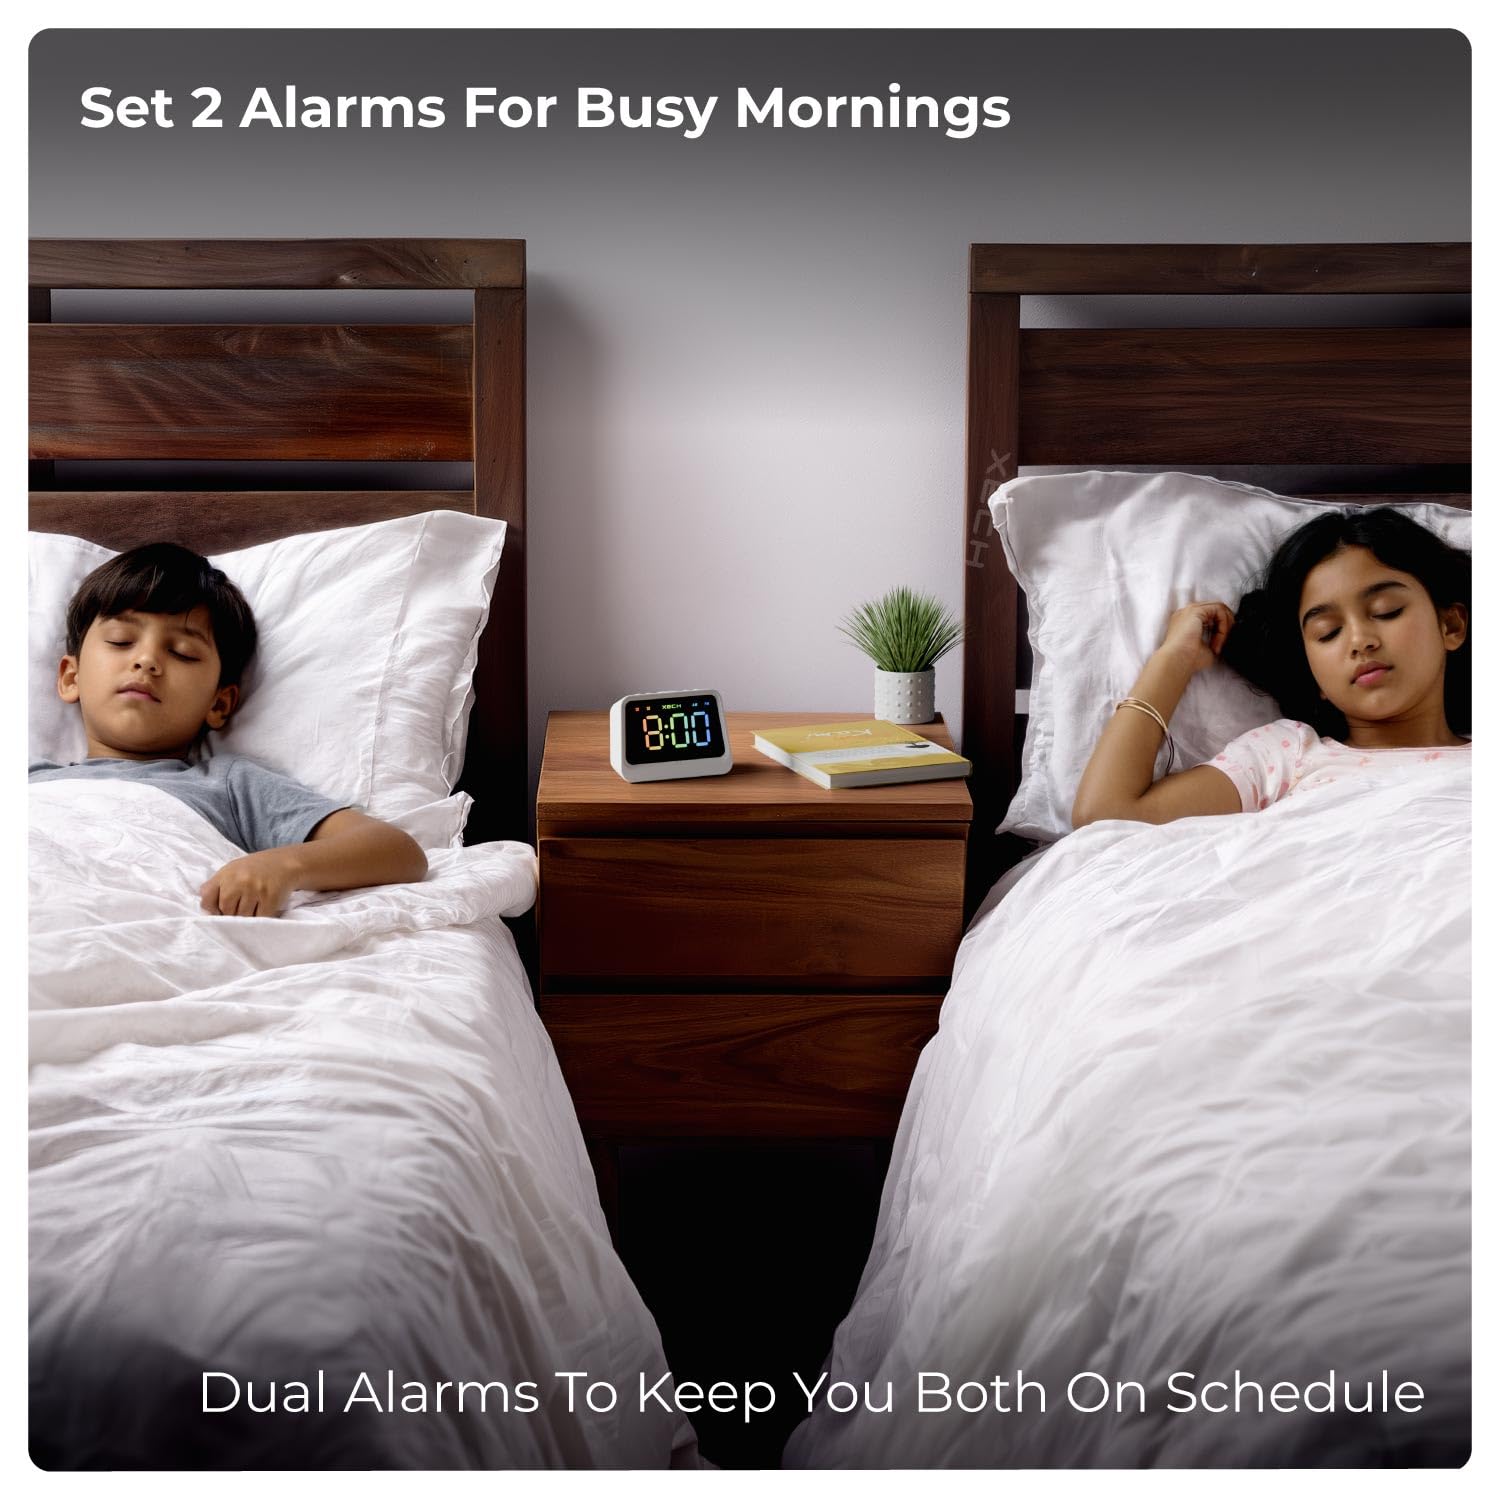
Image: The Xech Prism Pro alarm clock positioned between two beds, highlighting its dual alarm functionality for multiple users.
5.2 Using the Bluetooth Speaker
The integrated 5W Bluetooth 5.3v speaker allows for wireless audio playback.
- Ensure the clock is powered on.
- Press the "Mode" button (or Bluetooth button) to switch to Bluetooth mode. The display may show a Bluetooth icon or "BT".
- On your smartphone or audio device, search for Bluetooth devices and select "Xech Prism Pro".
- Once connected, you can play audio from your device through the clock's speaker.
- Use the volume controls on the clock or your connected device to adjust audio levels.

Image: The Xech Prism Pro functioning as a wireless speaker, wirelessly connected to a smartphone for audio playback.
5.3 Tautuhinga Whakaatu
The multi-coloured display offers adjustable brightness for comfortable viewi roto i nga ahuatanga rama rereke.
- Whakaritenga Tirohanga: Press the "Brightness" button (or a dedicated button, refer to Product Overview) to cycle through different brightness levels.
- The display is designed to be clear during the day and dim enough for comfortable viewing at night without harsh light.

Image: The clock displaying time with high brightness, suitable for daytime viewing.

Image: The clock displaying time with low brightness, ideal for night use without causing disturbance.
5.4 Using the Pen Stand
The integrated pen stand provides a convenient storage solution for pens, pencils, or other small desk items, helping to keep your workspace organized.
6. Tiaki
To ensure the longevity and proper functioning of your Xech Prism Pro, follow these maintenance guidelines:
- Te horoi: Use a soft, dry cloth to wipe the exterior of the clock. Avoid abrasive cleaners, solvents, or sprays that could damage the finish or display.
- Turanga: Whakanohoia te karaka ki runga i te mata papatahi. A ape i te ra tika, te wera nui, me te makuku nui.
- Tiaki Pūhiko: While the device is rechargeable, prolonged periods without charging or frequent deep discharges may affect battery life over time. Charge regularly as needed.
7. Te Raru
If you encounter issues with your Xech Prism Pro, refer to the following common problems and solutions:
| Raruraru | Take pea | Rongoā |
|---|---|---|
| Kare te karaka i te hiko. | He iti te pākahiko, kore utu ranei. | Connect the device to a power source using the USB-C cable and allow it to charge for at least 30 minutes before attempting to power on again. |
| Kare e tangi te whakaoho. | Alarm is deactivated or volume is too low. | Ensure the alarm is activated (check alarm indicator on display) and the alarm volume is set to an audible level. |
| Kāore te kaikorero Nihokikorangi e hono ana. | Device not in pairing mode or out of range. | Ensure the clock is in Bluetooth pairing mode. Move the clock closer to your audio device. Disconnect and re-pair if necessary. |
| Kei te he te wa. | Not synchronized or manual setting error. | Pair with a smartphone for automatic time synchronization, or manually set the time following the instructions in section 5.1. |
| He poto ake te ora o te puhiko i te waa e manakohia ana. | Continuous use of speaker, high display brightness, or aging battery. | Reduce display brightness. Limit continuous speaker use. Ensure the device is fully charged before use. Note that battery performance may degrade over time. |
8. Whakatakotoranga
| Āhuahira | Taipitopito |
|---|---|
| Waitohu | Xech |
| Tau tauira | X-607 |
| Tae | Mā |
| Momo Whakaatu | Digital, Multi-Coloured |
| Nga waahanga motuhake | Bluetooth, Charging Port, Large Display, Loud Alarm, Snooze, Pen Stand |
| Hunga Hua | 7.8W x 6.3H Henimita |
| Puna Mana | Whakahikohia te Pūhiko (USB-C Ka taea te utu) |
| Rauemi | Acrylonitrile Butadiene Styrene (ABS) |
| Taumaha Tūemi | 208 Karamu |
| Te maha o nga pākahiko | 1 (9V, included) |
| Hangarau Hononga | USB-C, Bluetooth 5.3v |
| Kaihanga | XECH Technologies Pvt Ltd |
| Whenua Taketake | Haina |
9. Pūtāhui me te Tautoko
The Xech Prism Pro Digital Alarm Clock comes with a Rarangi Whakaiti. For specific details regarding warranty coverage, duration, and terms, please refer to the warranty card included with your product or contact Xech customer support.
For technical assistance or support inquiries, please visit the official Xech website or contact their customer service department. Contact information is typically provided on the product packaging or the manufacturer's webpae.


