1. Kupu Whakataki
This manual provides detailed instructions for the installation, adjustment, and maintenance of the Helloradio VG01 CNC Hall Gimbals. These gimbals are designed to enhance the control precision and responsiveness of compatible FPV RC radio transmitters, including Radiomaster TX16S, Boxer, V14, V16, and AG01 models. Please read this manual thoroughly before proceeding with installation or adjustments.

Image 1.1: Two Helloradio VG01 CNC Hall Gimbals, showcasing their robust metal construction and precise design.
2. Nga Hua o te Hua
- High-Precision Hall Sensor Technology: Utilizes elastic high-precision Hall sensors for accurate control and responsiveness, ensuring smooth, high-resolution stick movement and precise return-to-center accuracy.
- Aerospace-Grade CNC Aluminum Construction: Manufactured entirely from CNC-machined aerospace aluminum for superior strength, durability, and minimal flex, providing a professional aesthetic.
- Hoahoa Whakaritea Katoa: Allows for customization of panel tension, throw angle (38° to 54°), and spring force to suit individual pilot preferences and flight styles.
- STICKY360 Ergonomic Anti-Slip Stick Ends: Equipped with 3D joystick caps that offer a secure, non-slip grip from all angles, reducing hand fatigue during extended use.
- Quad Precision Bearings: Features four bearings per gimbal for unparalleled stick feel and smooth operation.
- Hototahi Whānui: Engineered for direct-fit upgrade with Radiomaster TX16S, Boxer, AG01, V14, and V16 transmitters.

Whakaahua 2.1: He pahū view diagram illustrating the quad precision bearings within the gimbal mechanism, designed for smooth movement.

Image 2.2: Detail of the CNC processed aviation-grade aluminum material, highlighting its robust and precise construction.
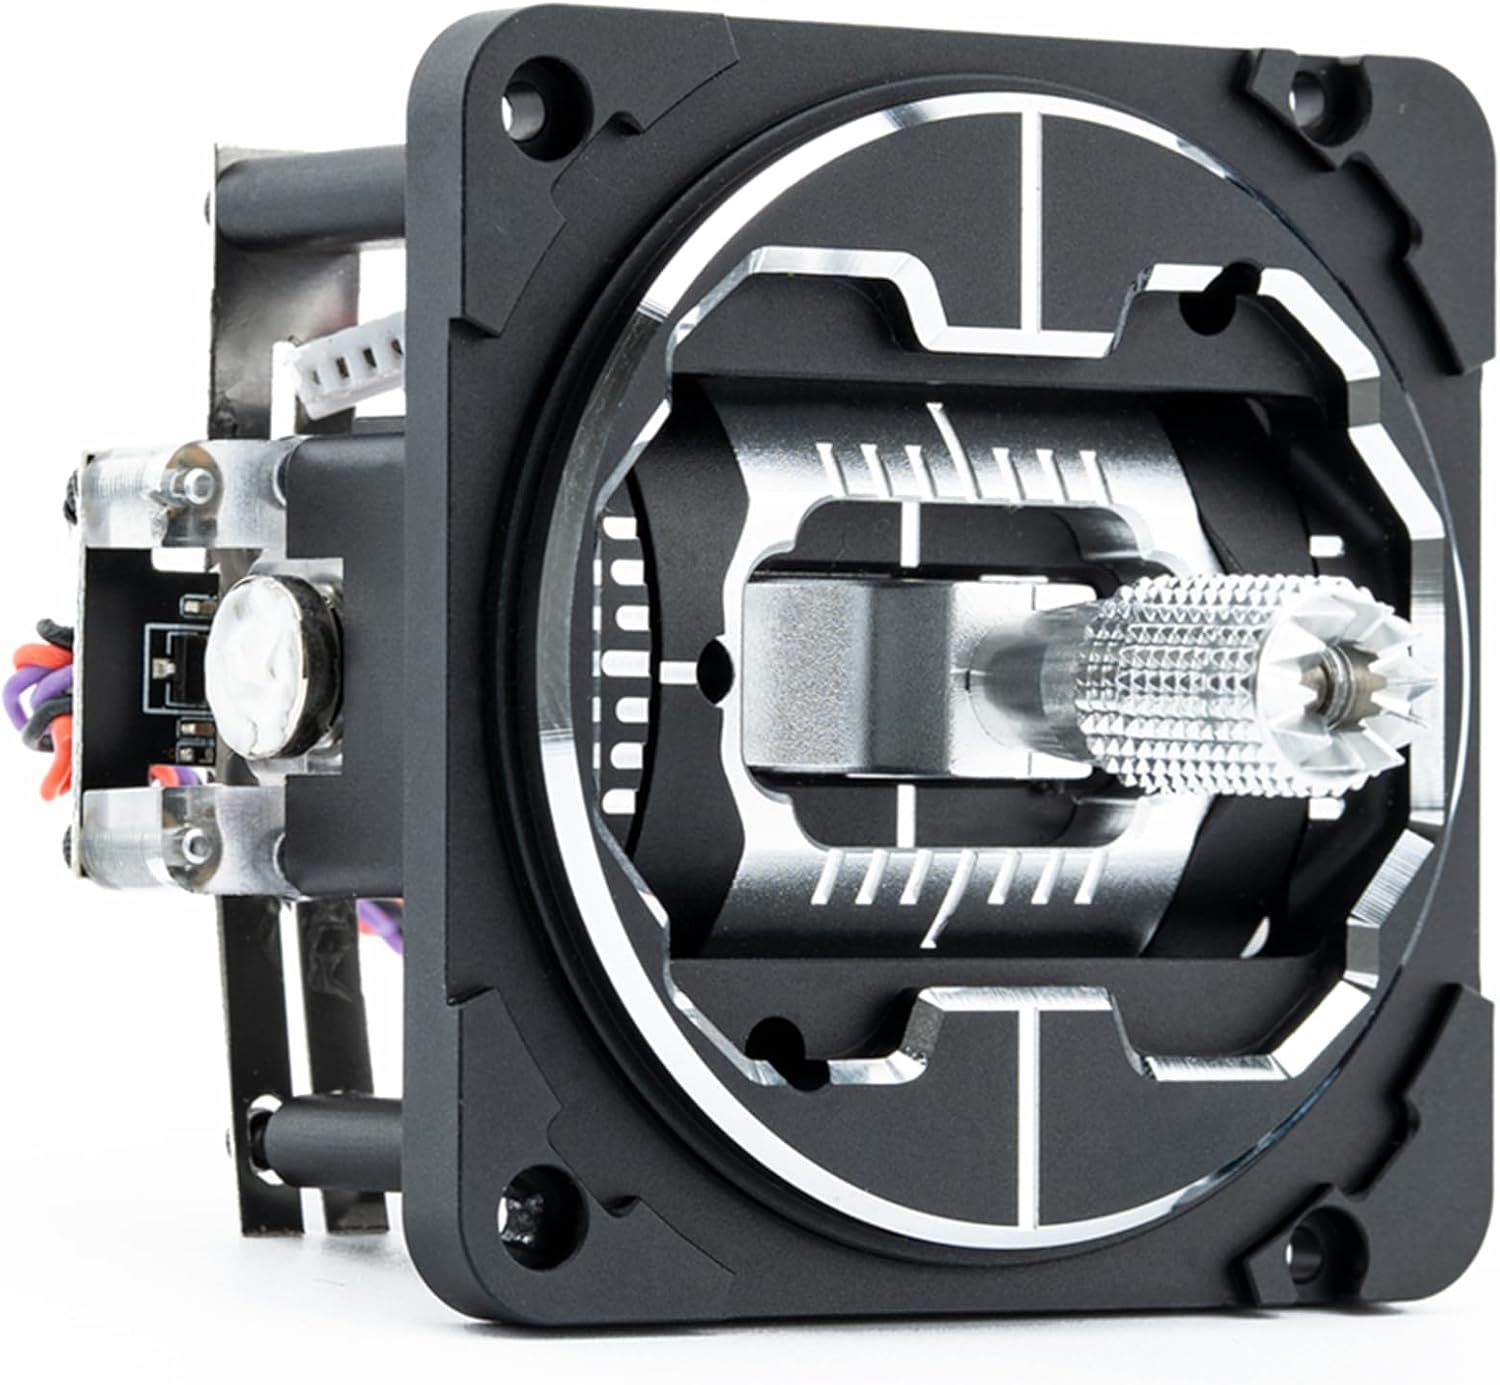
Image 2.3: A close-up of the STICKY360 joystick head, demonstrating its 360-degree anti-slip texture for enhanced grip.
3. Whakatakotoranga
| Whakatakotoranga | Taipitopito |
|---|---|
| Ingoa Tūemi | VG01 CNC Metal Hall Sensor Gimbal |
| Momo Pūoko | Pānga Hall |
| Mahinga Mahi Voltage | DC 3.3V |
| Whanui | Real-time (no delay) |
| Adjustable Travel | 38° ki te 54° |
| Aratau Whakaritea | Ae |
| Adjustable Tension | Ae |
| Nga piro | Four per gimbal |
| Awhe Pawera | -20 ℃ ki te 85 ℃ |
| Taumaha | 85g/pc (approx. 0.705 ounces) |
| Rauemi | Aerospace-grade CNC Aluminum |
| Tae | Pango |
4. Ihirangi mokete
The Helloradio VG01 CNC Hall Gimbals package typically includes:
- 2x Helloradio VG01 CNC Metal Hall Sensor Gimbals
- Whakaeke Tiu
- Adjustment Tool (e.g., Allen key)
- Spare Springs (if applicable)

Image 4.1: The Helloradio VG01 CNC metal gimbal shown with its packaging, mounting screws, and an adjustment tool.
5. Tatūnga me te Whakatikatika
The following instructions detail how to adjust the Helloradio VG01 CNC Hall Gimbals. Refer to your transmitter's manual for specific gimbal replacement procedures.

Image 5.1: A diagram illustrating the dimensions of the gimbal and key adjustment points for tension and centering.
- Left and Right Spring Tension Adjustment (Point 1 on diagram):
Turn the screw clockwise to reduce the left and right spring tension. Turn the screw counter-clockwise to increase the left and right spring tension. - Up and Down Spring Tension Adjustment (Point 2 on diagram):
Turn the screw clockwise to reduce the up and down spring tension. Turn the screw counter-clockwise to increase the up and down spring tension. - Centering and Mode Adjustment (Point 5 on diagram):
When the screw is turned clockwise to raise the arm, the gimbal will not center its up and down axis when the stick is released. This is typically used for throttle control (Mode 2). When the screw is turned counter-clockwise to lower the arm, the gimbal will center its up and down axis when the stick is released. You can also use screw 6 to raise or lower the arm for fine-tuning. - Throttle Tension Adjustment (Point 3 on diagram):
When there is no tension up and down (e.g., for throttle), screw 3 adjusts the tension tightness. Screw 4 adjusts the scale tightness.
Note: The physical orientation of the gimbal may turn 180 degrees from the diagram depending on transmitter installation. Always ensure adjustments are made carefully and tested before flight.
6. Tiaki
To ensure optimal performance and longevity of your Helloradio VG01 CNC Hall Gimbals, follow these maintenance guidelines:
- Whakapai auau: Keep the gimbals free from dust, dirt, and debris. Use a soft, dry cloth to wipe down the exterior. Avoid using harsh chemicals or solvents.
- Tirotiro: Periodically inspect the gimbals for any signs of wear, loose screws, or damage. Ensure all connections are secure.
- Whakahinuhinu: The Hall sensors and bearings are generally maintenance-free. Avoid applying lubricants unless specifically recommended by the manufacturer, as this could attract dust or interfere with sensor operation.
- Rokiroki: Store the gimbals in a clean, dry environment away from extreme temperatures and direct sunlight when not in use.
7. Te Raru
If you encounter issues with your Helloradio VG01 CNC Hall Gimbals, consider the following troubleshooting steps:
- Unresponsive or Erratic Movement:
- Check all wiring connections between the gimbal and the transmitter's main board. Ensure they are secure and correctly oriented.
- Verify that the gimbal is properly seated and mounted within the transmitter.
- Recalibrate the gimbals within your transmitter's firmware settings. Refer to your transmitter's manual for calibration procedures.
- Inspect for any physical obstructions or debris that might be impeding gimbal movement.
- Incorrect Centering:
- Perform a gimbal calibration through your transmitter's software.
- Adjust the centering screw (Point 5 in Section 5) to ensure the gimbal returns to the desired center position.
- Inconsistent Tension:
- Adjust the spring tension screws (Points 1 and 2 in Section 5) to achieve the desired feel.
- Ensure the throttle tension screws (Points 3 and 4 in Section 5) are set correctly for non-centering axes.
If problems persist after attempting these steps, contact Helloradio customer support or your retailer for further assistance.
8. Pūtāhui me te Tautoko
Helloradio products are manufactured to high standards. For information regarding warranty coverage, duration, and terms, please refer to the documentation provided with your purchase or visit the official Helloradio website. For technical support, troubleshooting assistance, or spare parts inquiries, please contact Helloradio customer service through their official channels.


