Kupu Whakataki
Welcome to the AceGamer Aurora II Wireless Bluetooth Controller instruction manual. This guide provides detailed information on setting up, operating, and maintaining your new gaming controller. Please read this manual thoroughly to ensure optimal performance and a seamless gaming experience across various platforms.
The AceGamer Aurora II controller is designed for multi-platform compatibility, including PC (Windows 7/10 and later), Nintendo Switch, Nintendo Switch 2, iOS, and Android devices. It features Hall Effect joysticks, customizable back buttons, and multiple connection modes for versatile use.
Ka mutu te huaview
The AceGamer Aurora II controller offers advanced features for an enhanced gaming experience. Key components and features include:
- Nga Riipoi Whakaaetanga Hall: Provides precise and reliable input detection, reducing drift and ensuring accurate in-game movement.
- Ngā Kī Whakamuri Ka Taea te Whakarite: Two programmable buttons (M1, M2) on the back for custom trigger combos or other functions. Includes two back button switches for easy access.
- Hononga Ahokore: Supports 2.4G wireless transmission and Bluetooth for stable, low-latency connections.
- Pūhiko Raukaha Nui: Equipped with a 1000mAh battery for extended playtime.
- Hototahitanga-maha: Compatible with PC, Nintendo Switch, Nintendo Switch 2, iOS, and Android. Note: Not compatible with Xbox systems.
- Rotary Motors: Mō te urupare haptic rumaki.
- Rarama RGB: Customizable RGB Hall Effect joysticks.

Image: AceGamer Aurora II Wireless Bluetooth Controller and its retail packaging.

Image: The package includes 1x Wireless Controller, 1x Type-C Data Cable, 1x Wireless Receiver, and 1x User Manual.
Tatūnga me te Hononga
1. 2.4G Wireless Connection (PC)
- Plug the 2.4G receiver into an available USB port on your computer.
- On the controller, press and hold the 'A' button, then simultaneously press and hold the 'HOME' button for 3 seconds.
- LED1 and LED3 on the controller will light up, indicating pairing mode.
- Wait 3-5 seconds. LED2 will light up, indicating a successful connection.
Video: Demonstrates how to connect the Aurora II controller to a PC using the 2.4G wireless receiver.
2. Bluetooth Connection (PC)
- Enable Bluetooth on your computer and navigate to the 'Add Device' option in your Bluetooth settings.
- On the controller, press and hold the 'HOME' button for approximately 3 seconds until LED2 flashes. This indicates Bluetooth pairing mode.
- On your PC, select 'Xbox Wireless Controller' from the list of available Bluetooth devices to connect.
- After 3-5 seconds, LED2 on the controller will remain lit, indicating a successful Bluetooth connection.
Video: Illustrates the steps for connecting the Aurora II controller to a PC via Bluetooth.
3. Nintendo Switch / Switch 2 Connection
- On your Nintendo Switch/Switch 2, go to the 'Controllers' option from the HOME Menu.
- Select 'Change Grip/Order' to bring up the pairing interface.
- On the Aurora II controller, press and hold the 'Y' button and the 'HOME' button simultaneously. All four LEDs on the controller will flash in sequence.
- Once the controller icon appears on the Switch screen, the connection is successful.
Video: Guide on connecting the Aurora II controller to a Nintendo Switch 2 console.
Video: Instructions for connecting the Aurora II controller to a Nintendo Switch console.
4. iOS and Android Connection
For iOS and Android devices, use Bluetooth connection mode. Follow the general Bluetooth pairing steps: enable Bluetooth on your device, put the controller into pairing mode (hold 'HOME' button until LED2 flashes), and select the controller from your device's Bluetooth list.
Nga Tohutohu Whakahaere
Customizable Back Keys (M1, M2)
The controller features two programmable back buttons, M1 and M2. These can be assigned to perform specific actions or trigger combinations, enhancing your gameplay. Consult the full manual for detailed programming instructions.

Image: The controller features customizable M1 and M2 back buttons for enhanced control.
Nga Ririhi Whakaari Hall
Experience enhanced joystick control with Hall Effect sensors, providing precise and reliable input detection for smooth and accurate in-game movement. This technology minimizes stick drift for a consistent gaming experience.

Image: Detail of the Hall Effect Joysticks, highlighting their precision and durability.
Rua-Stage Analog Triggers
The analog triggers offer two distinct stages for varied responsiveness. Use long trigger travel for smooth control in racing games or short trigger travel for quick responsiveness in action games.
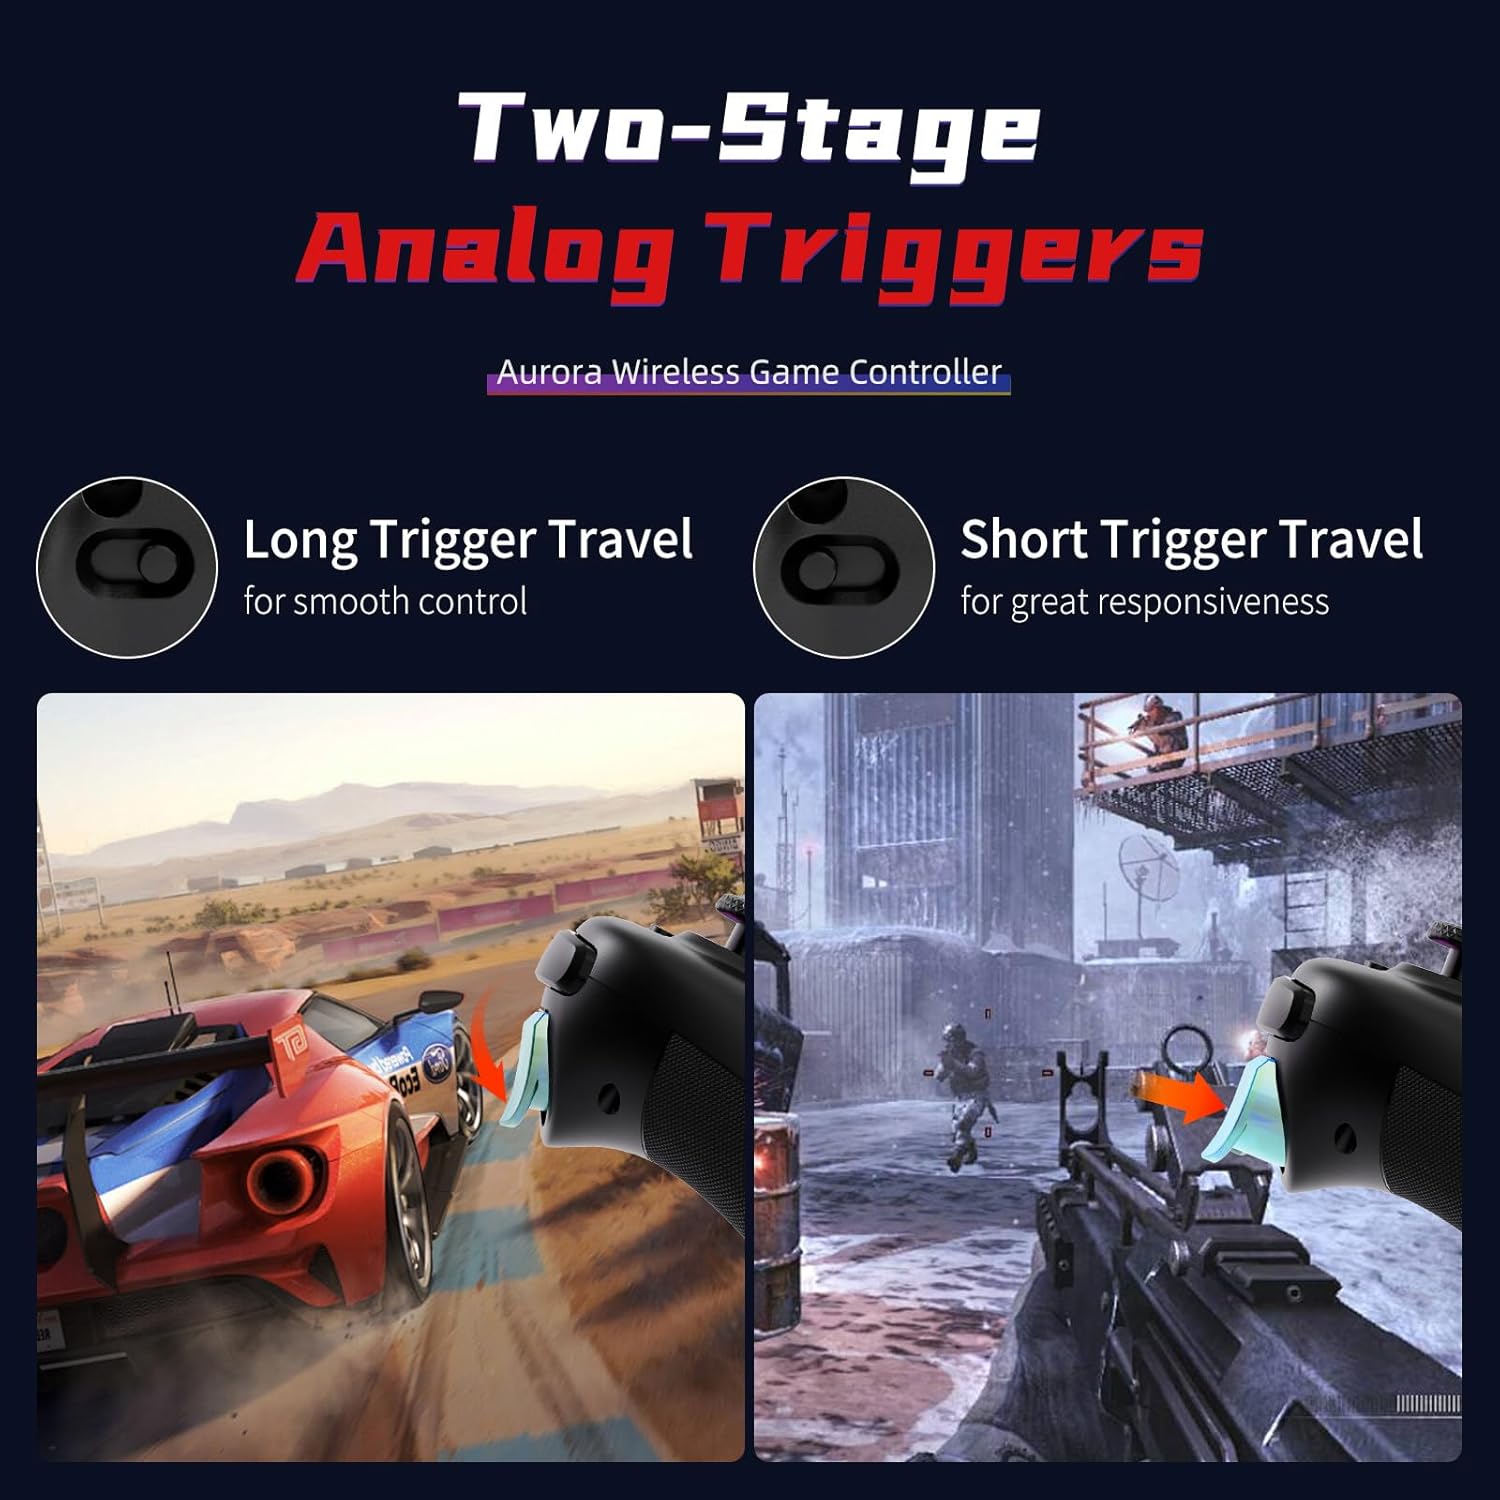
Image: Visual representation of the two-stage analog triggers, showing long and short travel options.
Whakaritea Tae RGB
The joysticks feature customizable RGB lighting. You can switch between one-color mode and running light mode to personalize your controller's appearance. Refer to the full manual for specific button combinations to adjust RGB settings.

Image: Demonstrates the RGB color adjustment features, including one-color and running light modes.
Game Operation Mode Adjustment (ABXY Key Swap)
The controller supports ABXY key swap functionality, allowing you to switch between default Xbox mode and Nintendo Switch mode for button layouts. Note that these functions are typically not saved after power off.

Image: Illustrates the ABXY key swap feature, adapting the button layout for different gaming platforms.
FPS Mode (Professional Joystick No Dead Zone)
Activate FPS mode for a professional joystick experience with no dead zone. This mode is designed for precision in first-person shooter games. Note that this setting may not be saved after power off.

Image: Shows the controller in FPS mode, emphasizing the no dead zone feature for precise aiming.
Adjustable Vibration Levels
The controller features dual vibration motors with 4 adjustable levels, providing immersive haptic feedback for a more engaging gaming experience.
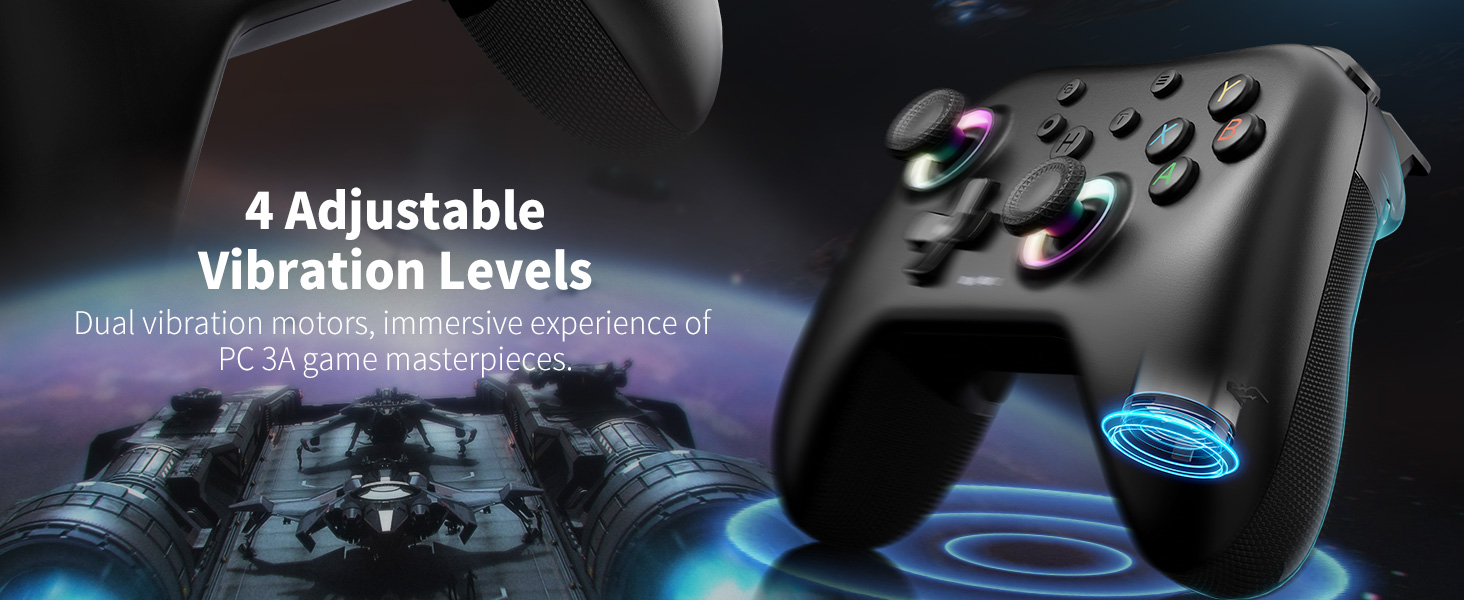
Image: Illustrates the 4 adjustable vibration levels, enhancing the immersive gaming experience.
Te Whakataki me te Pūhiko
The AceGamer Aurora II controller is equipped with a 1000mAh upgraded battery. A full charge takes approximately 2-3 hours and provides an extra-long playtime, typically around 8 hours based on laboratory test data. Connect the controller using the provided Type-C data cable to a USB power source for charging.

Image: The controller's 1000mAh battery being charged via a standard Type-C cable.
Te tiaki
To ensure the longevity and optimal performance of your AceGamer Aurora II controller, follow these maintenance guidelines:
- Puritia te pūmana kia ma mā te muru ki te kakahu ngohengohe, maroke. Āta karohia te whakamahi i ngā matū kaha, i ngā rauemi whakakoi rānei.
- Whakaorangia te pūmana ki te wahi matao, maroke atu i te ra tika me te wera nui.
- A ape i te tuku i te kaiwhakahaere, te tuku ranei ki nga paanga kaha.
- Do not attempt to disassemble the controller, as this may void the warranty and cause damage.
- Whakakīia te pākahiko i ia wā, ahakoa kāore e whakamahia pinepinetia, kia mau tonu ai te hauora o te pākahiko.
Raparongoā
If you encounter issues with your AceGamer Aurora II controller, please refer to the following common solutions:
- Karekau te kaiwhakahaere e hono ana: Ensure the controller is fully charged. Re-attempt the connection steps for your specific platform (2.4G, Bluetooth, or Switch) as described in the 'Setup and Connection' section.
- Taurua, momotuhia ranei: Ensure the controller is within range of your device. Minimize interference from other wireless devices. For 2.4G connection, ensure the receiver is securely plugged in.
- Buttons or joysticks unresponsive: Check if the controller's battery is low. Try resetting the controller (refer to the full manual for reset instructions if available).
- PC connection issues (recognized as 'GameMacro'): Some users have reported that installing the Xbox accessories app from the Microsoft Store can resolve recognition issues by providing necessary Xbox wireless controller drivers for Bluetooth connections.
- Nga take utu: Ensure the Type-C cable is properly connected to both the controller and the power source. Try a different charging cable or USB port.
If problems persist, please contact AceGamer customer support for further assistance.
Whakatakotoranga
| Āhuahira | Taipitopito |
|---|---|
| Tau tauira | Aurora II (T47) |
| Hononga | 2.4G Ahokore, Nihokikorangi |
| Hototahi | PC (Windows 7/10+), Nintendo Switch, Nintendo Switch 2, iOS, Android |
| Pūhiko Raukaha | 1000mAh |
| Ora Pūhiko | Approx. 8 hours (usage dependent) |
| Waa Whakatau | 2-3 haora |
| Nga rakau harikoa | Hall Effect with RGB lighting |
| Pātene Whakahōtaka | 2 back keys (M1, M2) |
| Wiri | Ngā motuka takirua, e 4 ngā taumata whakarerekētanga |
| Hunga Hua | 1.21 x 6.5 x 4.07 inihi |
| Taumaha Tūemi | 11.3 hekere |
Pūtāhui me te Tautoko
For warranty information and customer support, please refer to the documentation included with your product or visit the official AceGamer webpae. Puritia to rihiti hoko mo nga kereme whakamana.


