Kupu Whakataki
This manual provides detailed instructions for the proper use, setup, and maintenance of your ALLmeter Digital Dial Indicator with Magnetic Base. Designed for high-precision measurements, this tool is suitable for various applications in machine shops, automotive repair, and industrial settings. Please read this manual thoroughly before operating the device to ensure accurate results and safe handling.
He aha kei roto i te Pouaka
I te whakatuwheratanga o te kete, me tirotiro kei roto i te kete nga waahanga katoa e whai ake nei:
- Tohu Waea Mamati
- Magnetic Base with Flexible Arm
- 1.5V Pūhiko
- Pouaka Pupuri Kawe
- Pukapuka Tohutohu (tenei tuhinga)
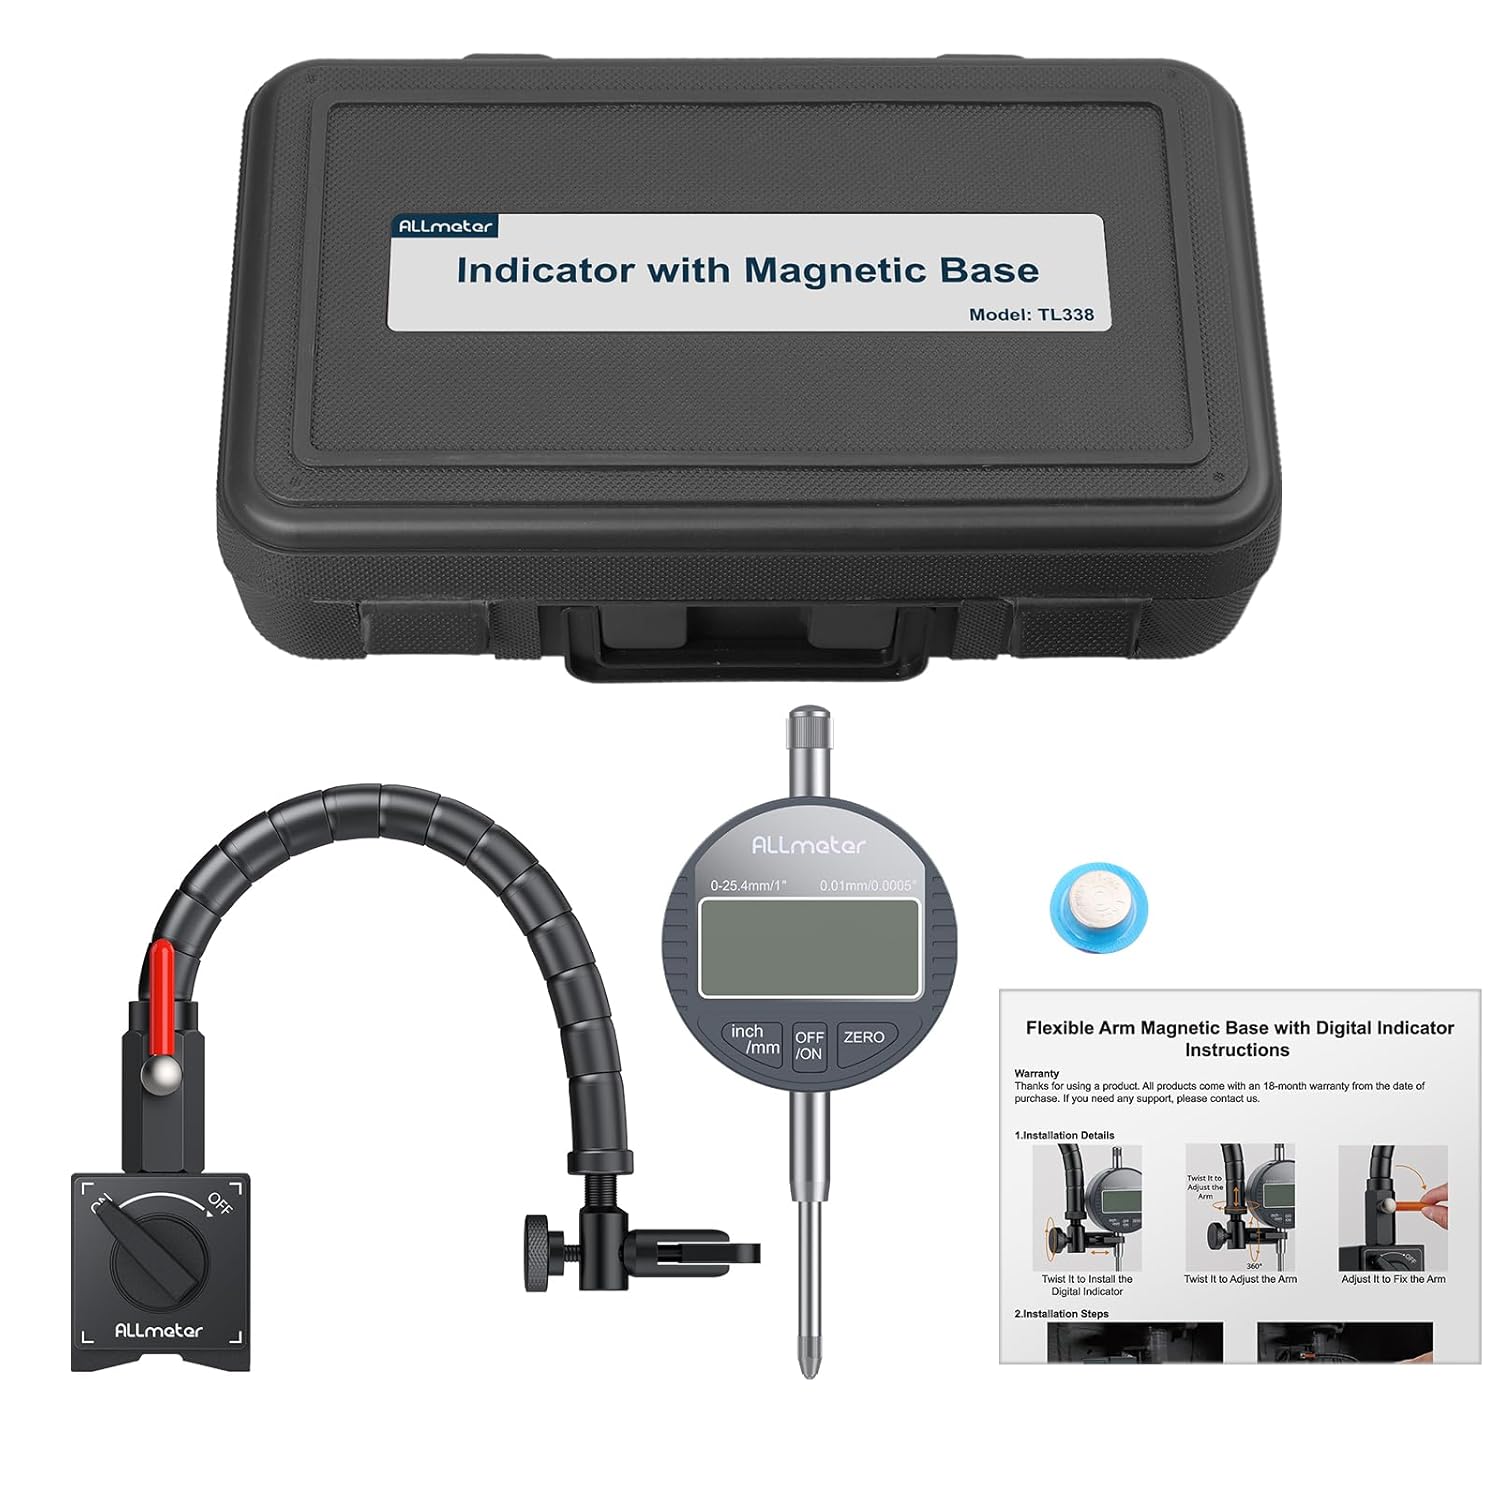
Image: All components included in the ALLmeter Digital Dial Indicator set, neatly arranged for inspection.
Nga waahanga hua
- Tino Tino: Offers 0.01mm (0.0005") resolution and a 0-1 inch/25.4mm measuring range for accurate results.
- Turanga Hangawari: Features a 360° adjustable magnetic base with 176lbs (80kg) tensile force for secure attachment and versatile positioning.
- Robust & Easy Use: Constructed with an aluminum alloy body, includes an auto-off function, and supports unit conversion between inches and millimeters.
- Hototahi Ao: Designed to fit all 4-14mm dial indicators, making it suitable for various machinery, including lathes, presses, and CNC machines.
- Kete Whakaoti: Comes with a battery, portable box, and this manual for immediate use.

Whakaahua: Ka mutuview of the ALLmeter Digital Dial Indicator and its key features.
Tatūnga me te Tāuta
Follow these steps to set up your digital dial indicator and magnetic base:
- Attach Flexible Arm to Magnetic Base: Securely screw the flexible arm into the magnetic base. Ensure it is tightened to prevent movement during use.
- Position Magnetic Base: Place the magnetic base on a clean, flat ferrous surface. Rotate the ON/OFF switch on the base to the "ON" position to activate the magnet and secure the base.
- Install Digital Dial Indicator: Insert the stem of the digital dial indicator into the clamp at the end of the flexible arm. Tighten the adjusting screw to firmly hold the indicator in place.
- Whakaritea te Turanga ringa: Use the rotary lever on the flexible arm to adjust its angle and position. The 360° rotating twist allows for precise alignment of the indicator's probe with the measurement point.

Image: Components of the flexible arm and magnetic base, illustrating adjustment points.

Image: Visual guide for the installation process, from securing the base to preparing for measurement.
Video: Demonstrates the assembly and initial setup of the ALLmeter Digital Dial Indicator with Magnetic Flex Arm.
Nga Tohutohu Whakahaere
Once the indicator is installed, follow these steps for accurate measurements:
- Whakahiko: Press the "ON/OFF" button to turn on the digital dial indicator.
- Tīpako Waeine: Press the "inch/mm" button to switch between imperial (inches) and metric (millimeters) units as needed.
- Tautuhinga Kore: Position the probe against the reference surface or the starting point of your measurement. Press the "ZERO" button to set the current position as zero.
- Inenga: Gently move the object or the indicator to measure the desired dimension. The digital display will show the displacement from the zero point.
- Weto Whakakore: Press the "ON/OFF" button again to turn off the indicator when not in use. The device also features an auto-off function to conserve battery.

Whakaahua: Taipitopito view of the digital dial indicator's interface and controls.

Image: The dial indicator set measuring a brake rotor, illustrating a practical application.
Te tiaki
Proper maintenance ensures the longevity and accuracy of your ALLmeter Digital Dial Indicator:
- Te horoi: Wipe the indicator and magnetic base with a soft, dry cloth after each use. Avoid using solvents or abrasive cleaners.
- Rokiroki: Store the device in its portable storage box in a dry, dust-free environment when not in use.
- Whakakapinga Pūhiko: If the display becomes dim or unresponsive, replace the 1.5V battery. Refer to the indicator's battery compartment for specific instructions.
- Aukati i te Paanga: Protect the indicator from drops or impacts, as this can affect its precision.
- Tiaki turanga aukume: Keep the magnetic surfaces clean and free of debris to ensure maximum holding force.
Raparongoā
If you encounter issues with your digital dial indicator, consider the following:
- Whakaatu Kaore i te Mahi:
- Tirohia mēnā kua tika te tāutanga o te pākahiko.
- Whakakapia te pākahiko mēnā kua iti, kua pau rānei.
- Me whakarite kua pēhia te pātene ON/OFF.
- Nga Panui Heke:
- Ensure the magnetic base is securely attached to a stable, flat ferrous surface.
- Verify that the indicator is firmly clamped in the flexible arm and not loose.
- Clean the probe tip and the measurement surface to remove any debris.
- Perform a zero-setting calibration before taking measurements.
- Magnetic Base Not Holding:
- Ensure the ON/OFF switch on the magnetic base is in the "ON" position.
- Clean the magnetic surfaces and the mounting surface.
- The magnetic base requires a ferrous material surface at least 30mm thick for maximum pull force.
Whakatakotoranga
| Āhuahira | Whakatakotoranga |
|---|---|
| Awhe Ine | 0-1 inihi / 0-25.4 mm |
| Whakatau | 0.01 mm (0.0005 inihi) |
| Magnetic Base Tensile Force | 176 lbs (80 kg) |
| Flexible Arm Length | 13.5 inihi (340 mm) |
| Tohu Hototahi | 4-14 mm dial indicators |
| Puna Mana | 1.5V Pūhiko |
| Taumaha Tūemi | 3.53 pauna |
| Ahu mōkihi | 12.44 x 7.64 x 3.5 inihi |
| Tau tauira | ALL090FBA |

Whakaahua: Examples of the dial indicator set being used in different precision measurement scenarios.
Pūtāhui me te Tautoko
ALLmeter products come with a 15-month warranty from the date of purchase. If you require any support, have questions, or need to claim warranty service, please contact ALLmeter customer service through the retailer where the product was purchased or visit the official ALLmeter webpae mo nga korero whakapā.
ALLmeter is committed to providing precise, accurate, and stable measuring tools. We strive for unparalleled quality in each product to ensure customer satisfaction.

