1. Kupu Whakataki
Thank you for choosing the FLYBIRD Twister Arm Trainer. This device is designed to assist in strengthening various upper body muscle groups, including the chest, arms, back, and shoulders. Its adjustable resistance feature allows for progressive training suitable for different fitness levels. Please read this manual thoroughly before initial use to ensure safe and effective operation.
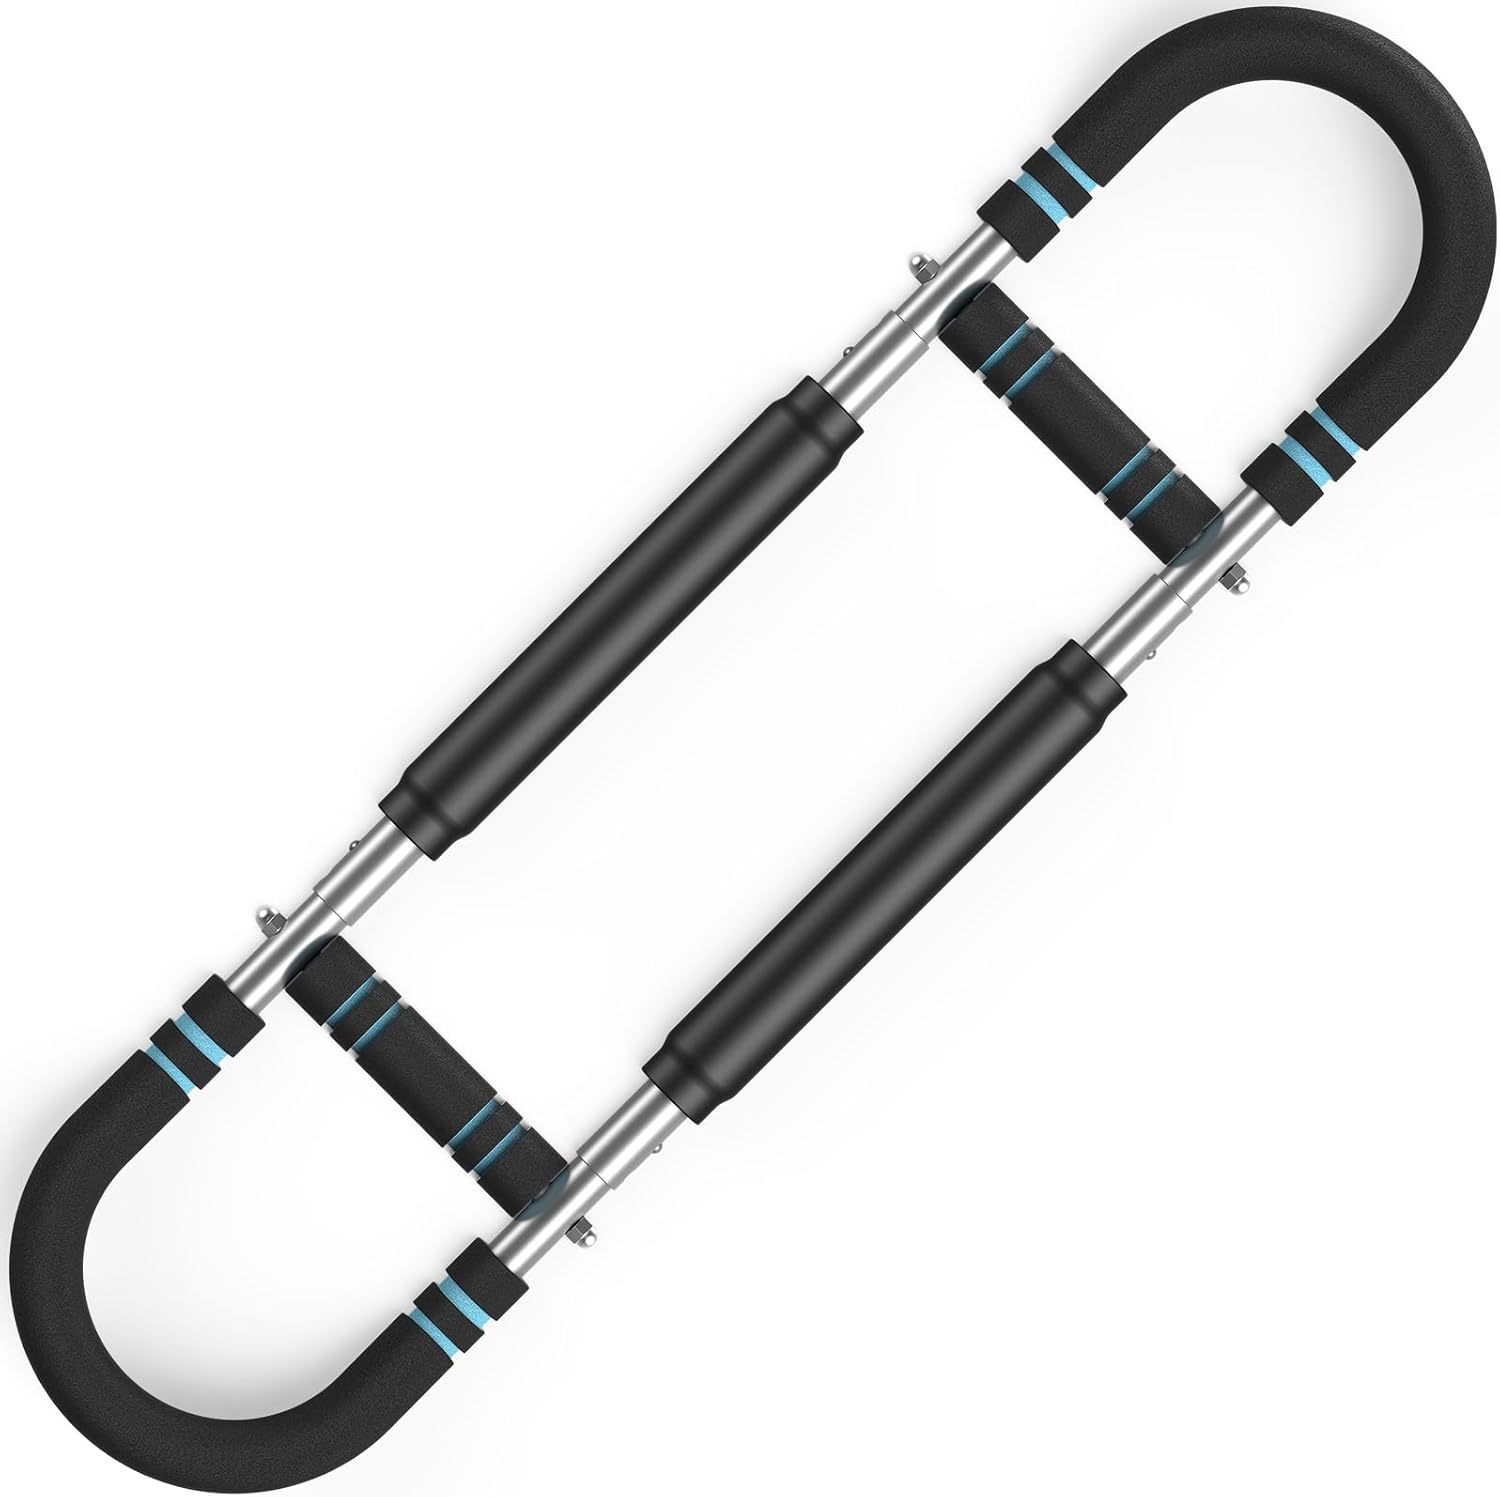
Image 1.1: The FLYBIRD Twister Arm Trainer, showcasing tona hoahoatanga me tona hanganga.
2. Nga korero haumaru
- Me toro atu ki tetahi rata i mua i te tiimata i tetahi kaupapa whakangungu hou.
- Kia whakamahana i mua i te korikori me te whakamatao i muri mai.
- Inspect the device for any damage or loose parts before each use. Do not use if damaged.
- Ensure the resistance setting is securely locked before beginning an exercise.
- Perform exercises with controlled movements. Avoid sudden jerks or excessive force.
- Stop exercising immediately if you experience pain, dizziness, or discomfort.
- Tiakina nga tamariki me nga kararehe mai i nga taputapu i te wa e whakamahia ana.
- Use the device on a stable, non-slip surface.
3. Waenga Hua
The FLYBIRD Twister Arm Trainer consists of the main adjustable resistance unit with ergonomic non-slip foam grips and a U-shaped double steel spring mechanism for resistance.

Image 3.1: Detail of the U-shaped double steel spring and comfort grip handles.
4. Tatūnga me te Runanga
The FLYBIRD Twister Arm Trainer is designed for easy assembly and disassembly for portability. Follow these steps to assemble the device:
- Step 1: Hole Alignment - Align the inner connector of one handle with the corresponding hole on the main bar.
- Step 2: Align Holes on Other Side - Repeat the alignment process for the other handle on the opposite side of the main bar.
- Hipanga 3: Press Raro - Firmly press down on the handles to secure them into place. Ensure the locking pins engage.
- Step 4: It's Done! - Verify that all connections are secure before use.

Image 4.1: Step-by-step visual guide for assembling the arm trainer.
To disassemble for storage or travel, press the release buttons (if present) or pull the components apart with firm, controlled force, reversing the assembly steps.
5. Nga Tohutohu Whakahaere
5.1. Te Whakatikatika i te Ātete
The FLYBIRD Twister Arm Trainer offers adjustable resistance levels from 22 lbs to 440 lbs. To adjust the resistance:
- Locate the adjustment pins on the main bar.
- Press the pin and slide the inner connector to the desired position.
- Ensure the pin locks securely into one of the designated holes for the chosen resistance level.
- Level 1 (e.g., 60 lbs): Inner connectors on both ends.
- Level 2 (e.g., 80 lbs): One for each of the inner and outer connectors.
- Level 3 (e.g., 120 lbs): Outer connector on both ends.
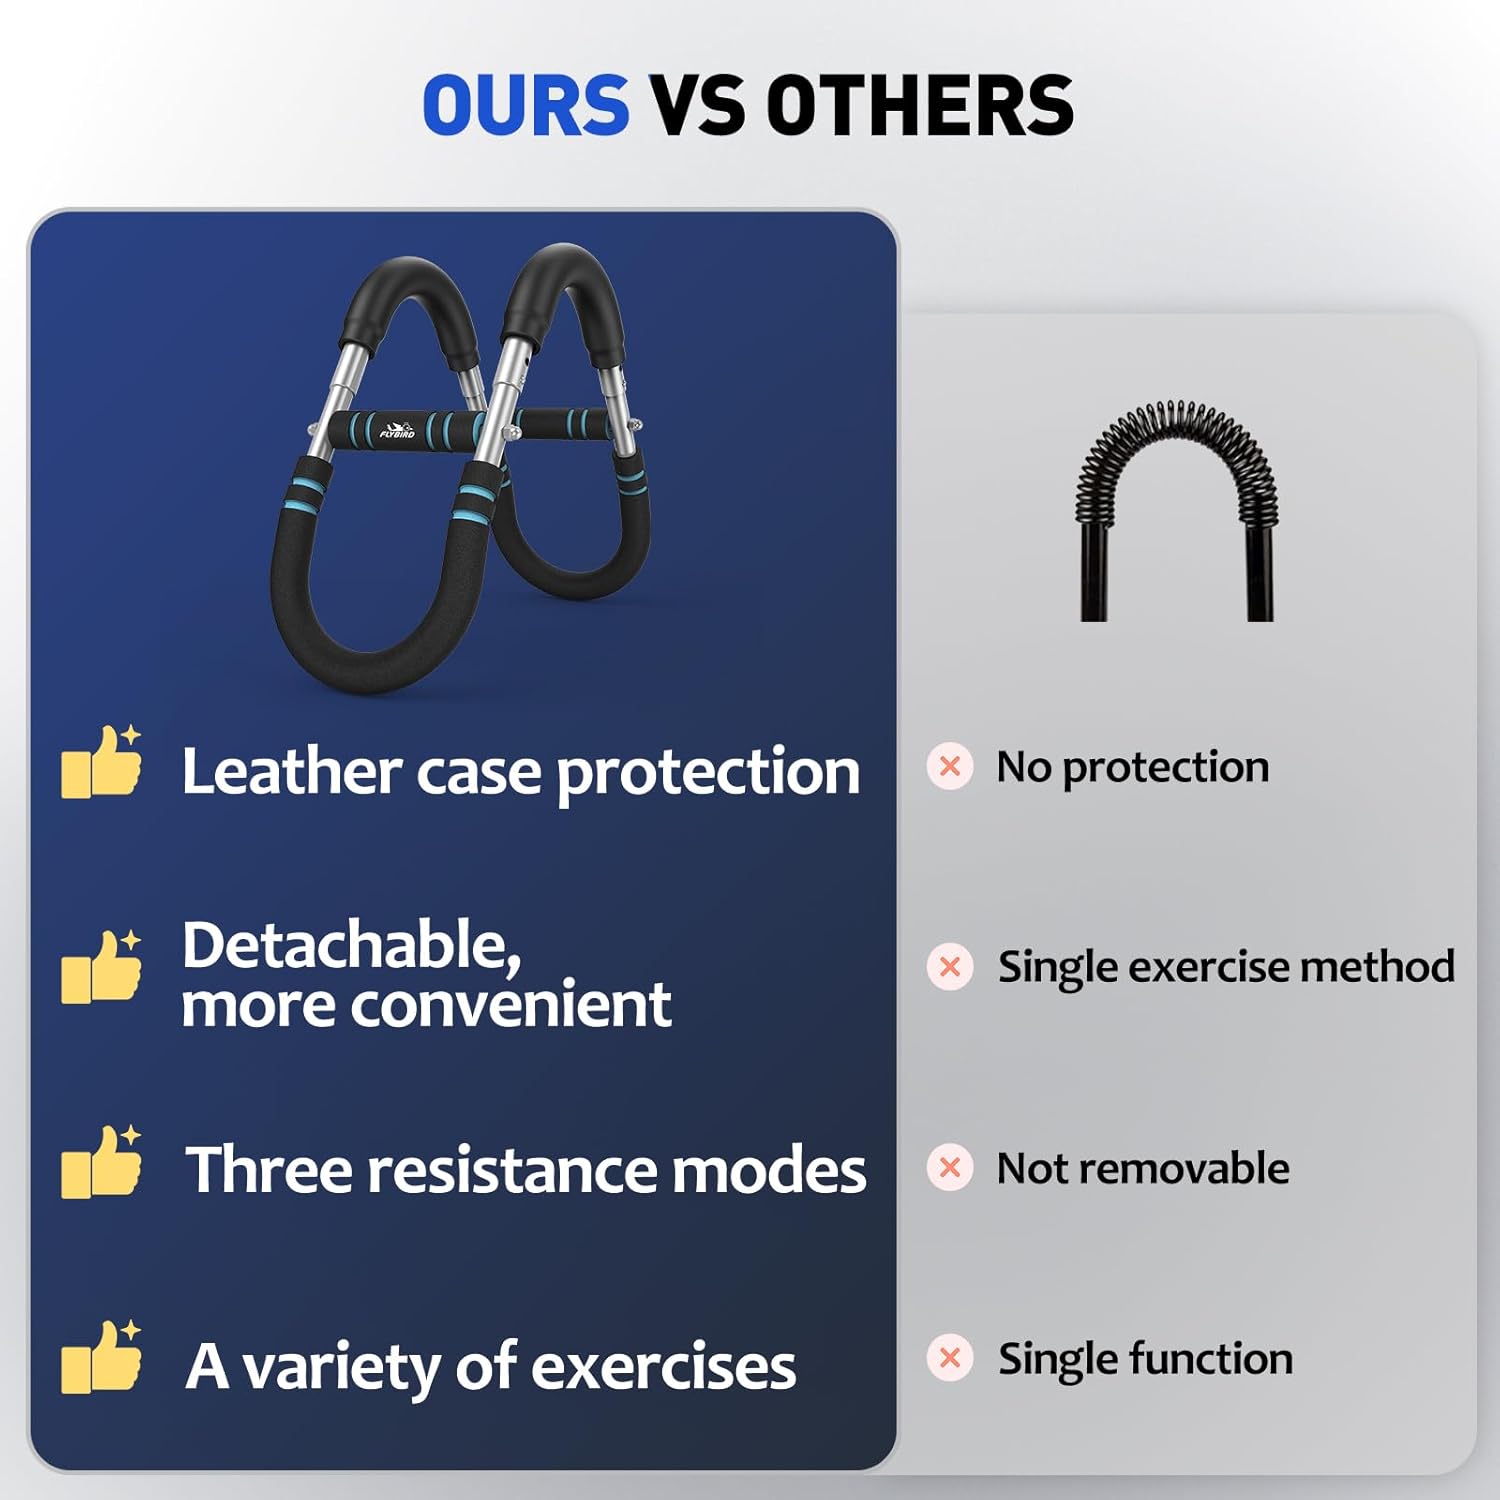
Image 5.1: Resistance adjustment mechanism and corresponding intensity levels.
5.2. Aratohu Whakakorikori Tinana
The Twister Arm Trainer can be used for a variety of exercises targeting different muscle groups. Always maintain proper form and controlled movements.
- Chest Exercise: Hold the trainer with both hands, palms facing each other, and press inward towards your chest.
- Biceps Exercise: Hold the trainer with one hand, palm up, and curl it towards your shoulder.
- Back Exercise: Hold the trainer behind your back and pull outwards.
- Triceps Exercise: Hold the trainer overhead and extend your arms.
- Forearm Training: Grip the handles and perform wrist curls or extensions.
- Leg Training: Place the trainer between your thighs and squeeze inward.

Whakaahua 5.2: Examples of exercises targeting different muscle groups.
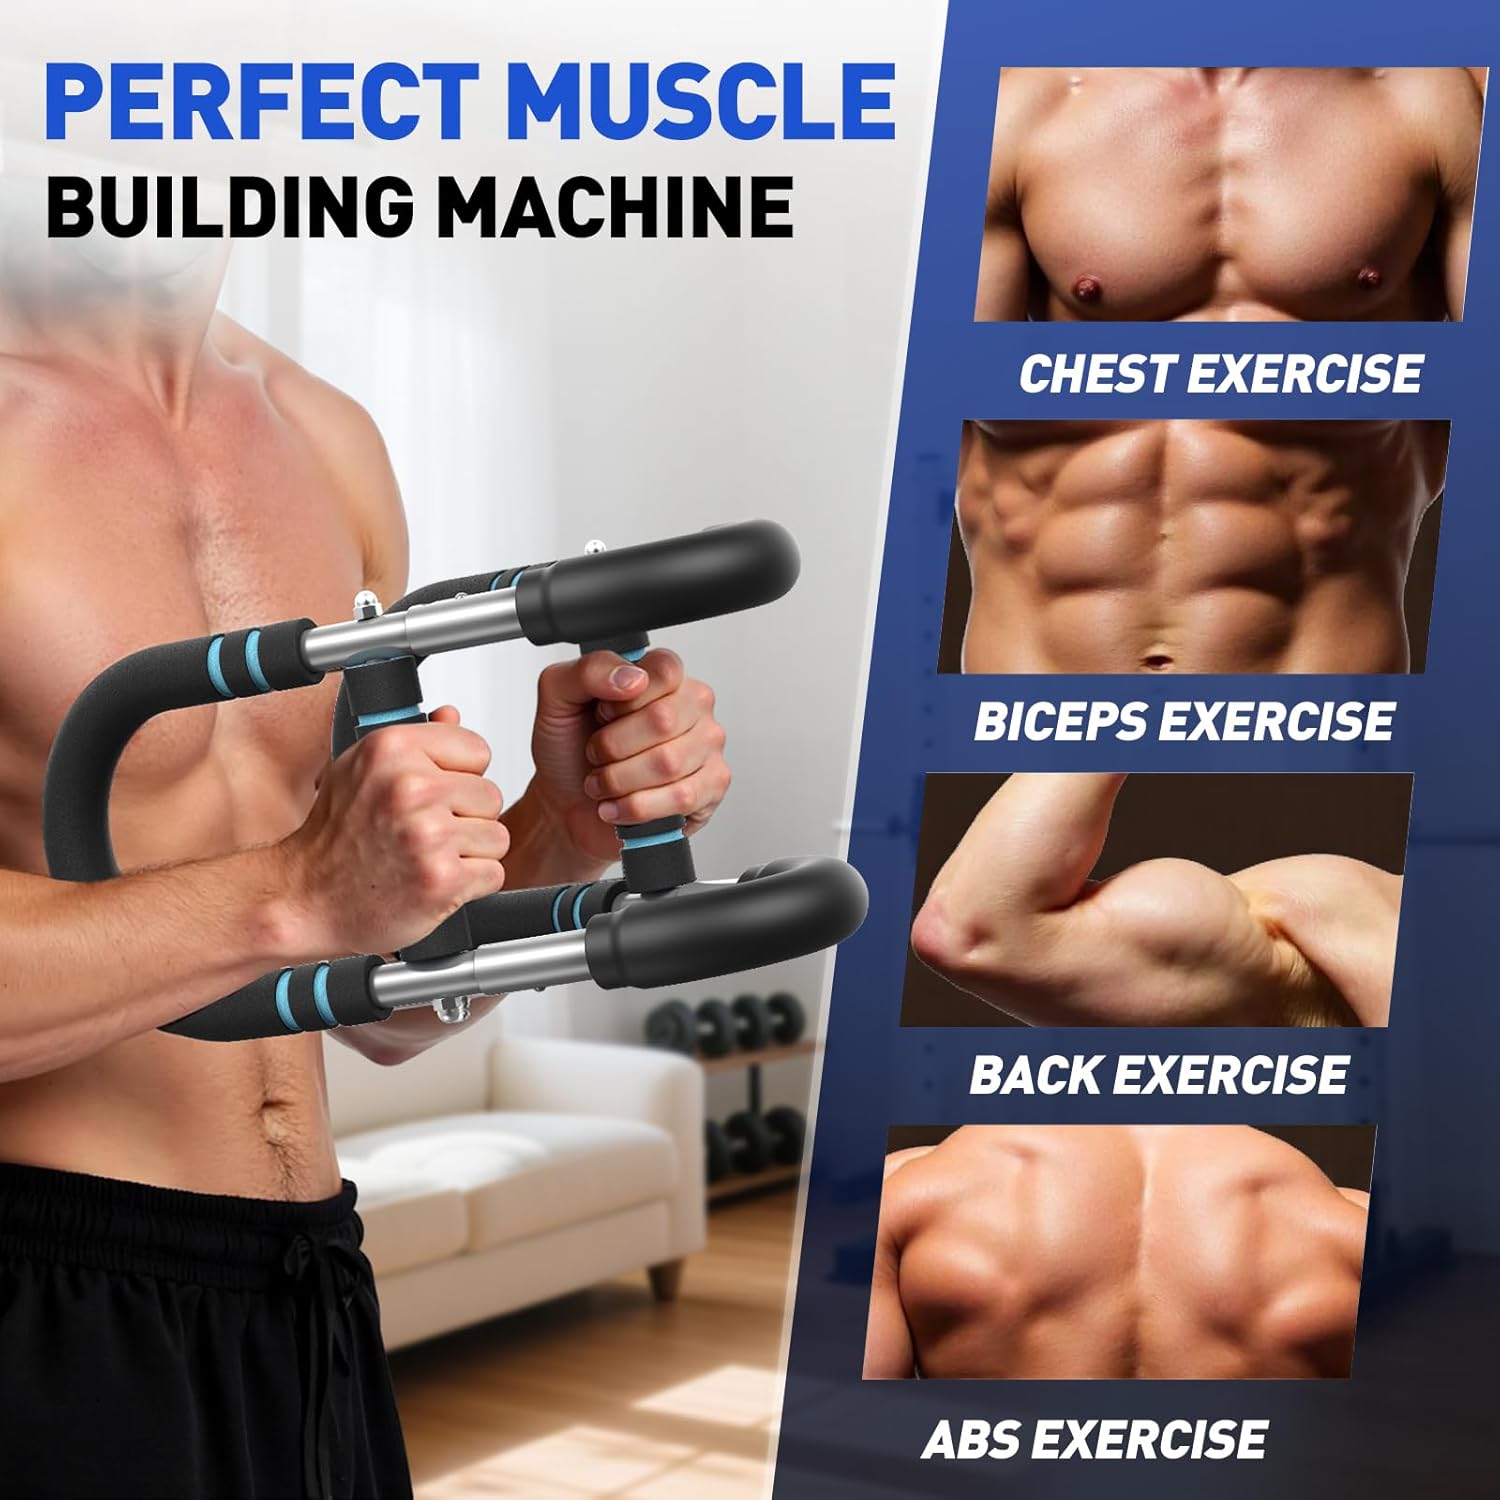
Image 5.3: Visual representation of muscle groups engaged during training.
6. Tiaki
- Te horoi: Horoia te taputapu me te panuiamp he kakahu i muri i ia whakamahinga hei tango i te werawera me te paru. A ape i nga kai horoi abrasive.
- Rokiroki: Store the arm trainer in a cool, dry place away from direct sunlight and extreme temperatures. For portability, the device can be disassembled and stored compactly.
- Tirotiro: Periodically check all components for wear and tear, especially the springs and connection points.

Image 6.1: The arm trainer disassembled for compact storage and portability.
7. Te Raru
- Resistance feels inconsistent: Ensure the adjustment pins are fully engaged and locked into the desired resistance holes.
- Device feels loose: Re-check all assembly points to ensure components are securely connected. Do not use if any part feels unstable.
- Haruru haruru: A small amount of silicone-based lubricant can be applied to the spring mechanism if squeaking occurs. Avoid oil-based lubricants.
8. Whakatakotoranga
- Ingoa Tauira: JH-FB-BLQ-01
- Waitohu: RERERERERE
- Rauemi: Te whakarewa
- Tae: Pango
- Rahi Tūemi (LxWxH): 13.59 x 2.76 x 9.06 inihi
- Rahi Hua: 13.59"D x 2.76"W x 9.06"H
- Te Rahi Mokete Tuemi (LxWxH): 10.24 x 8.94 x 3.19 inihi
- Taumaha mōkihi: 3.5 Pauna
- Kaupapa Poari Taurahi: 440 Pounds (Resistance)
- Nga Waahanga Kei roto: Arm Workout Equipment
- Nga Kaiwhakamahi Kua Tohua: unisex-pakeke
9. Pūtāhui me te Tautoko
The FLYBIRD Twister Arm Trainer comes with a 1 Tau Kaihanga Rarangi. For warranty claims, technical support, or any questions regarding your product, please contact FLYBIRD customer service through the retailer where the product was purchased or visit the official FLYBIRD webpae.
Kaihanga: RERERERERE


