1. Kupu Whakataki me Nekeview
The SINOTIMER TM922 is a versatile dual-channel programmable digital timer switch designed for precise control of electrical equipment. It features two independent relay outputs, allowing simultaneous control of two separate devices or systems. With up to 8 ON/OFF programs per day and 15 combinations per week, this timer provides flexible scheduling options. Its accurate-to-the-second control ensures reliable operation according to preset programs, cycling weekly or daily from one second to 168 hours. Programs are saved by a battery backup in case of power failure, and the replaceable battery ensures long-term usage. The device is designed for DIN standard 35mm mounting, making it easy to install in DB boxes.
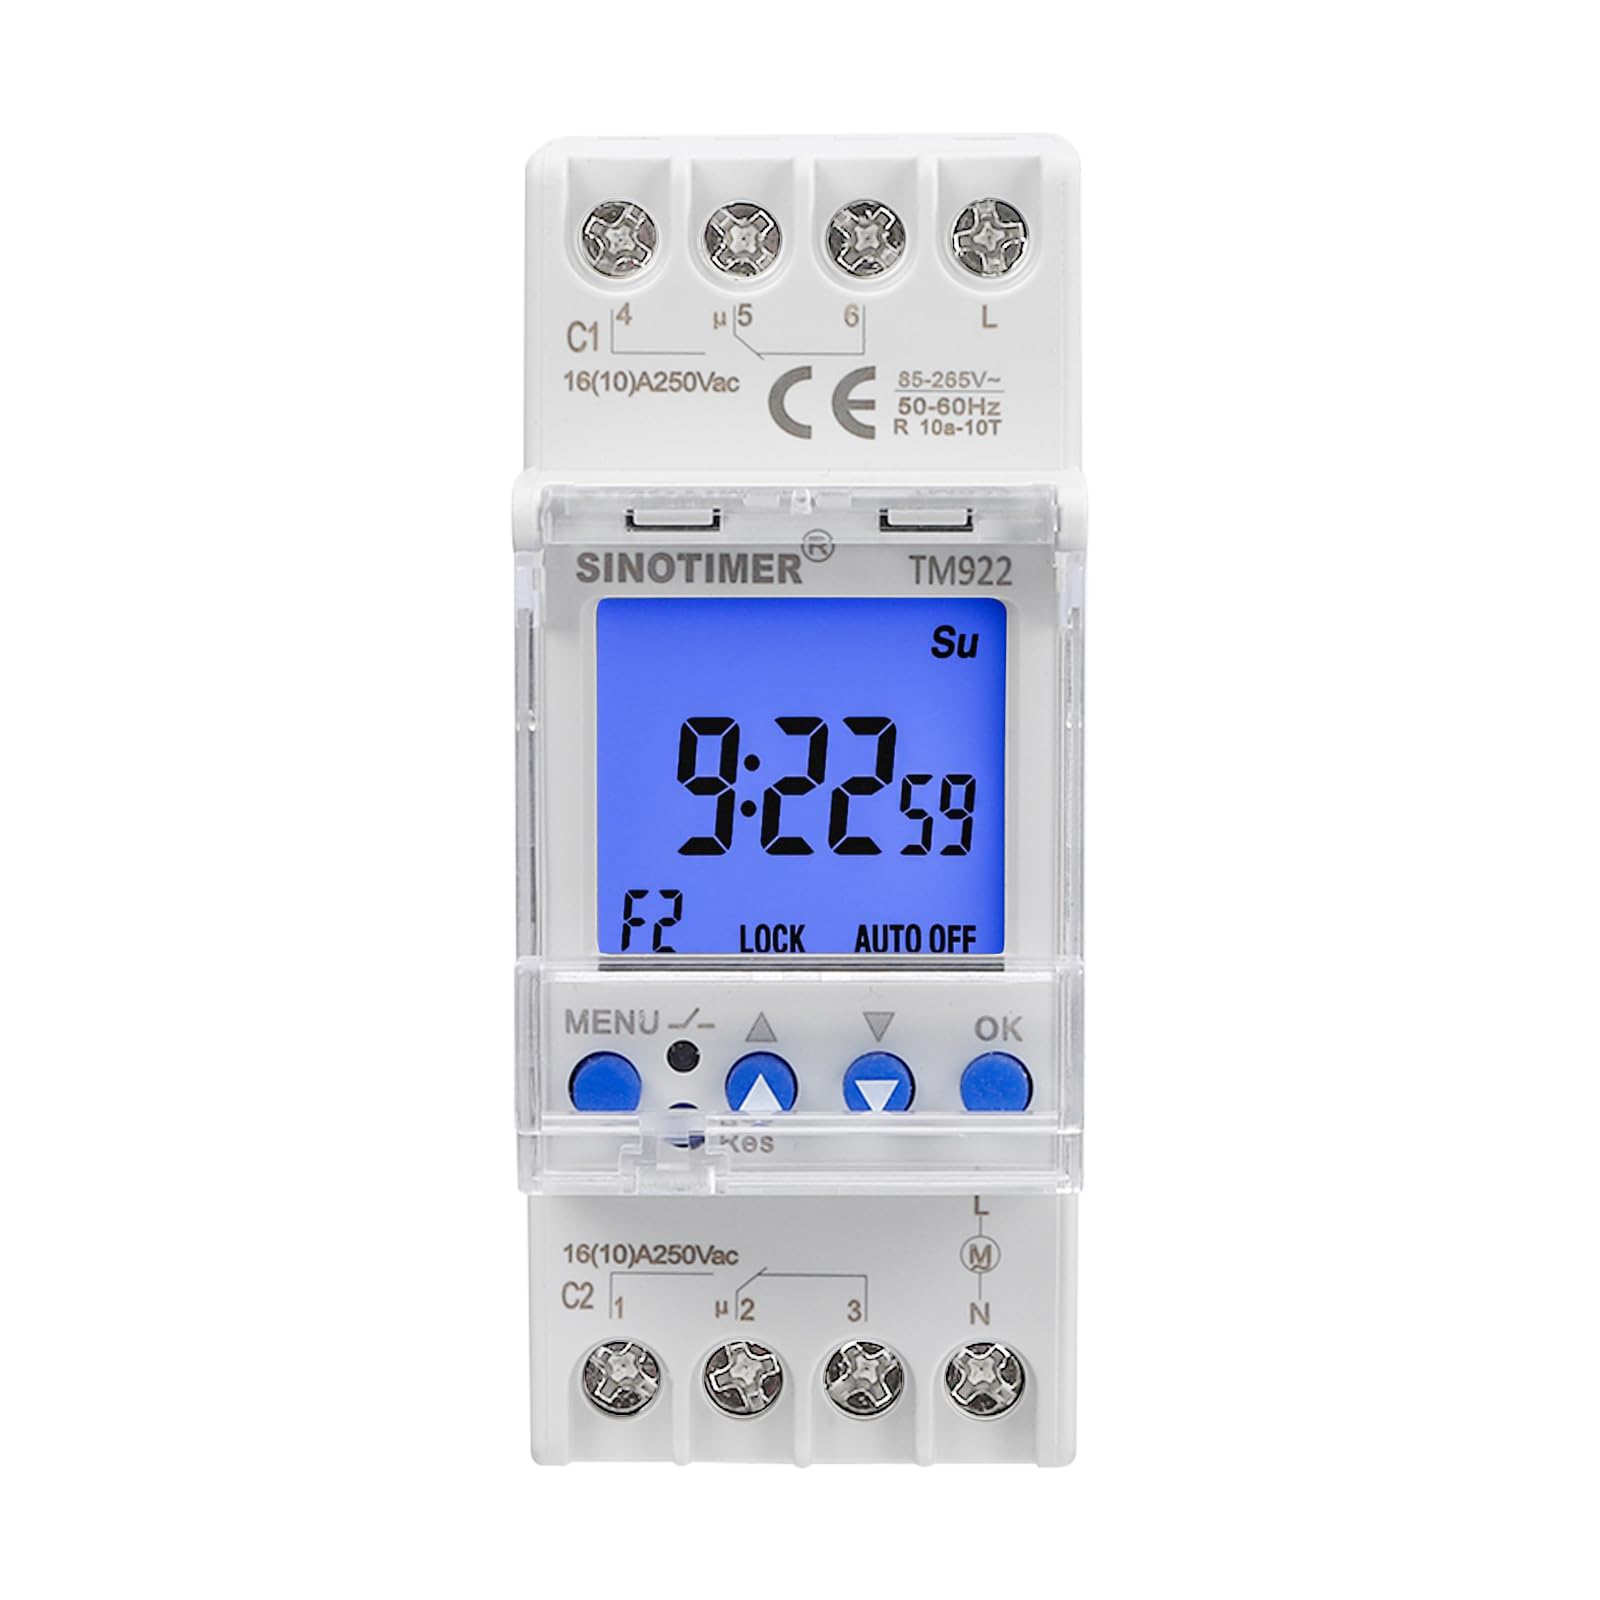
Whakaahua 1: Mua view of the SINOTIMER TM922 Digital Timer Switch.
2. Nga korero haumaru
Please read all instructions carefully before installation and operation. Incorrect installation or use can lead to electric shock, fire, or damage to the device. Ensure power is disconnected before any wiring or maintenance. This device should be installed by a qualified electrician in accordance with local electrical codes. Do not expose the device to moisture or extreme temperatures. Keep out of reach of children.
3. Nga Hua o te Hua
- Dual Independent Relays: Two separate 16A outputs for controlling two distinct devices.
- Ngā Hōtaka Whakahōtaka: Up to 8 ON/OFF programs per day, with 15 weekly combinations.
- Te Wā Tika: Accurate to the second, with cycles from 1 second to 168 hours.
- Pūrua Pūmahara: Built-in battery saves programs during power outages.
- Pūhiko Whakakapi: Ka whakarite kia roa te ora o te hua.
- Maunga Rerewe DIN: Standard 35mm design for easy installation in electrical panels.
- Whakaaturanga LCD Nui: Clear blue backlight for easy readability.

Figure 2: Close-up of the TM922's LCD display and control buttons.
4. Ihirangi mokete
- SINOTIMER TM922 Digital Timer Switch
- One screwdriver
- Pukapuka Kaiwhakamahi (tenei tuhinga)
5. Whakatakotoranga
| Huanga | Uara |
|---|---|
| Hunga Hua | 3.54 x 1.42 x 2.68 inihi |
| Taumaha Tūemi | 5.9 hekere |
| Whakauru Voltage | 85-265VAC |
| Relay Huaputa | Two independent 16A outputs |
| Rauemi | Kirihou |
| Tae | Mā |
| Tau o Tautuhinga | 23 (programs) |
6. Tatūnga & Tāuta
6.1 DIN Rail Mounting
The TM922 is designed for standard 35mm DIN rail mounting. To install, align the timer with the DIN rail and press firmly until it clicks into place. Ensure it is securely fastened.

Whakaahua 3: Taha view e whakaatu ana i te tikanga whakairinga reera DIN.
6.2 Wiring Hoahoa
WHAKATŪPATO: Disconnect all power before wiring. Wiring should be performed by a qualified professional.
The TM922 features terminals for power input (L, N) and two independent relay outputs (C1, C2). Each output has common (C), normally open (NO), and normally closed (NC) contacts. Refer to the labels on the device for precise terminal identification.
- Whakauru Hiko: Connect your 85-265VAC power supply to the 'L' (Live) and 'N' (Neutral) terminals.
- Channel 1 Output (C1): Connect your first load to the C1 terminals. For normally open operation, connect the load between the common (C1-4) and normally open (C1-5) terminals. For normally closed operation, connect between common (C1-4) and normally closed (C1-6) terminals.
- Channel 2 Output (C2): Connect your second load to the C2 terminals. For normally open operation, connect the load between the common (C2-1) and normally open (C2-2) terminals. For normally closed operation, connect between common (C2-1) and normally closed (C2-3) terminals.

Figure 4: Wiring terminals for power input and dual relay outputs.
7. Nga Tohutohu Whakahaere
7.1 Nga Mahi Patene

Figure 5: Control button functions for the TM922.
- MENU: Unlock/Lock buttons, Enter program settings.
- ▲ (Pere Runga): Increase value, Navigate up.
- ▼ (Pere Whakararo): Decrease value, Navigate down.
- OK: Select, Confirm settings.
- Res (Reset): Channel selection, Sleep mode, Remove programs. (Requires a pointed object like a pen or the provided screwdriver).
7.2 Locking/Unlocking the Timer
To prevent accidental changes, the timer can be locked. Press and hold the MENU button for more than 3 seconds to lock or unlock the timer. The 'LOCK' indicator on the display will show the current status.
7.3 Te Whakatakoto i te Wā o Nāianei
- Ensure the timer is unlocked.
- Pehia te OK button repeatedly to cycle through and select the minute, hour, second, and day of the week.
- Whakamahia te ▲ a ▼ buttons to adjust the selected number.
- Perehi OK ki te whakaū i ia tautuhinga.
7.4 Manual Control (Working Status)
To manually override the programmed settings for a channel, press the MENU a ▲ buttons together. This will cycle the working status through: ON, ON AUTO, OFF, AUTO OFF. The current status will be displayed (e.g., F1 ON, F2 OFF).
7.5 Switching Channels (F1/F2)
To switch between Channel 1 (F1) and Channel 2 (F2) for programming or manual control, press the recessed Res button using a pointed object. The display will show 'F1' or 'F2' to indicate the active channel.
7.6 Te Hōtaka i ngā Huringa Whakakā/Whakaweto
The TM922 supports up to 8 ON/OFF programs for each channel (F1 and F2), totaling 16 ON/OFF events per channel. Each program can be set for specific days of the week.
- Ensure the timer is unlocked.
- Select the desired channel (F1 or F2) by pressing the Res pātene.
- Pehia te MENU button to enter the program setting mode. The display will show '1 ON' (for the first ON program).
- Perehi OK to select the time setting for '1 ON'. Use ▲ a ▼ to adjust the hour, minute, and second. Press OK after each adjustment.
- After setting the time, you can select the days of the week for this program. Use ▲ a ▼ to cycle through various day combinations (e.g., Mo Tu We Th Fr Sa Su, Mo-Fr, Sa Su, etc.). Press OK ki te whakau.
- The display will then show '1 OFF'. Repeat steps 4 and 5 to set the OFF time and days for the first program.
- Me pehi tonu MENU to cycle through '2 ON', '2 OFF', up to '8 ON', '8 OFF' for the current channel, setting each as needed.
- Once all programs are set, press and hold MENU to exit programming mode and return to the main clock display.
Video 1: Official SINOTIMER guide on setting up the TM922's channels and programs.
8. Tiaki
8.1 Whakakapinga Pūhiko
The TM922 uses a replaceable battery to maintain program settings during power outages. If the display becomes dim or settings are frequently lost, the battery may need replacement. Refer to the device's internal compartment for battery type and replacement instructions. Ensure power is disconnected before replacing the battery.
8.2 Te horoi
Clean the device with a soft, dry cloth. Do not use abrasive cleaners or solvents, as these can damage the casing whakaatu ranei.
9. Te Raru
- Timer not switching:
- Check if the timer is in 'AUTO ON' or 'AUTO OFF' mode. Use manual control to switch to 'AUTO ON' for programmed operation.
- Verify that the ON/OFF programs are correctly set for the desired times and days.
- Ensure the device is receiving power.
- I ngaro ngā tautuhinga i muri i te whakawetonga hikotage:
- The internal backup battery may be depleted or faulty. Replace the battery.
- Patene kore whakautu:
- Ensure the timer is unlocked (press and hold MENU for 3 seconds).
- If the 'Res' button is stuck, gently try to release it. Avoid pressing too hard.
- He atarua, he putea ranei te whakaaturanga:
- Tirohia te tuku hiko.
- Replace the internal backup battery.
10. Raihana me te Tautoko
This SINOTIMER product comes with a standard manufacturer's warranty. For specific warranty details, please refer to the documentation included with your purchase or contact SINOTIMER customer support. For technical assistance, troubleshooting, or spare parts, please visit the official SINOTIMER webpaetukutuku, whakapā atu ranei ki ta raatau tari ratonga kaihoko. Puritia to rihiti hoko mo nga kereme whakamana.
Tirohia te SINOTIMER Store mo etahi atu korero.


